Sending Individual Mailings
Send individual letters, postcards, and checks to specific contacts directly from Salesforce using the PostGrid integration.
You can create individual orders through Salesforce to send out letters, postcards, and checks.
Creating Letter Orders
Section titled “Creating Letter Orders”1. Click on “Print & Mail Orders” and then click on “New”
Section titled “1. Click on “Print & Mail Orders” and then click on “New””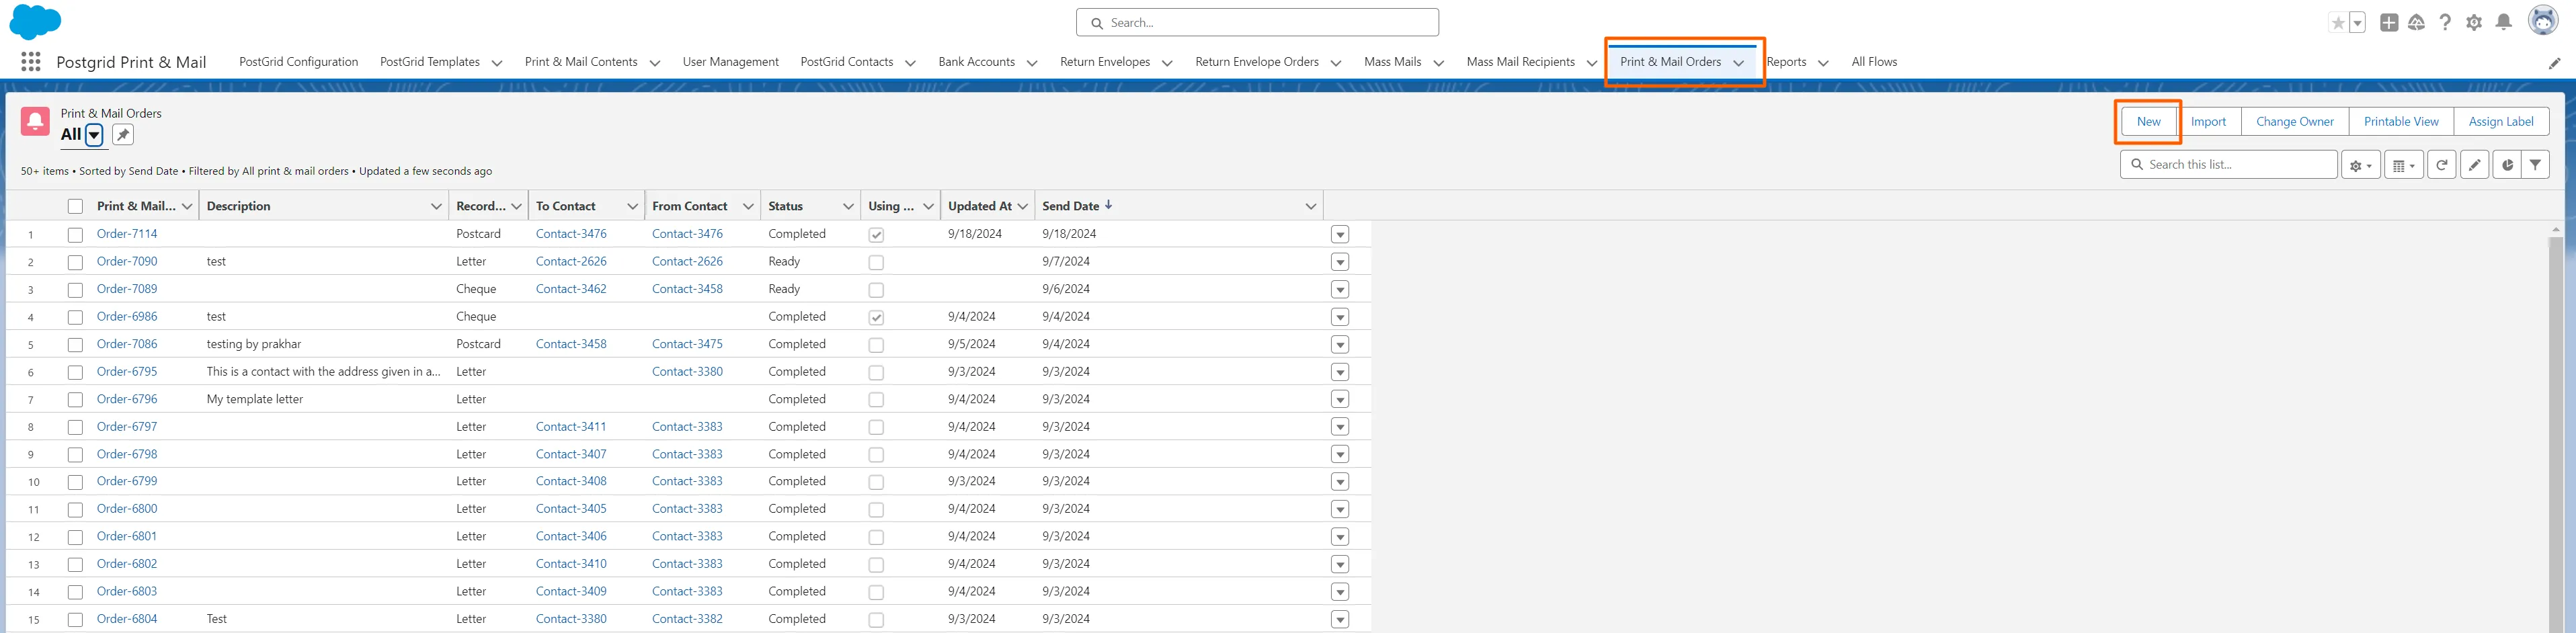
2. Select the collateral type (In this case a letter) and click on “Next”
Section titled “2. Select the collateral type (In this case a letter) and click on “Next””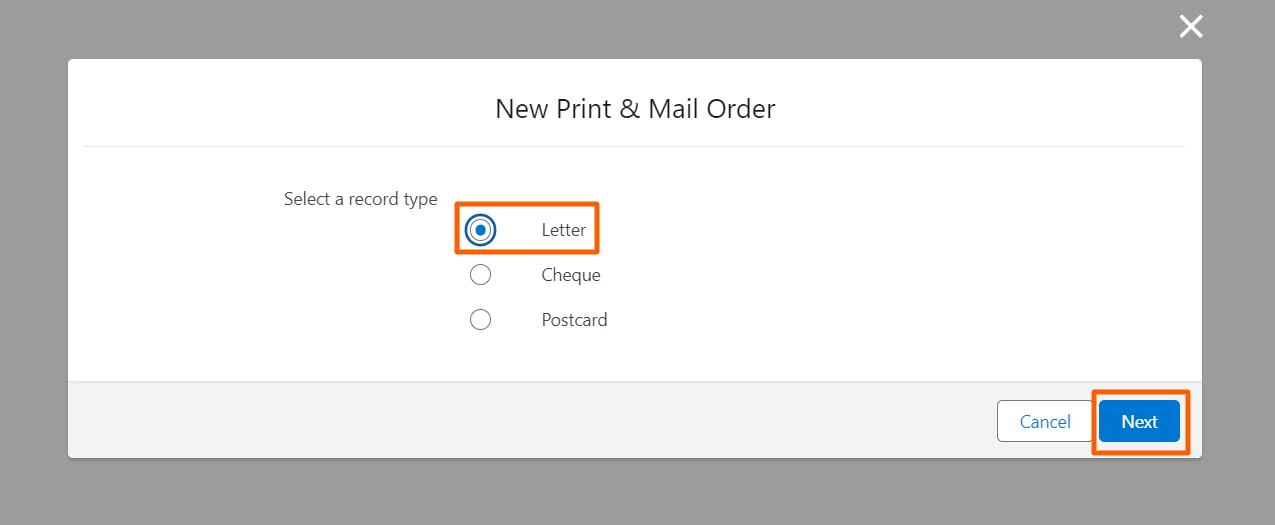
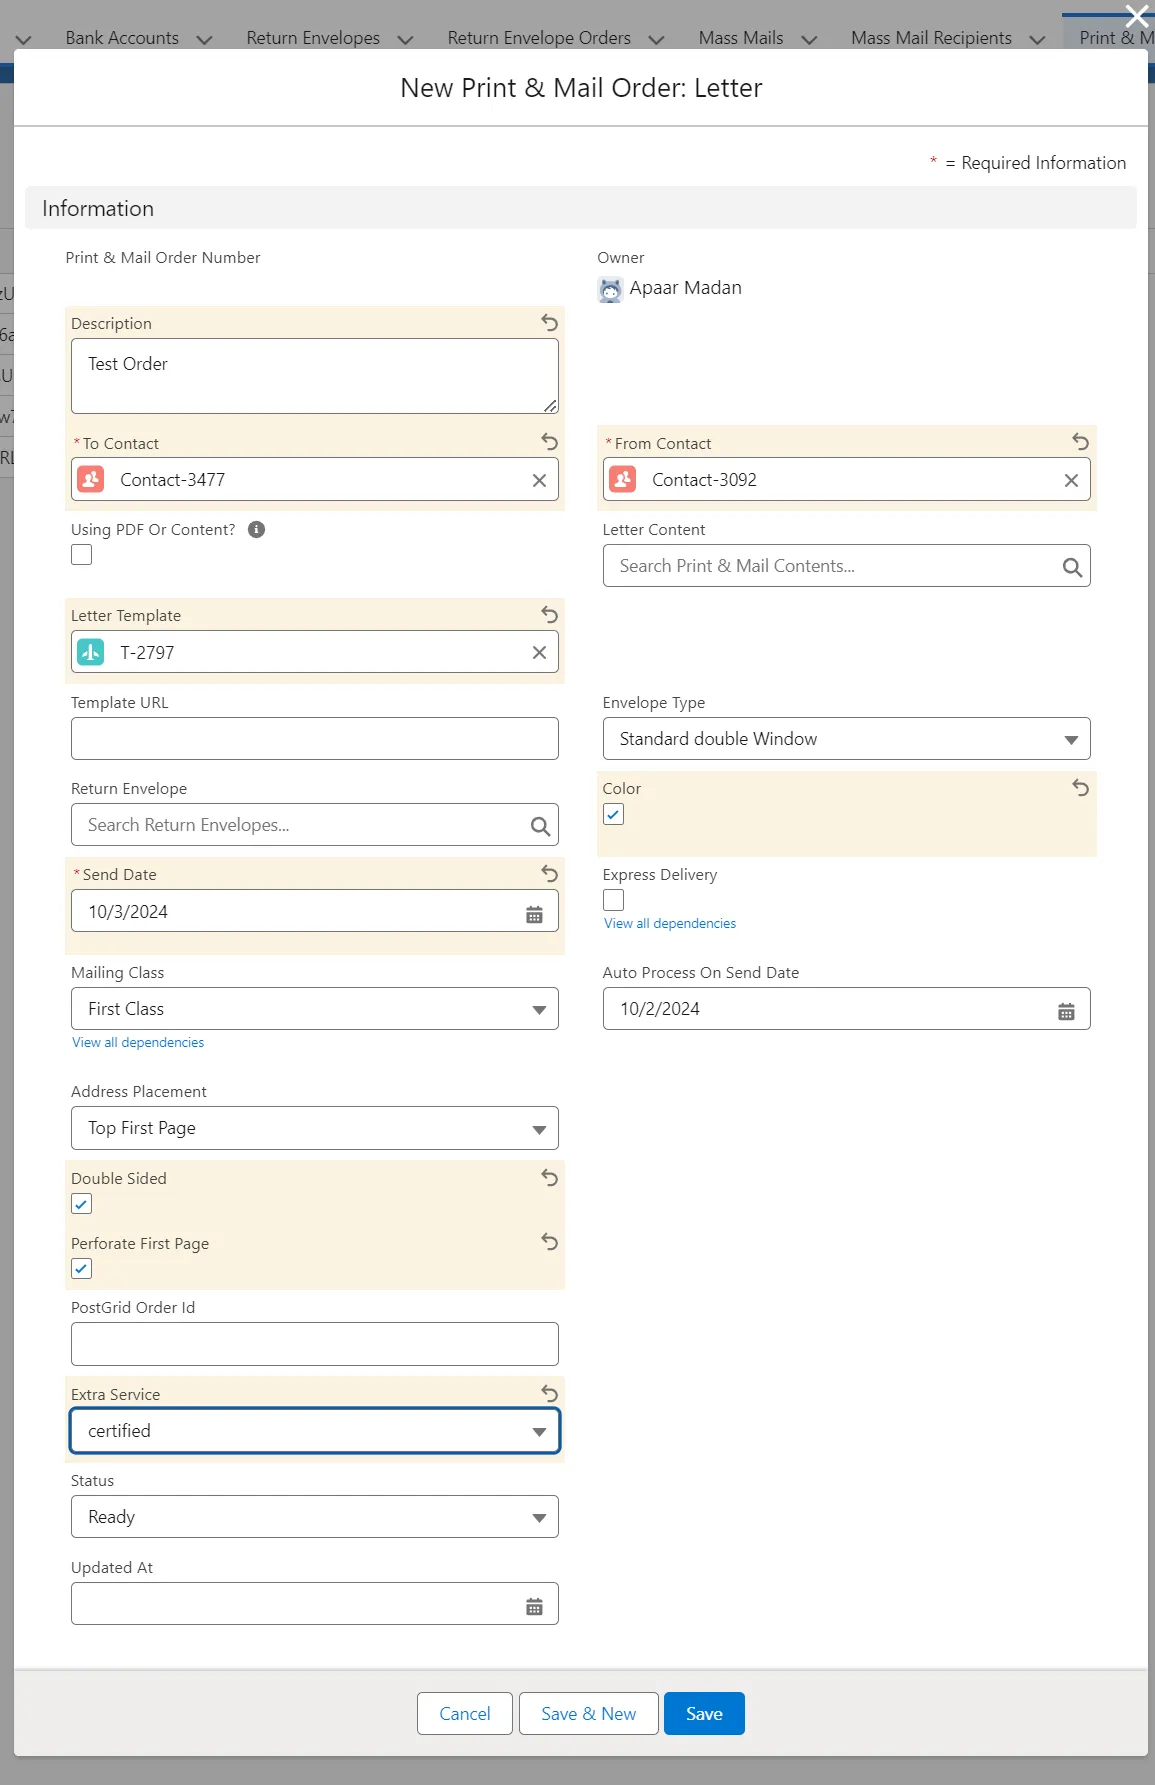
3. Enter the required details
Section titled “3. Enter the required details”- Add a description for the letter order
- Select a Recipient Contact, Letter Template/Letter Content and then a Sender Contact from the respective drop-down list
- Choose a Send Date
- Adding additional Services
- Select an Envelope Type
- Click on the “Color” checkbox if you want the document to be printed in Color and the “Express Delivery Checkbox” if you want to opt for Express Delivery
- Select a mailing class from the drop-down menu
- By default, all mail is sent as First Class or the fastest non-express postage available in the destination country.
- Choose where you want the address to be placed
- Click on the “Double Sided” checkbox if you want the content to be printed on both the sides
- Select an Extra Service for your order
- Click on “Save”
Please note: You can either opt for Express Delivery or Select a Mailing Class. You cannot opt for both
4. Click on “View PDF” to view the preview of the final order and click on “Deploy To PostGrid” to view the order on your PostGrid dashboard
Section titled “4. Click on “View PDF” to view the preview of the final order and click on “Deploy To PostGrid” to view the order on your PostGrid dashboard”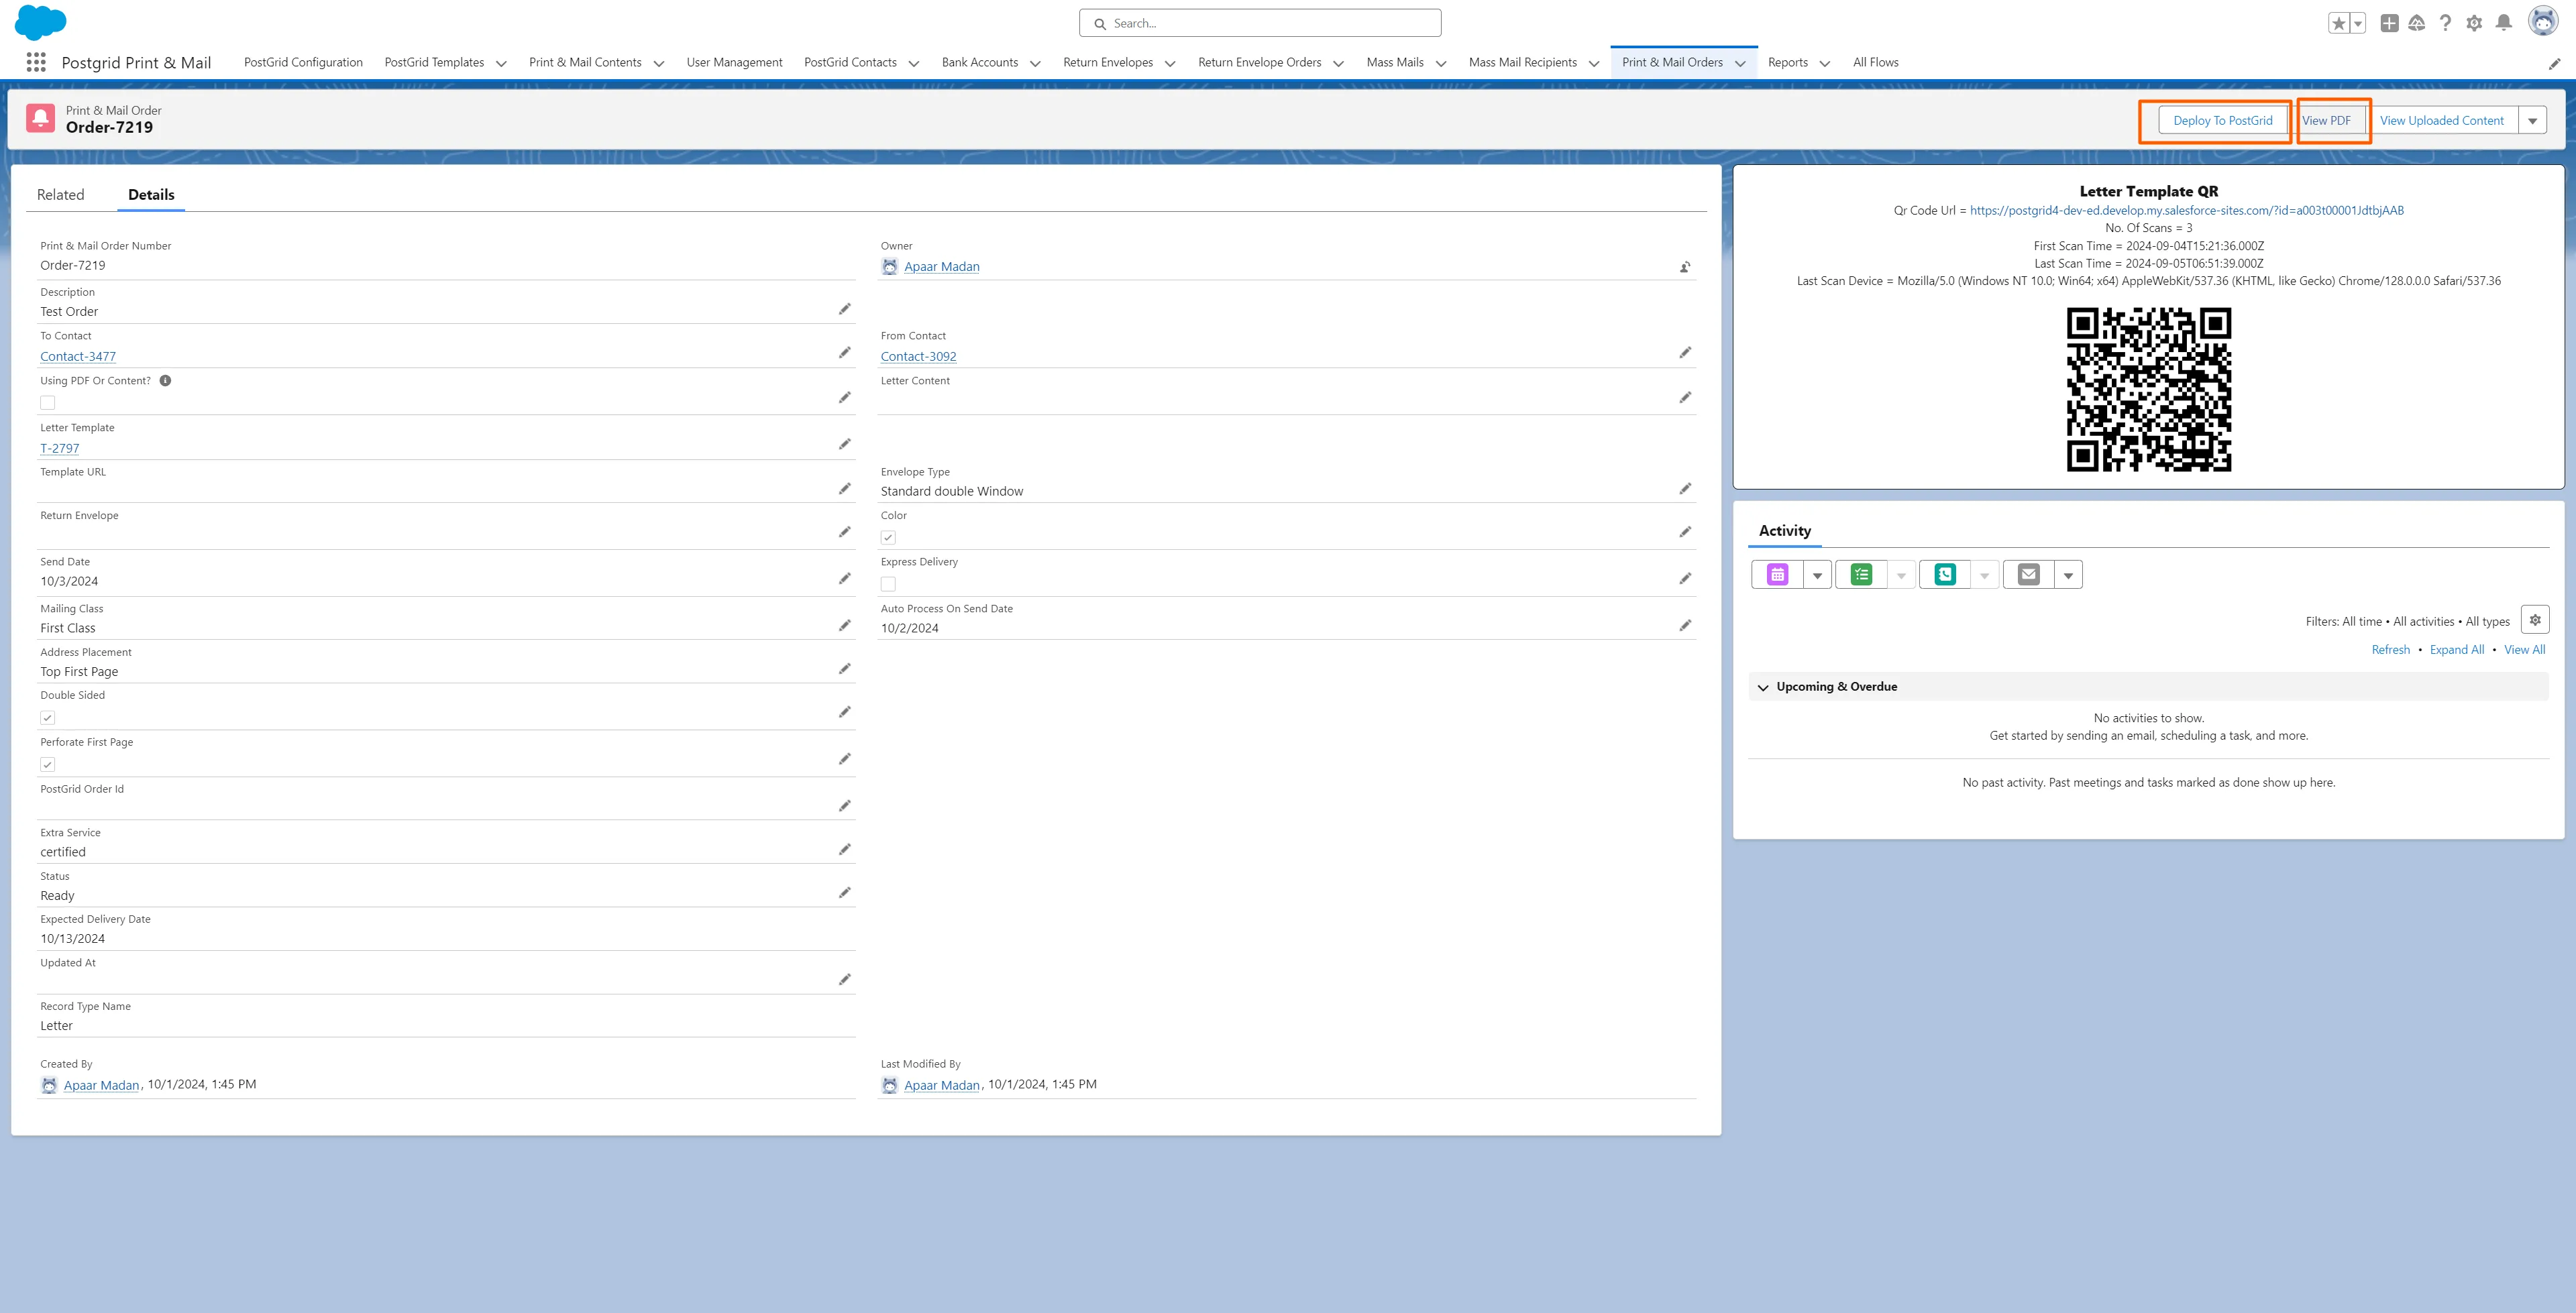
Creating Postcard Orders
Section titled “Creating Postcard Orders”1. Click on “Print & Mail Orders” and then click on “New”
Section titled “1. Click on “Print & Mail Orders” and then click on “New””
2. Select the collateral type (In this case a postcard) and click on “Next”
Section titled “2. Select the collateral type (In this case a postcard) and click on “Next””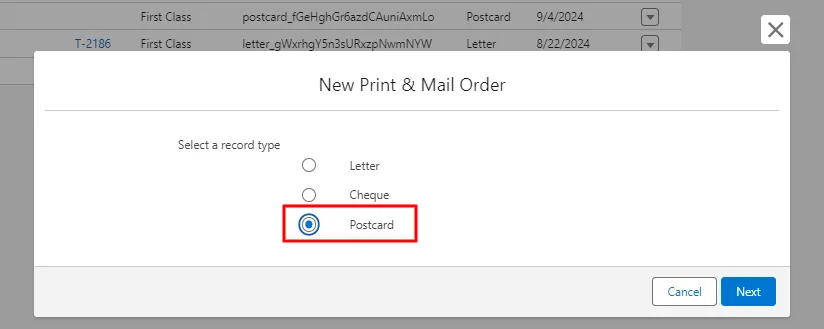
3. Enter the required details
Section titled “3. Enter the required details”- Add a description for the postcard order
- Select a Recipient Contact, Postcard Template/Postcard Content and then a Sender Contact from the respective drop-down list (Sender Contact is not mandatory for creating a postcard order)
- Choose a Send Date
- Adding additional Services
- Select an Envelope Type
- Click on the “Express Delivery Checkbox” if you want to opt for Express Delivery
- Select a mailing class from the drop-down menu
- By default, all mail is sent as First Class or the fastest non-express postage available in the destination country.
- Select an Extra Service for your order
- Click on “Save”
Please note: You can either opt for Express Delivery or Select a Mailing Class. You cannot opt for both
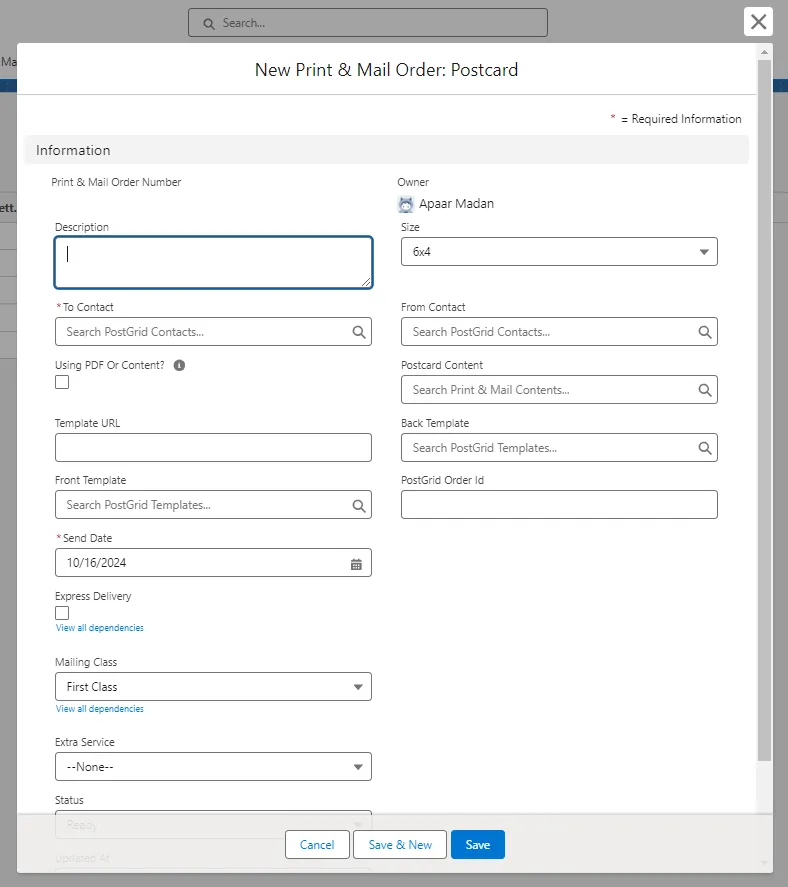
4. Click on “View PDF” to view the preview of the final order and click on “Deploy To PostGrid” to view the order on your PostGrid dashboard
Section titled “4. Click on “View PDF” to view the preview of the final order and click on “Deploy To PostGrid” to view the order on your PostGrid dashboard”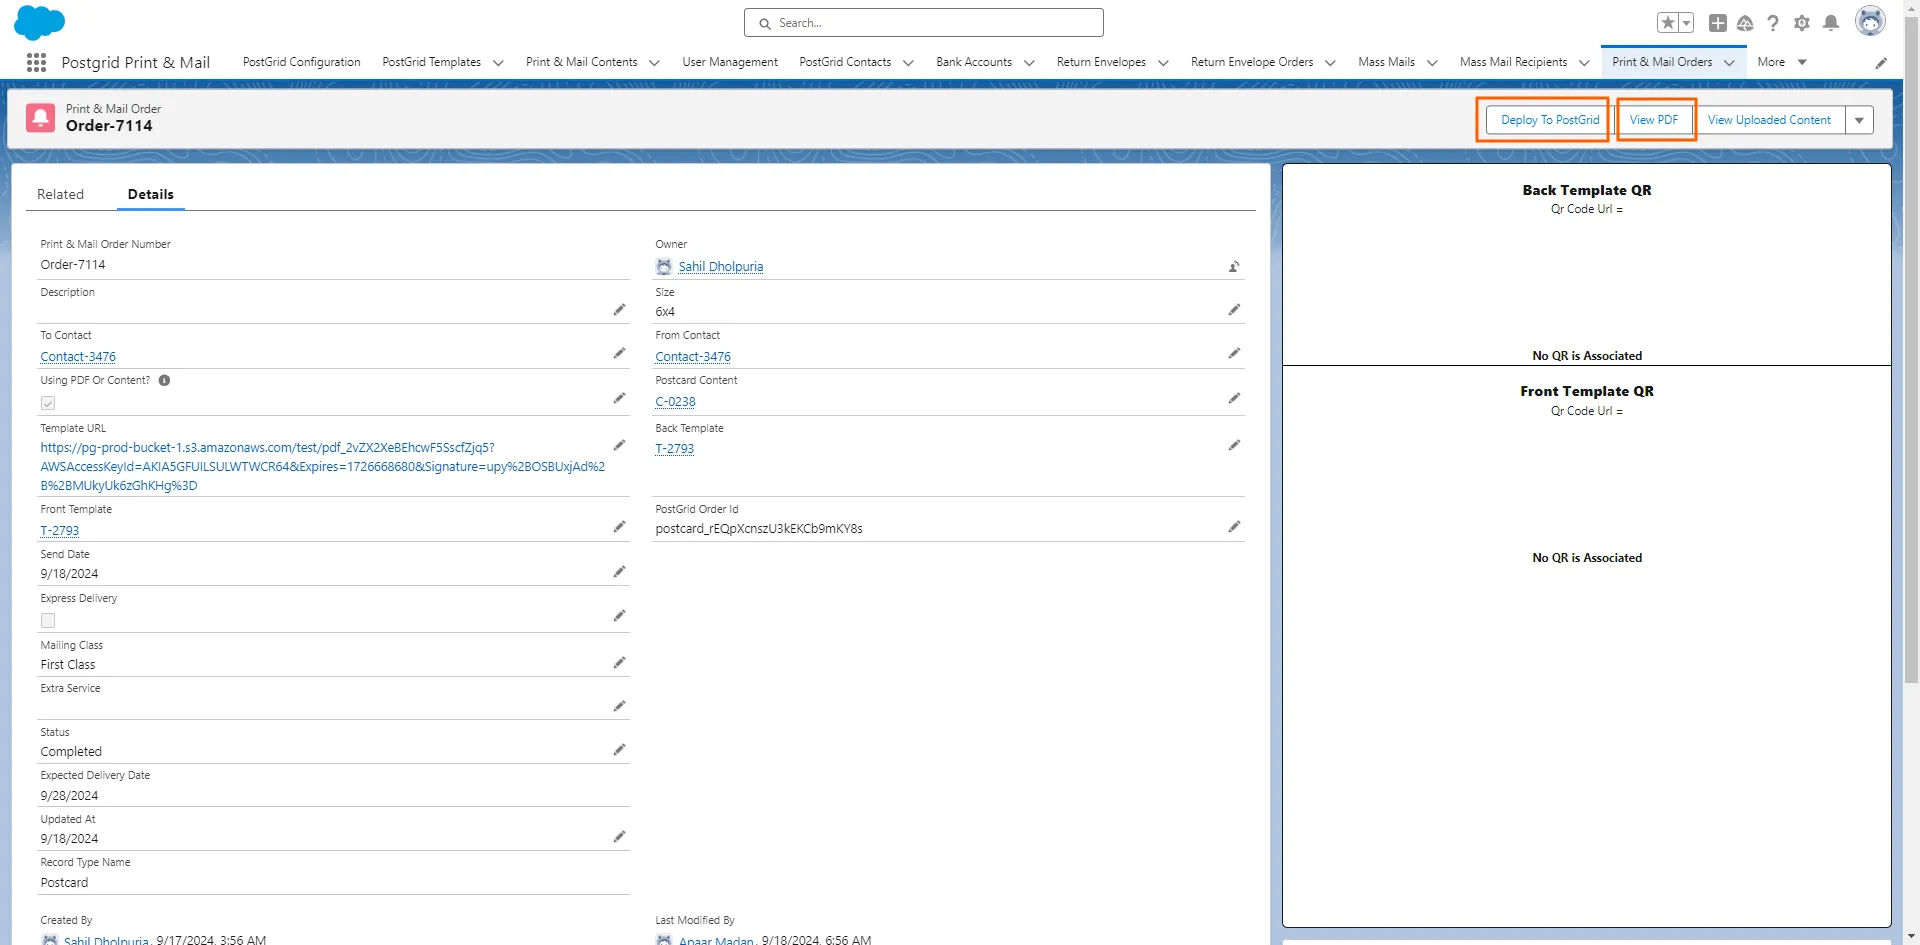
Creating Cheque Orders
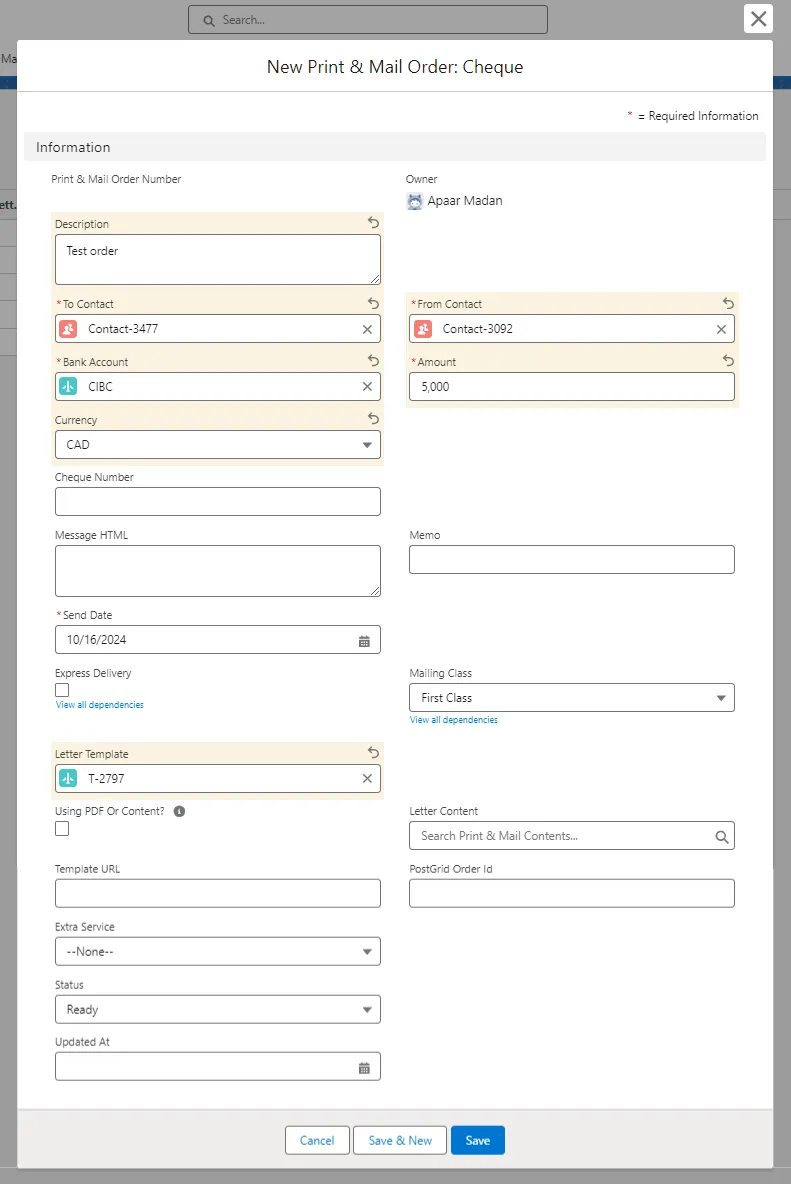
Section titled “Creating Cheque Orders”1. Click on “Print & Mail Orders” and then click on “New”
Section titled “1. Click on “Print & Mail Orders” and then click on “New””
2. Select the collateral type (In this case a cheque) and click on “Next”
Section titled “2. Select the collateral type (In this case a cheque) and click on “Next””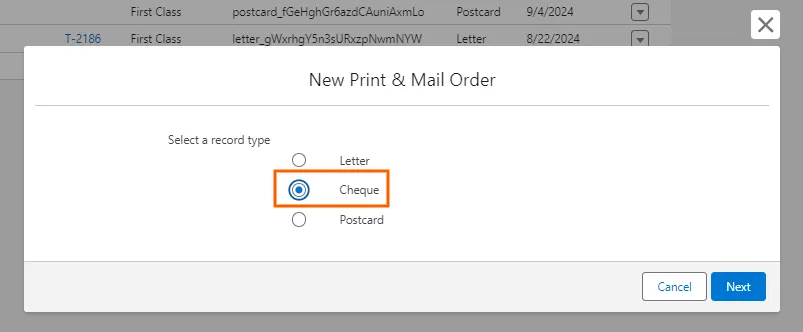
3. Enter the required details
Section titled “3. Enter the required details”- Add a description for the cheque order
- Select a Recipient Contact, and then a Sender Contact from the respective drop-down list
- Choose a Send Date
- Add the Cheque Number, Message HTML and Memo information for the order. (These fields are optional)
- Adding additional Services
- To add another letter to your order, select a “Letter Template” or “Letter Content” from the drop-down menu.
- Select an Envelope Type
- Click on the “Express Delivery Checkbox” if you want to opt for Express Delivery
- Select a mailing class from the drop-down menu
- By default, all mail is sent as First Class or the fastest non-express postage available in the destination country.
- Select an Extra Service for your order
- Click on “Save”
Please note: You can either opt for Express Delivery or Select a Mailing Class. You cannot opt for both