
Send Letter
Configure letter settings in a Salesforce Marketing Cloud Journey, including design format and optional card insert options.
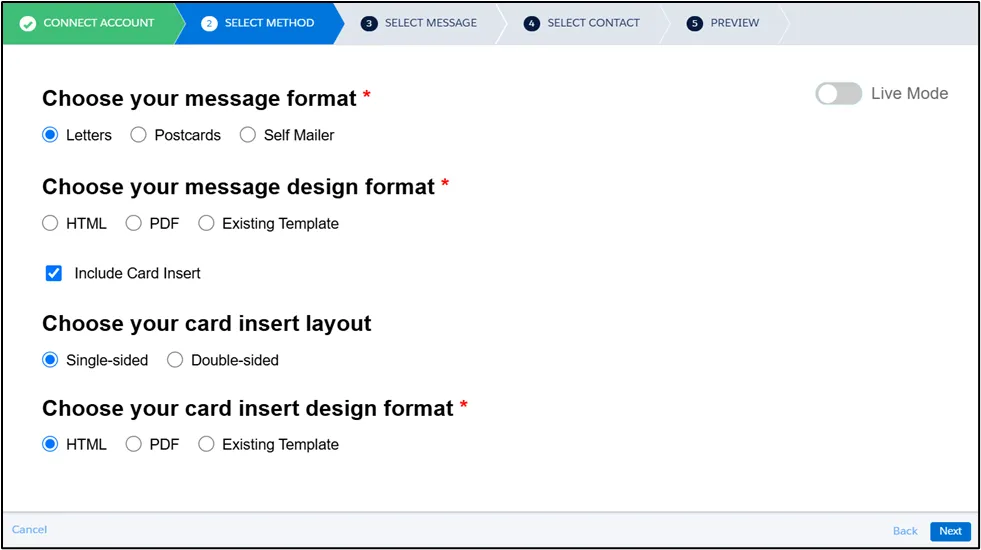
If you selected Letter as your Message Format, you’ll have the option to include a Card Insert. If you proceed without a card insert, you’ll only need to choose a Design Format for the letter.
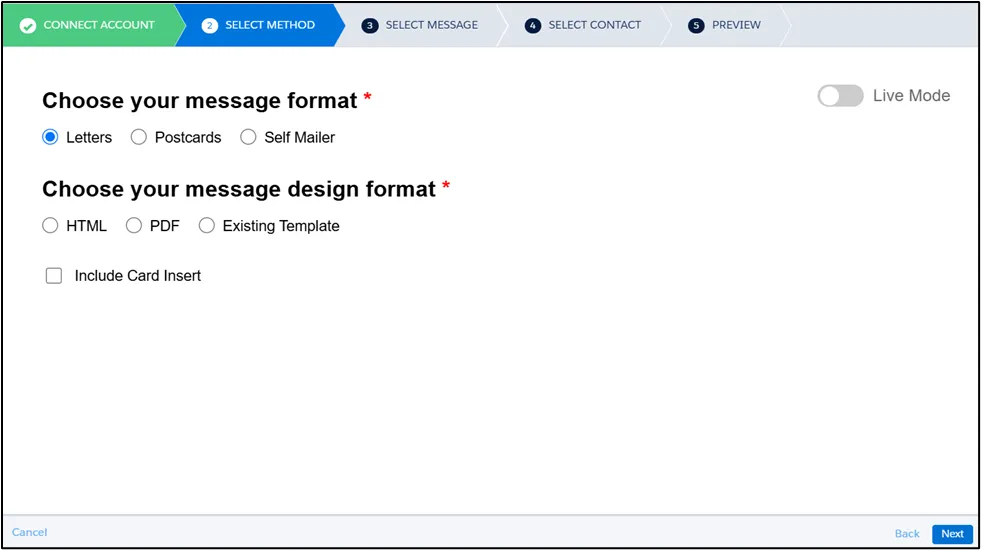
However, if you opt to include a card, you’ll also need to select a Design Format for the card, as outlined below.
Message Setting
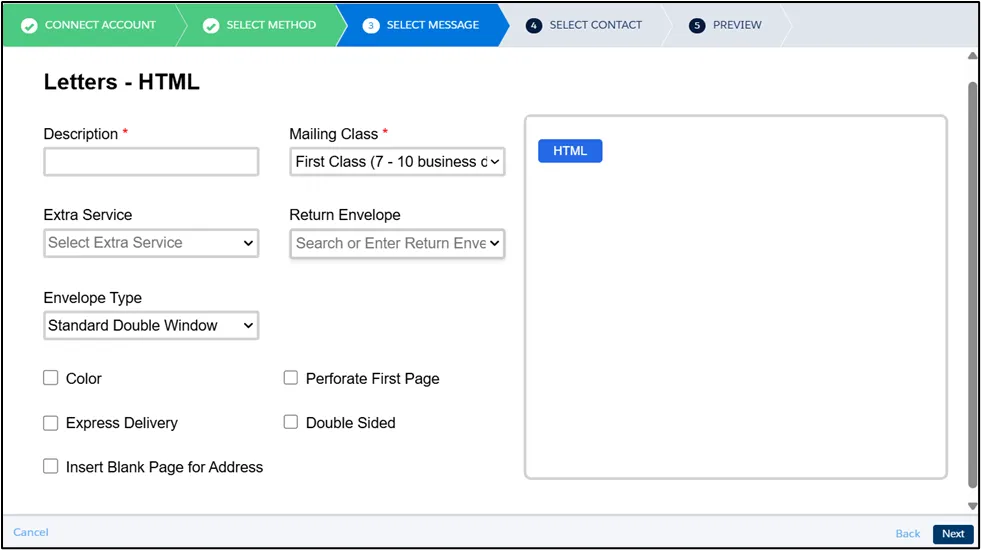
Section titled “Message Setting”For letters, in addition to fill in the required fields like Description and Mailing Class, you can also configure additional options, including:
- Extra Services (Registered, Certified, or Certified with Return Receipt)
- Return Envelope and Envelope Type
- Color Printing and Double-Sided options
- Perforate First Page
- Address Placement
- Express Delivery
The Design Format is depend on how you selected that to be fill in which is listed below.
To personalize your letters using Merge Variables, ensure that each variable
field is added to the PostGrid_Contact_Data Data Extension using the exact
names used in your template. These values will be automatically populated in the
final letter for each recipient.
Include an HTML Code for the letter.
HTML Letter and HTML Card Insert
Section titled “HTML Letter and HTML Card Insert”In addition to the HTML Code for the letter, you may also need to provide a Card Front HTML Code, or both Card Front and Card Back HTML Codes, depending on your selected insert configuration, as shown below.
Letter with Single Sided Card Insert
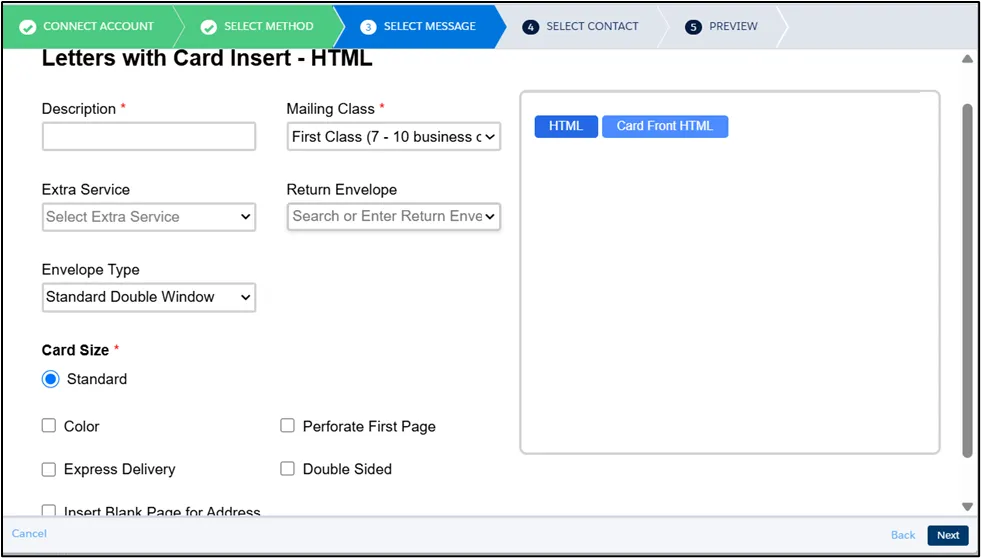
Letter with Double Sided Card Insert
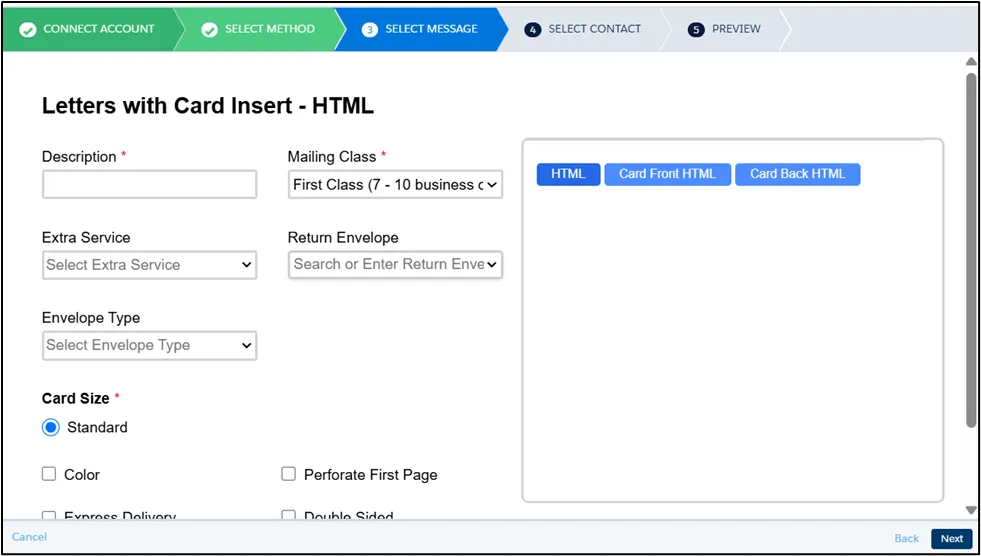
HTML Letter and PDF Card Insert
Section titled “HTML Letter and PDF Card Insert”In addition to the HTML Code for the letter, you may also need to provide a publicly accessible Card Insert PDF URL. If you are including a double-sided card insert, the PDF must contain two pages.
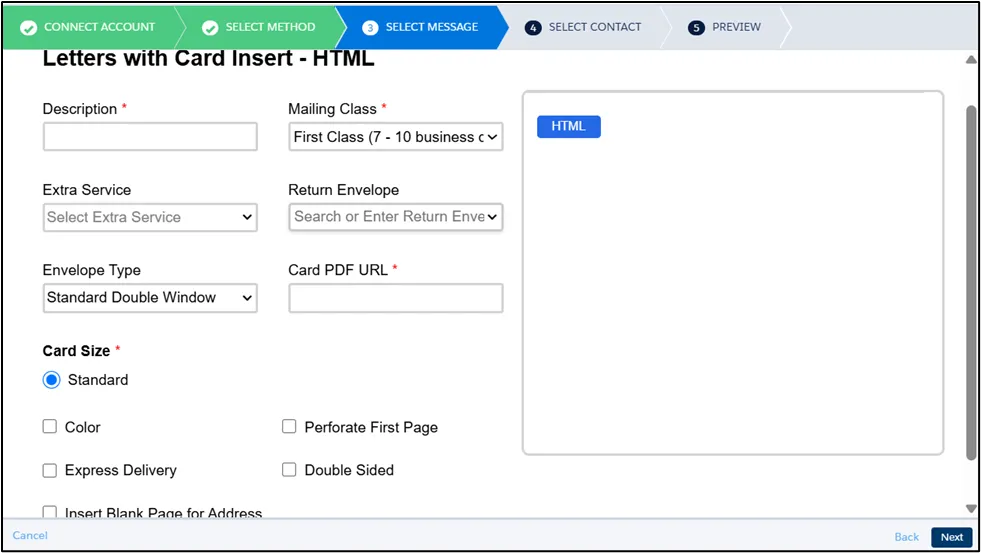
HTML Letter and Existing Template for Card Insert
Section titled “HTML Letter and Existing Template for Card Insert”In addition to the HTML Code for the letter, you may also need to provide a Card Front Template, or both Card Front and Card Back Template, depending on your selected insert configuration, as shown below.
Letter with Single Sided Card Insert
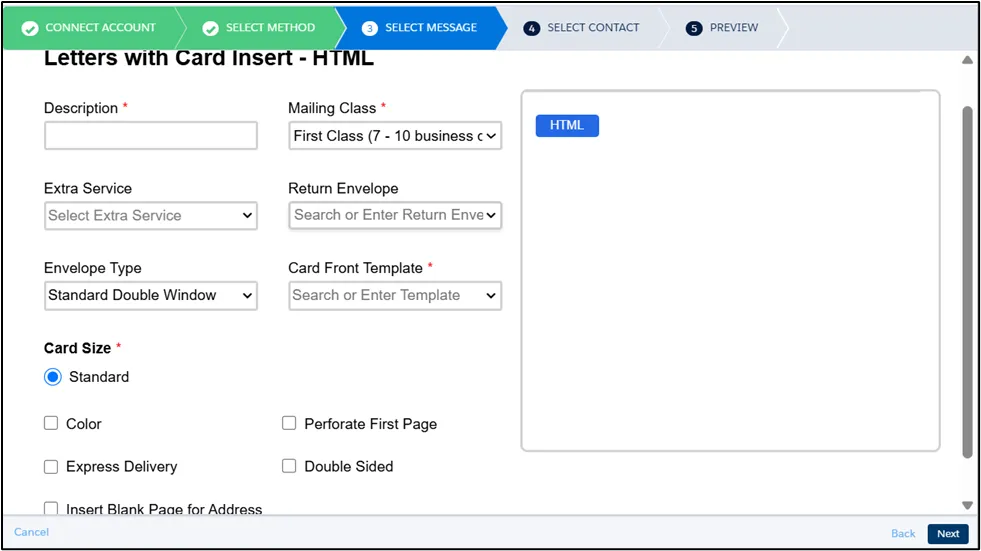
Letter with Double Sided Card Insert
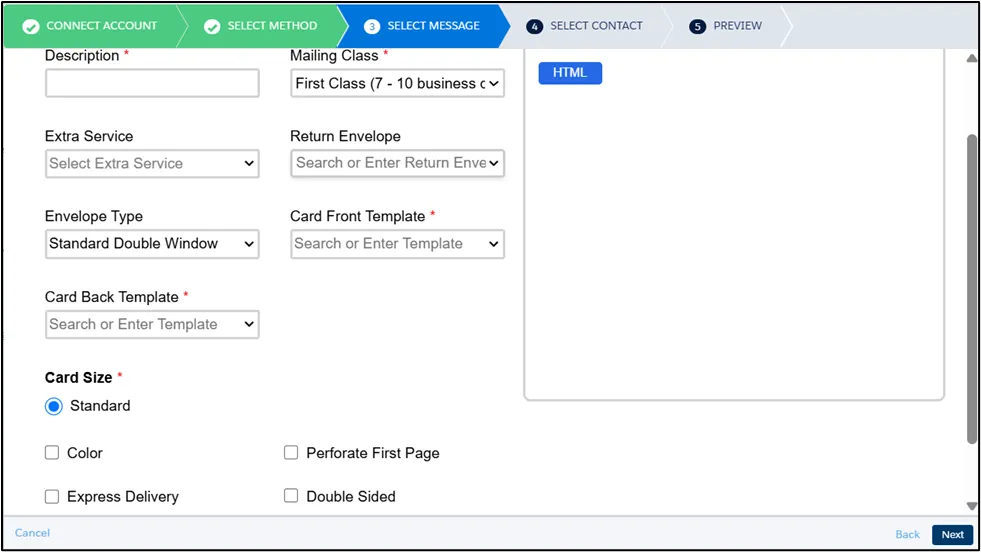
Include a PDF URL for the letter which is publicly accessible.
🚧 Ensure that the dimensions of the PDF file match the letter Size; otherwise, an error message will be displayed on the next screen.
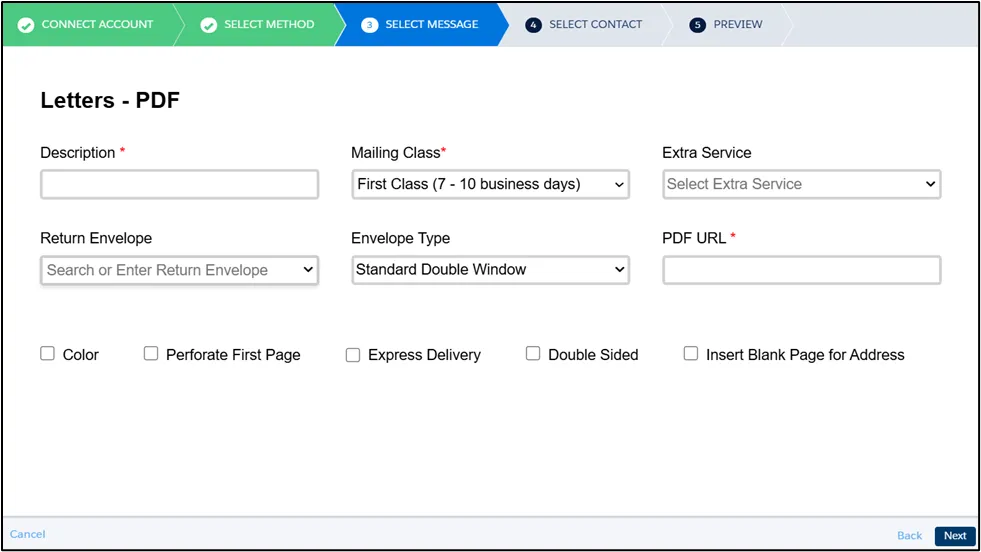
PDF Letter and HTML Card Insert
Section titled “PDF Letter and HTML Card Insert”In addition to the PDF URL for the letter, you may also need to provide a Card Front HTML Code, or both Card Front and Card Back HTML Codes, depending on your selected insert configuration, as shown below.
Letter with Single Sided Card Insert
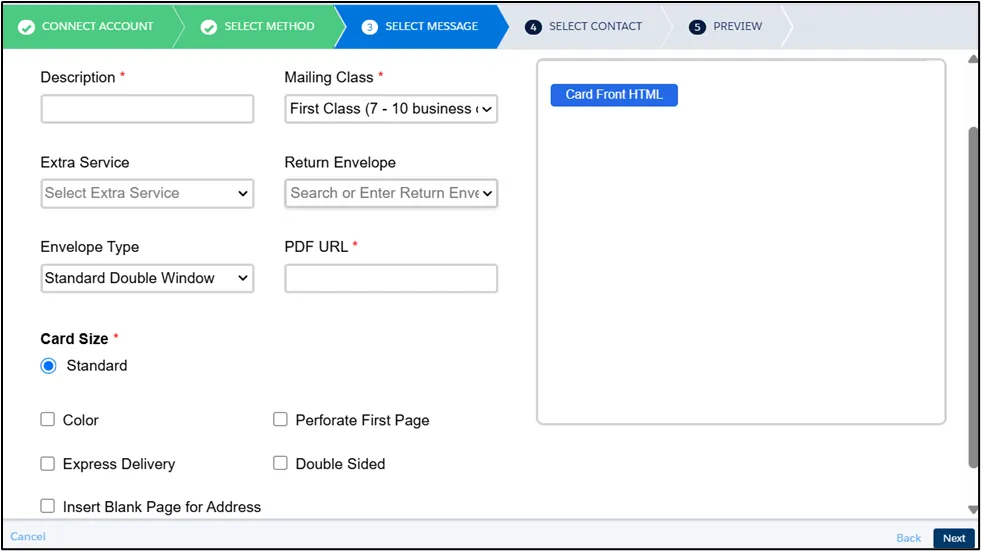
Letter with Double Sided Card Insert
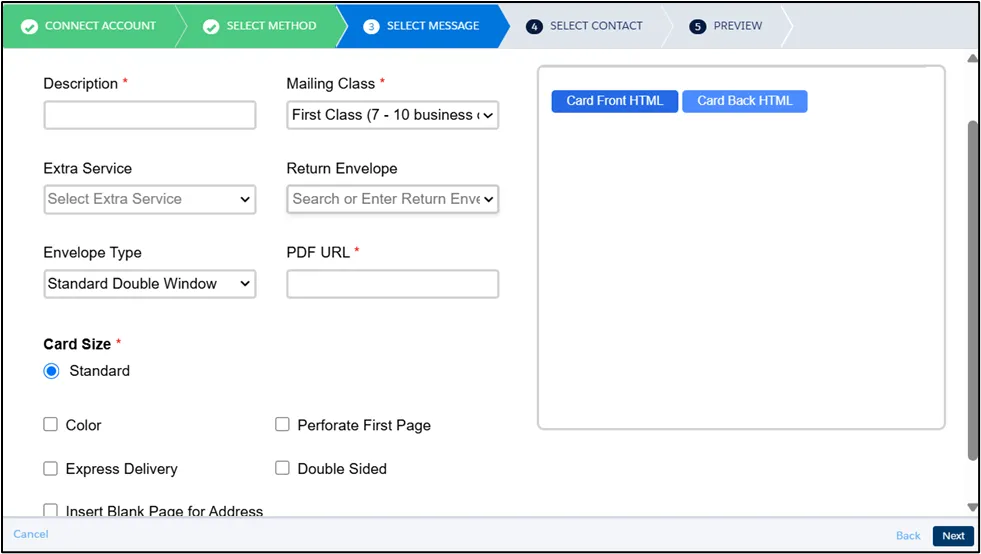
PDF Letter and PDF Card Insert
Section titled “PDF Letter and PDF Card Insert”In addition to the PDF URL for the letter, you may also need to provide a publicly accessible Card Insert PDF URL. If you are including a double-sided card insert, the PDF must contain two pages.
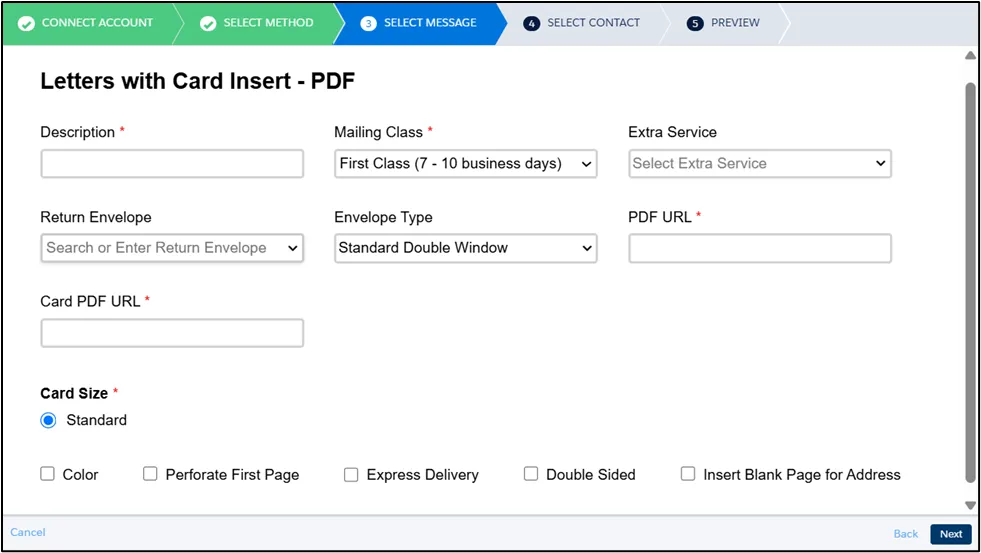
PDF Letter and Existing Template for Card Insert
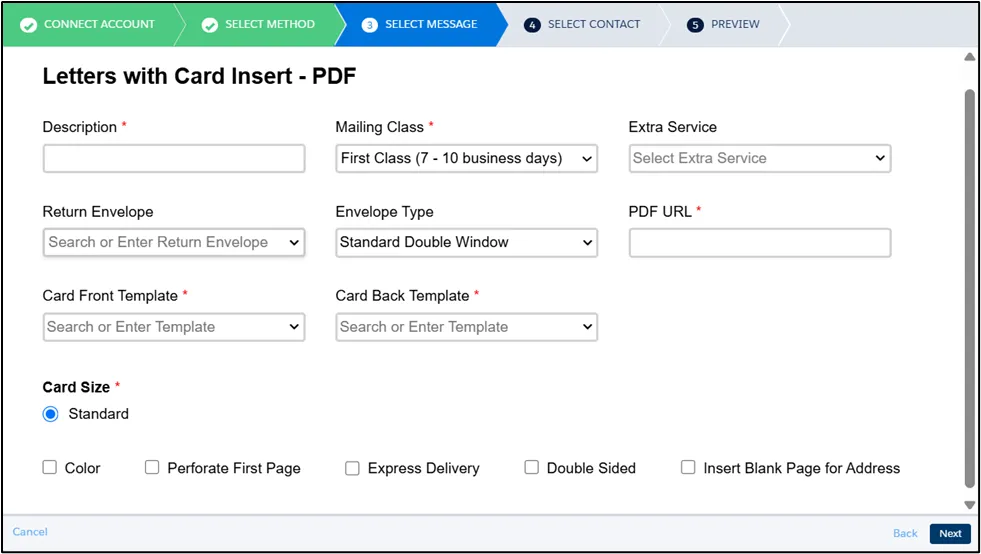
Section titled “PDF Letter and Existing Template for Card Insert”In addition to the PDF URL for the letter, you may also need to provide a Card Front Template, or both Card Front and Card Back Template, depending on your selected insert configuration, as shown below.
Letter with Single Sided Card Insert
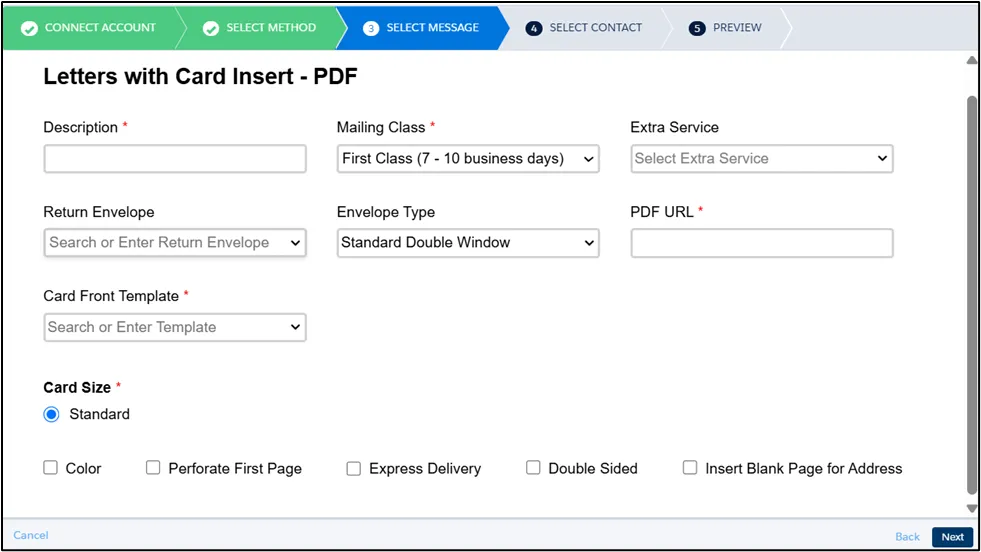
Letter with Double Sided Card Insert
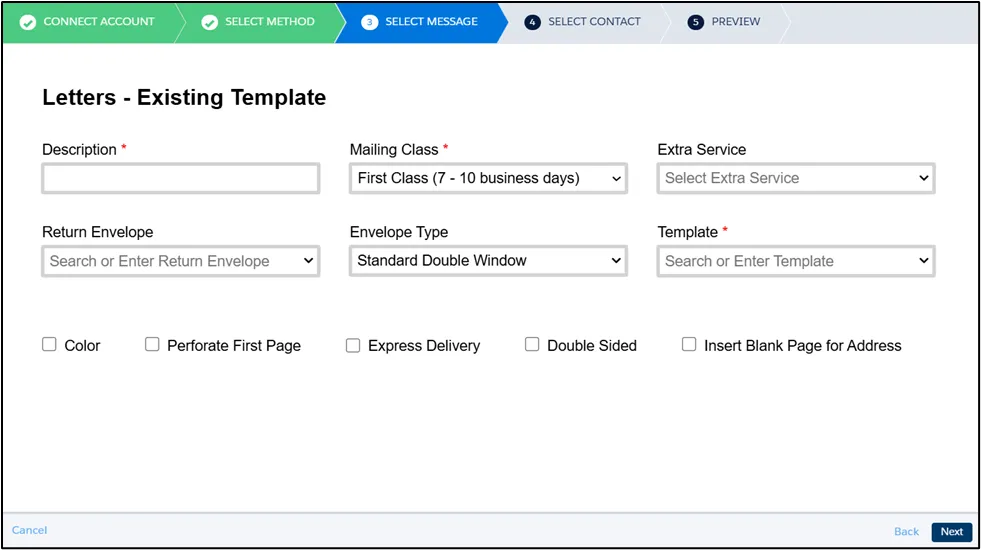
Existing Template
Section titled “Existing Template”Include the Existing Template from PostGrid account for the letter.
Existing Template for Letter and HTML Card Insert
Section titled “Existing Template for Letter and HTML Card Insert”In addition to the existing template for the letter, you may also need to provide a Card Front HTML Code, or both Card Front and Card Back HTML Codes, depending on your selected insert configuration, as shown below.
Letter with Single Sided Card Insert
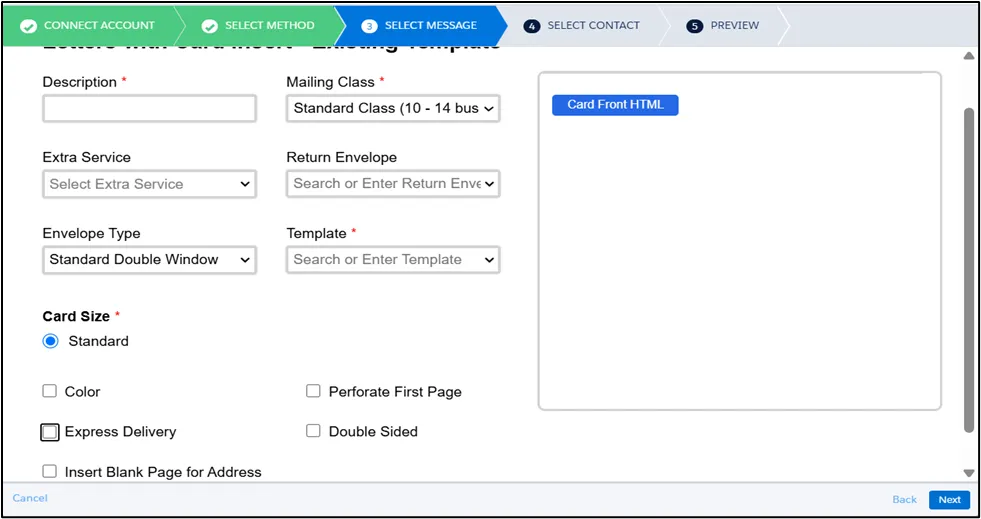
Letter with Double Sided Card Insert
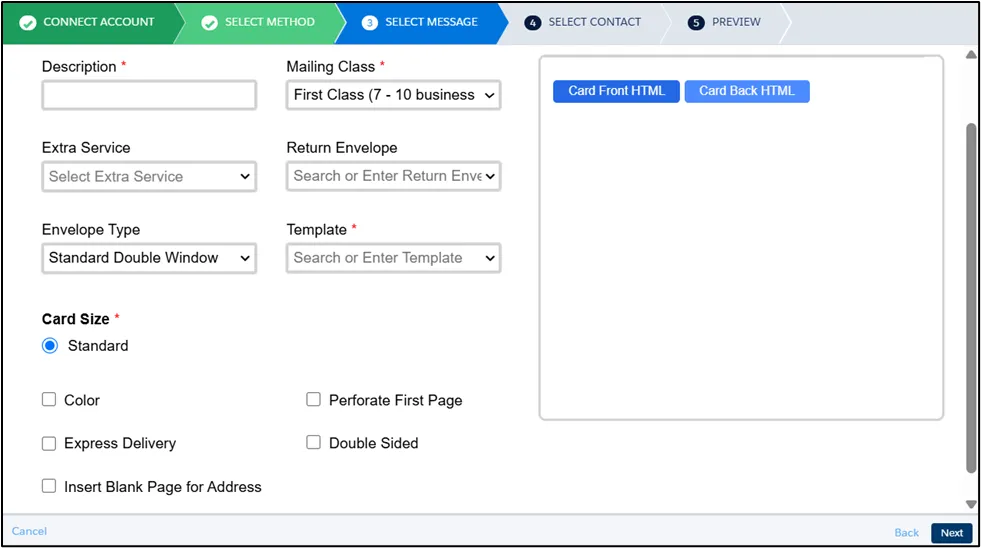
Existing Template for Letter and PDF Card Insert
Section titled “Existing Template for Letter and PDF Card Insert”In addition to the existing template for the letter, you may also need to provide a publicly accessible Card Insert PDF URL. If you are including a double-sided card insert, the PDF must contain two pages
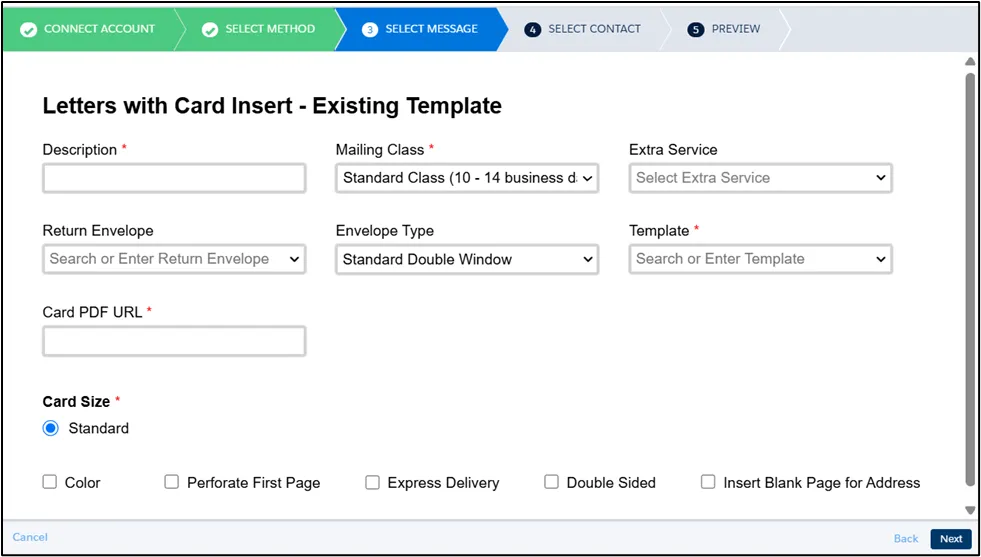
Existing Template for Letter and Existing Template for Card Insert
Section titled “Existing Template for Letter and Existing Template for Card Insert”In addition to the existing template for the letter, you may also need to provide a Card Front Template, or both Card Front and Card Back Template, depending on your selected insert configuration, as shown below.
Letter with Single Sided Card Insert
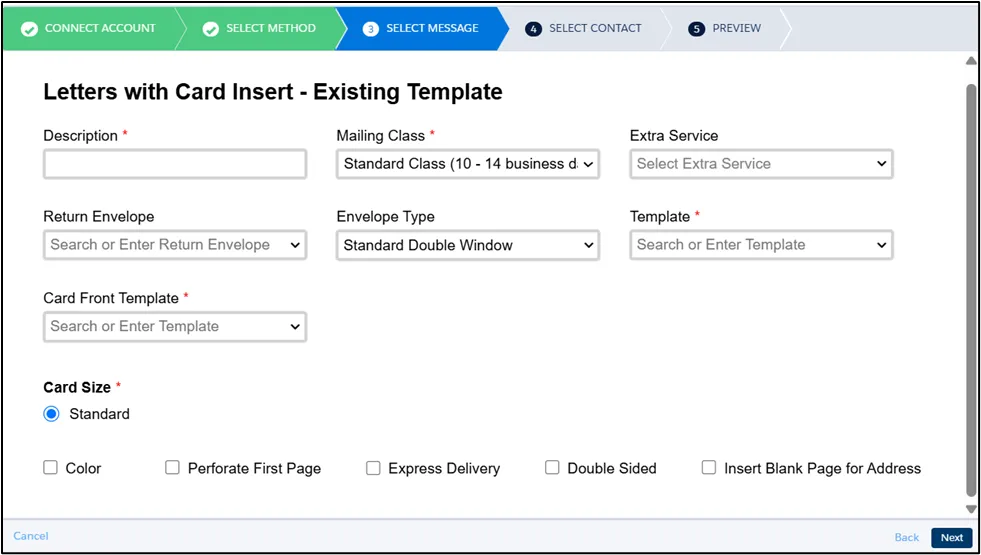
Letter with Double Sided Card Insert
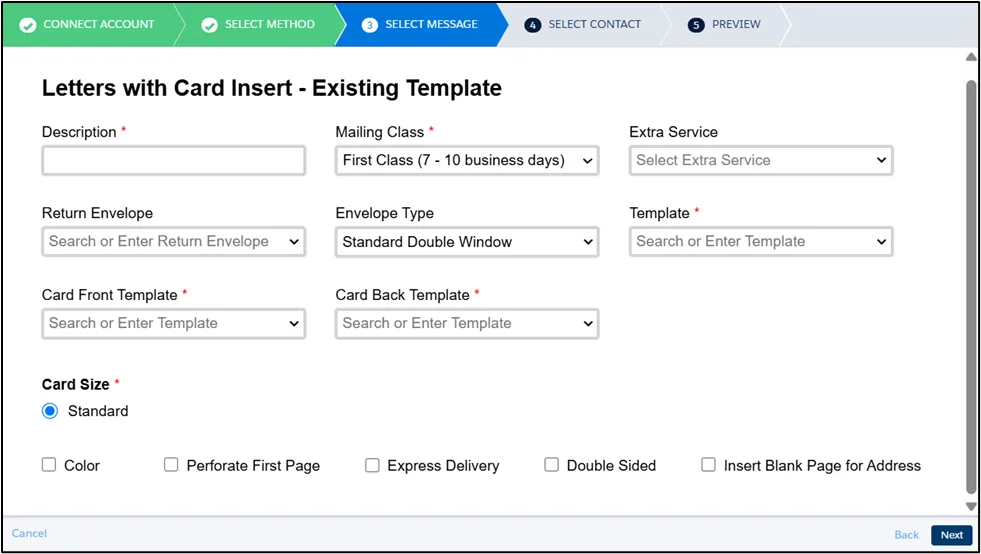
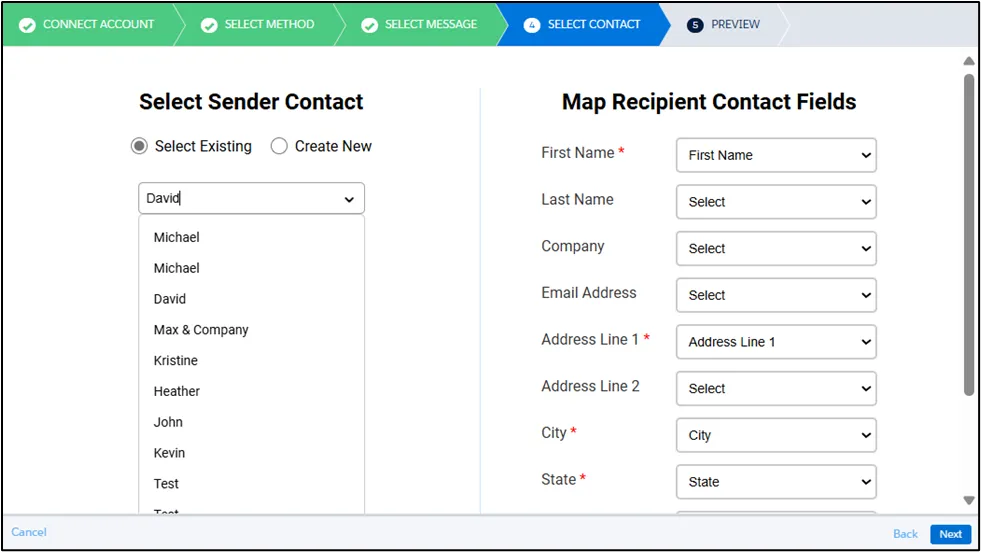
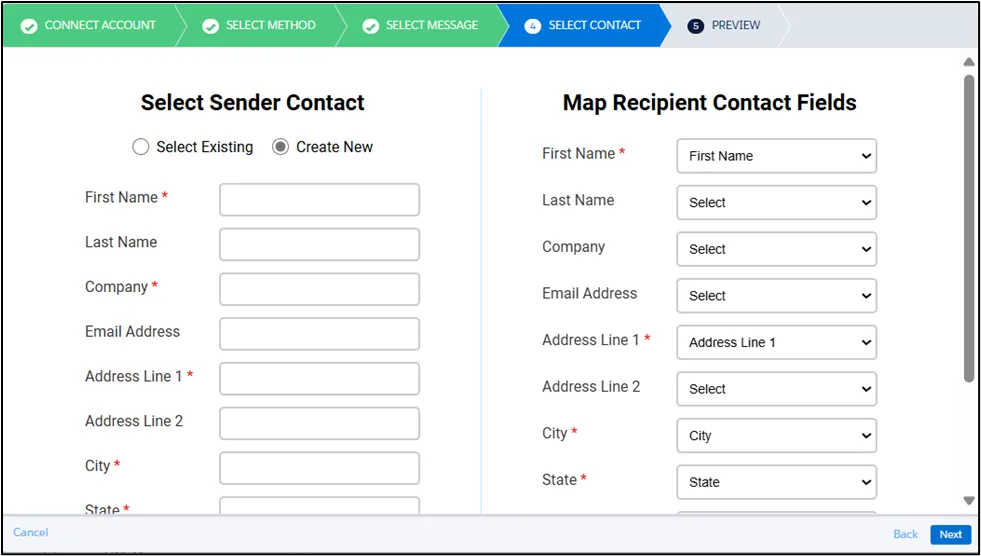
Contact Setting
Section titled “Contact Setting”In Step 4, map the Recipient Contact fields from your Salesforce Marketing Cloud Data Extension to the appropriate fields in PostGrid. This ensures your campaign is personalized with the correct recipient details.
For the Sender Contact, you can either select an existing contact or create a new one as needed. Once mapping is complete, click Next to proceed.
Preview
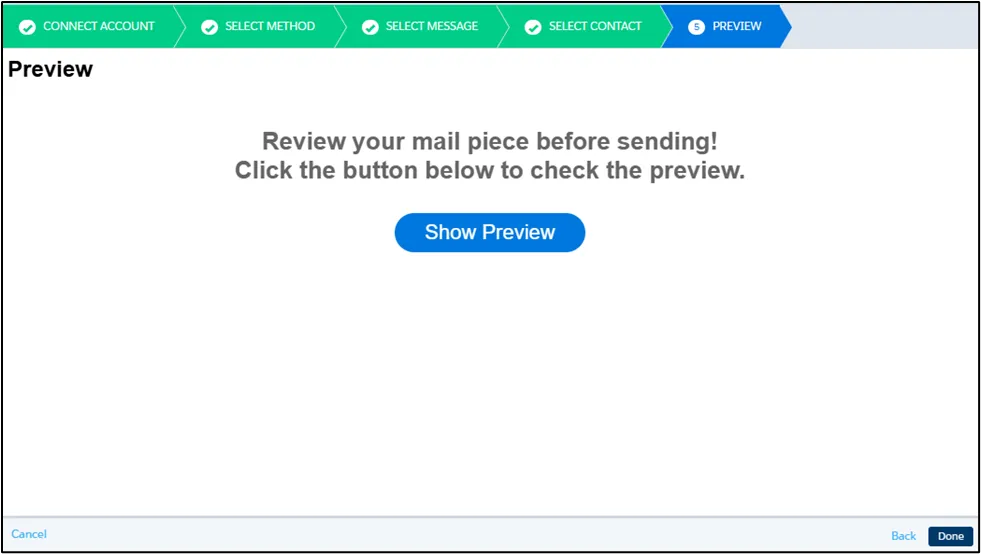
Section titled “Preview”In Step 5, you can see a test preview of your order. Click on the Show Preview button to preview the screen.
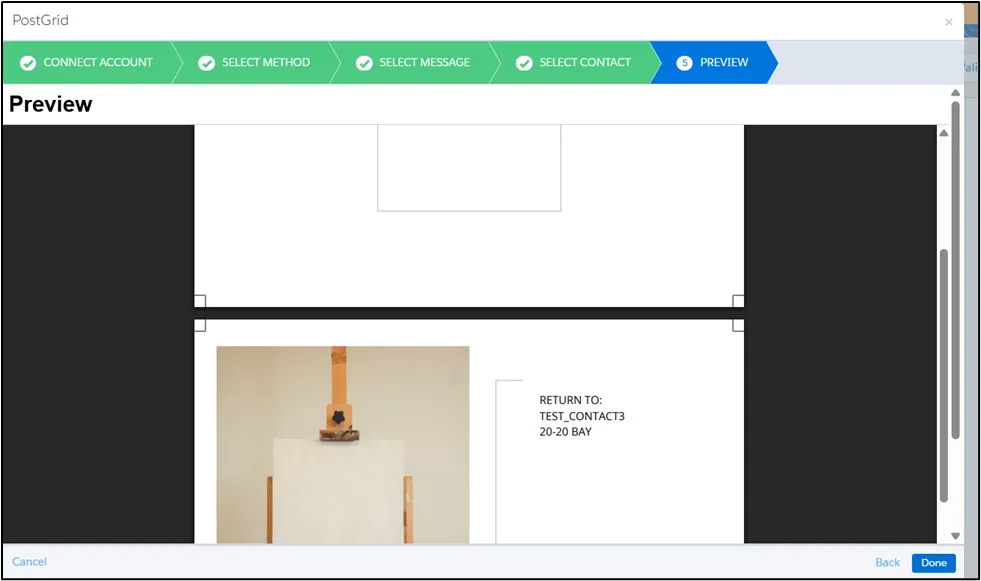
Please note that the values shown in the preview are placeholder data and are for display purposes only. The final mailings will be populated with actual values from the contact records in your Data Extension.