Okta Configuration
Step-by-step instructions for creating and configuring a SAML 2.0 app integration in Okta for PostGrid SSO.
Step 1: Create New SAML 2.0 Application
Section titled “Step 1: Create New SAML 2.0 Application”- Log in to your Okta Admin Dashboard
- Navigate to Applications -> Applications
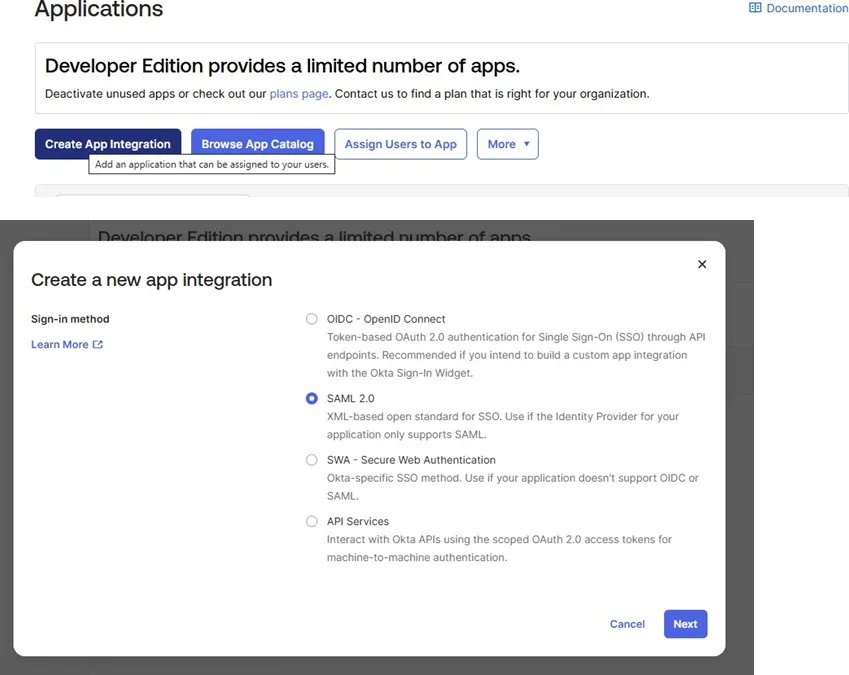
- Click Create App Integration
- Select SAML 2.0 as the sign-in method
- Click Next
Step 2: Configure General Settings
Section titled “Step 2: Configure General Settings”- Enter your application details:
- App name: PostGrid SSO (or your preferred name)
- App logo: (Optional) Upload your organization’s logo
- App visibility: Configure as needed for your organization
- Click Next to proceed to SAML settings
Step 3: Configure SAML Settings
Section titled “Step 3: Configure SAML Settings”A. Enter PostGrid URLs
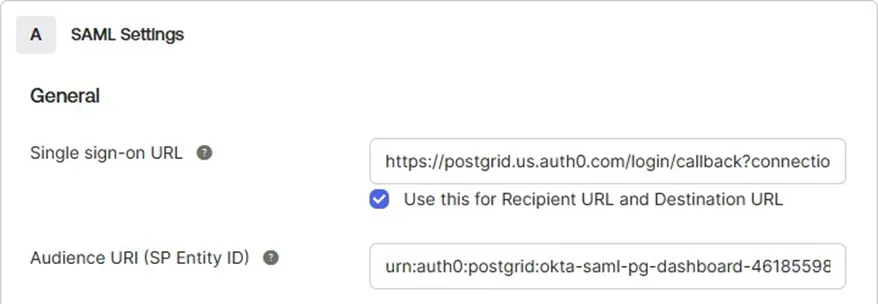
Section titled “A. Enter PostGrid URLs”Using the URLs provided by PostGrid, configure the following fields:
- Single sign-on URL:
- Paste the URL provided by PostGrid
- Example format:
https://postgrid.us.auth0.com/login/callback?connection=... - ✅ Check the box: “Use this for Recipient URL and Destination URL”
- Audience URI (SP Entity ID):
- Paste the Audience URI provided by PostGrid
- Example format:
urn:auth0:postgrid:okta-saml-pg-dashboard-46185598
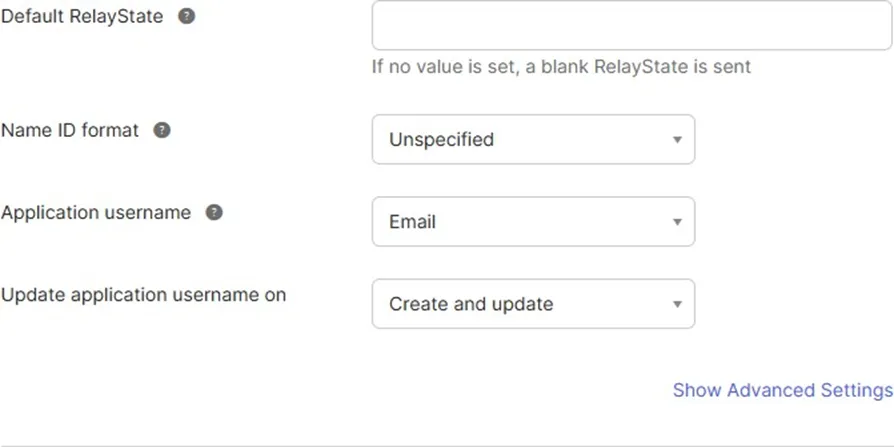
B. Configure Default SAML Settings
Section titled “B. Configure Default SAML Settings”Leave the following fields with their default values:
Step 4: Configure Attribute Statements (Recommended)
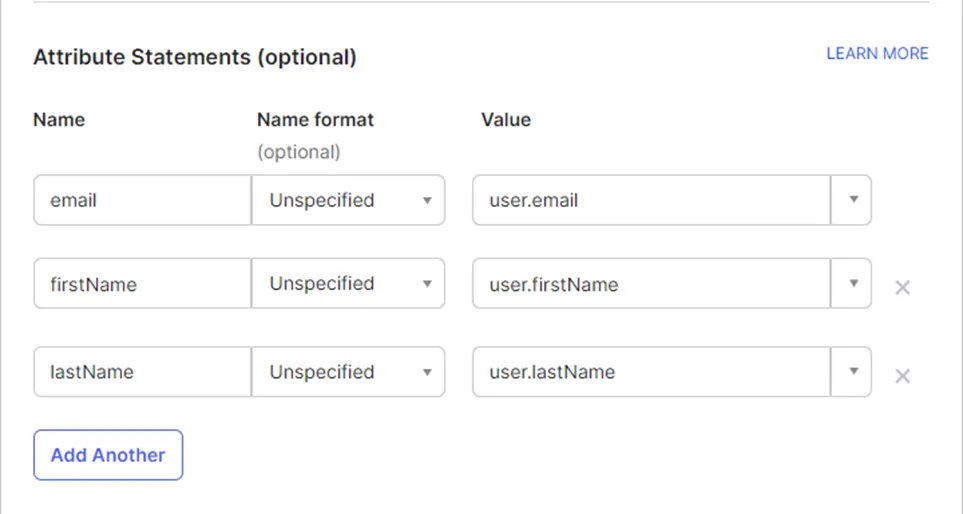
Section titled “Step 4: Configure Attribute Statements (Recommended)”Attribute Statements allow PostGrid to receive user details like name and email from Okta, enabling better user identification and personalization.
Why this is recommended: Passing user details eliminates the need for users to re-enter their information and improves the PostGrid experience.
Configure the following attributes:
Step 5: Complete Feedback and Create Application
Section titled “Step 5: Complete Feedback and Create Application”- Select the appropriate feedback option based on your use case:
- “I’m an Okta customer adding an internal app”
- “I’m a software vendor. I’d like to integrate my app with Okta”
- Click Finish to create the application
Step 6: Assign Users to the Application
Section titled “Step 6: Assign Users to the Application”Once your application is created, assign Okta users to enable their access to PostGrid.
- Navigate to the Assignments tab
- Click Assign > Assign to People or Assign to Groups
- Select users/groups who should have PostGrid access
- Click Done
For detailed instructions on how to assign users or groups to your application, refer to the official Okta documentation: Assign app integrations - Okta Documentation
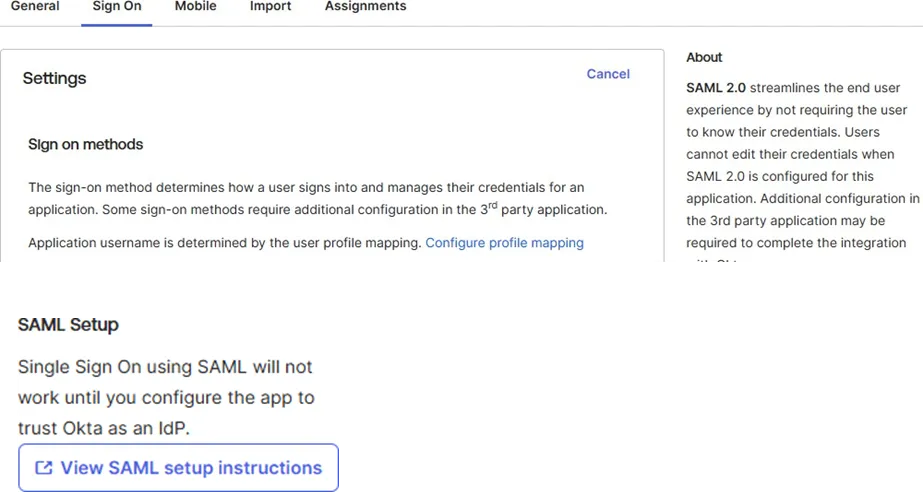
Step 7: Retrieve SAML Configuration Details
Section titled “Step 7: Retrieve SAML Configuration Details”Retrieve SAML Configuration Details
PostGrid will require:
- Sign In URL
- X509 Signing Certificate
To find these details:
- Navigate to the Sign On tab in your PostGrid SSO application
- Find and click the link “View SAML setup instructions”
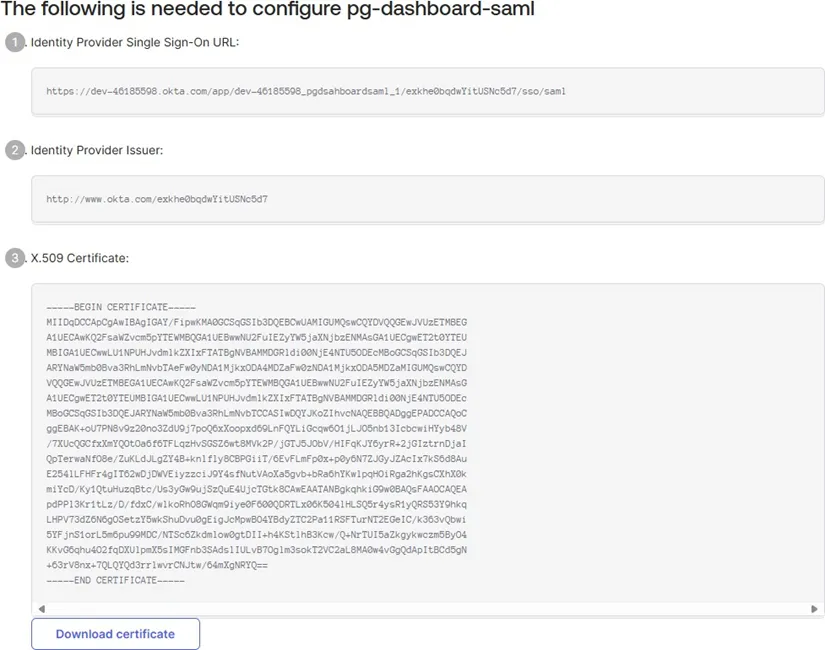
Step 8: Review the Configuration Details
Section titled “Step 8: Review the Configuration Details”Below is an example of the details you’ll see:
- Identity Provider Single Sign-On URL
- Identity Provider Issuer
- X.509 Certificate (with Download certificate option)
Step 9: Forward Information to PostGrid
Section titled “Step 9: Forward Information to PostGrid”Please forward this information to either your account manager or a PostGrid engineer working with your team.
Best practice: For the certificate, simply forward the file.
Additional requirement: Please provide the email domain for which all logins will be scoped. This can be either one domain or a comma separated list.
Contact: [email protected] or [email protected]