ActiveCampaign
Send letters, postcards, and self-mailers to your ActiveCampaign contacts with PostGrid's native integration.
PostGrid’s native ActiveCampaign Integration allows you to send letters, postcards, and self-mailers to your customer list through workflow automation. You can use pre-designed PDF or Personalized templates for creating your campaigns. In this guide, we will walk you through how to perform each step.
Setup the automation
Section titled “Setup the automation”Regardless of what type of mail you want to send, the first step of setting up the automation is the same.
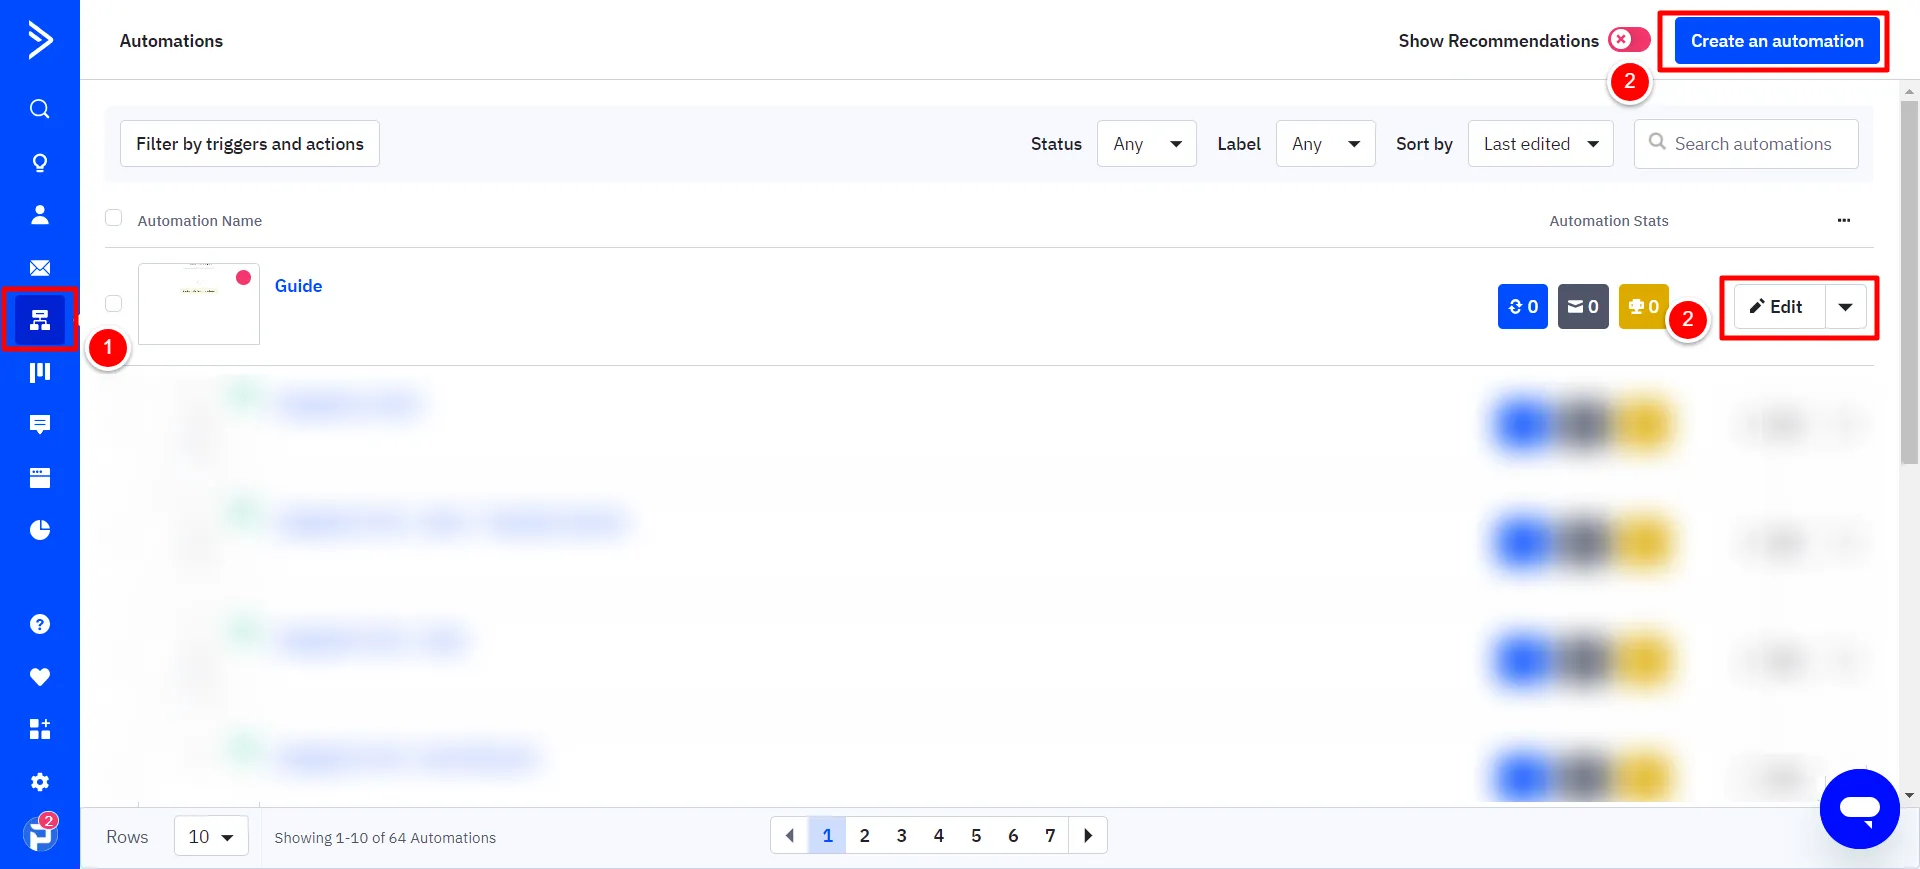
Navigate to the Automation Module and click on the “Create an automation” button to create a new automation or edit your existing automation.
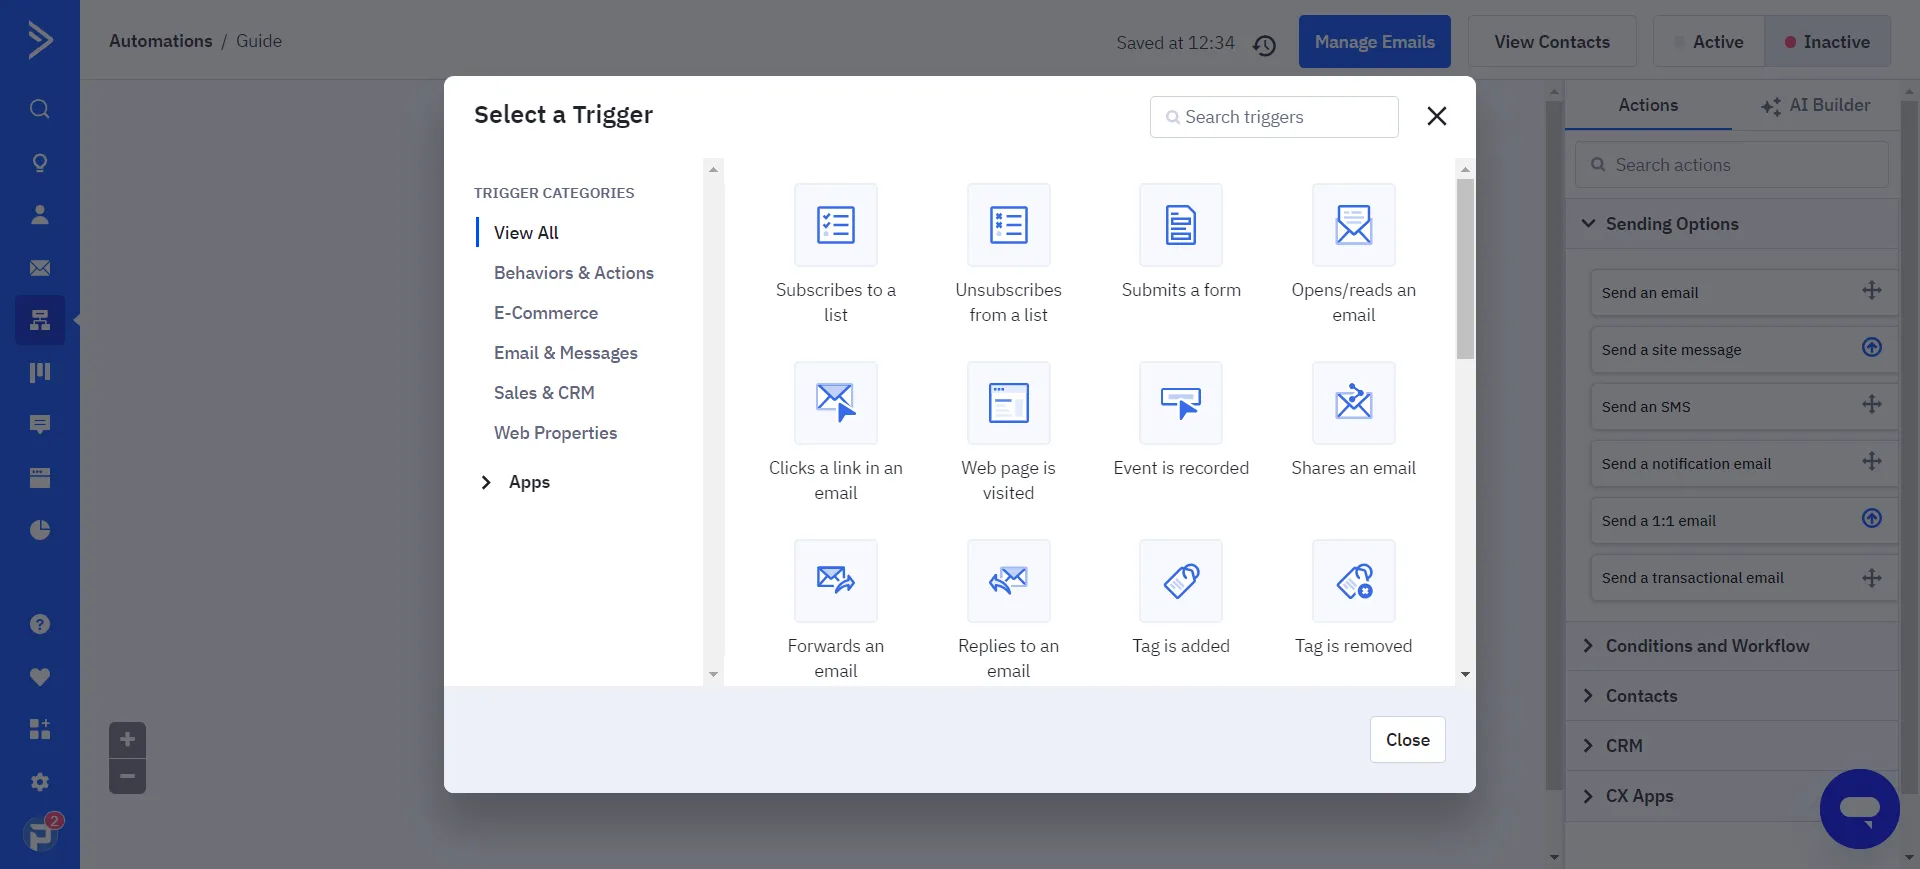
Create a Trigger
Section titled “Create a Trigger”You can set up your new trigger event. It can be any of the following trigger events within ActiveCampaign:
- Subscribes to a list.
- Unsubscribe from a list.
- Submit a form.
- Web page is visited.
- Tag is added.
- And more.
Create an Action
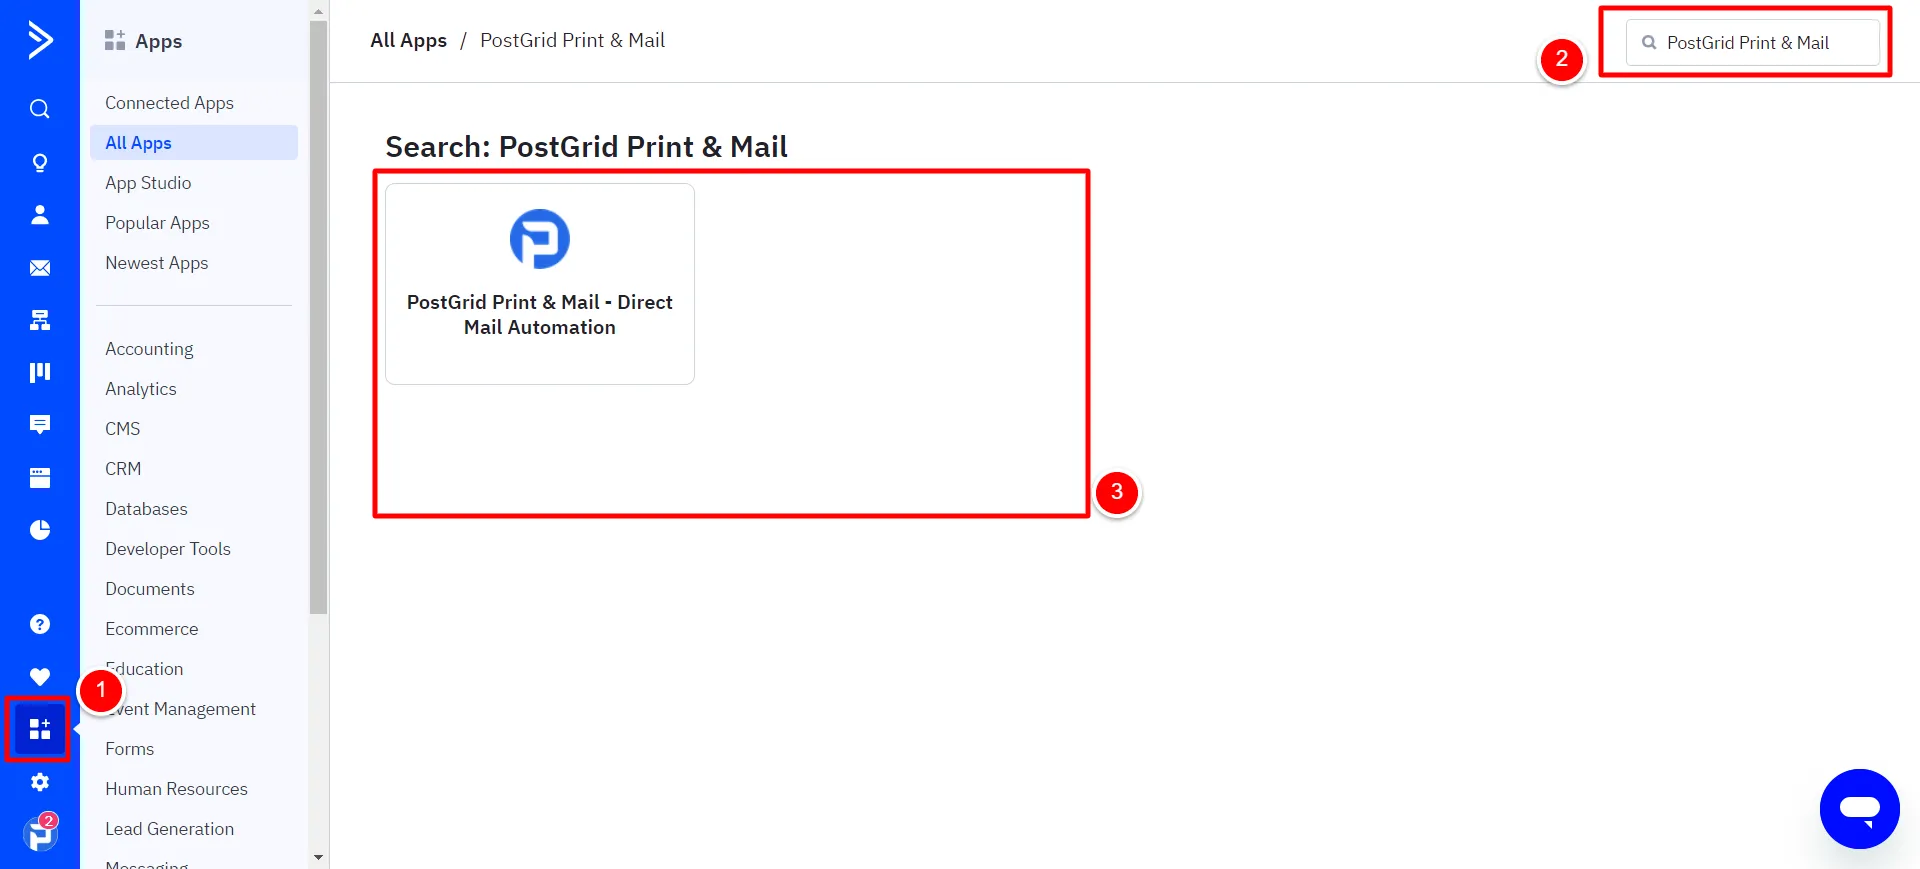
Section titled “Create an Action”After you have selected your triggers, add an Action Step by clicking the ’+’ button shown in your Automation Diagram. Navigate to the “CX Apps” and locate the PostGrid Apps.
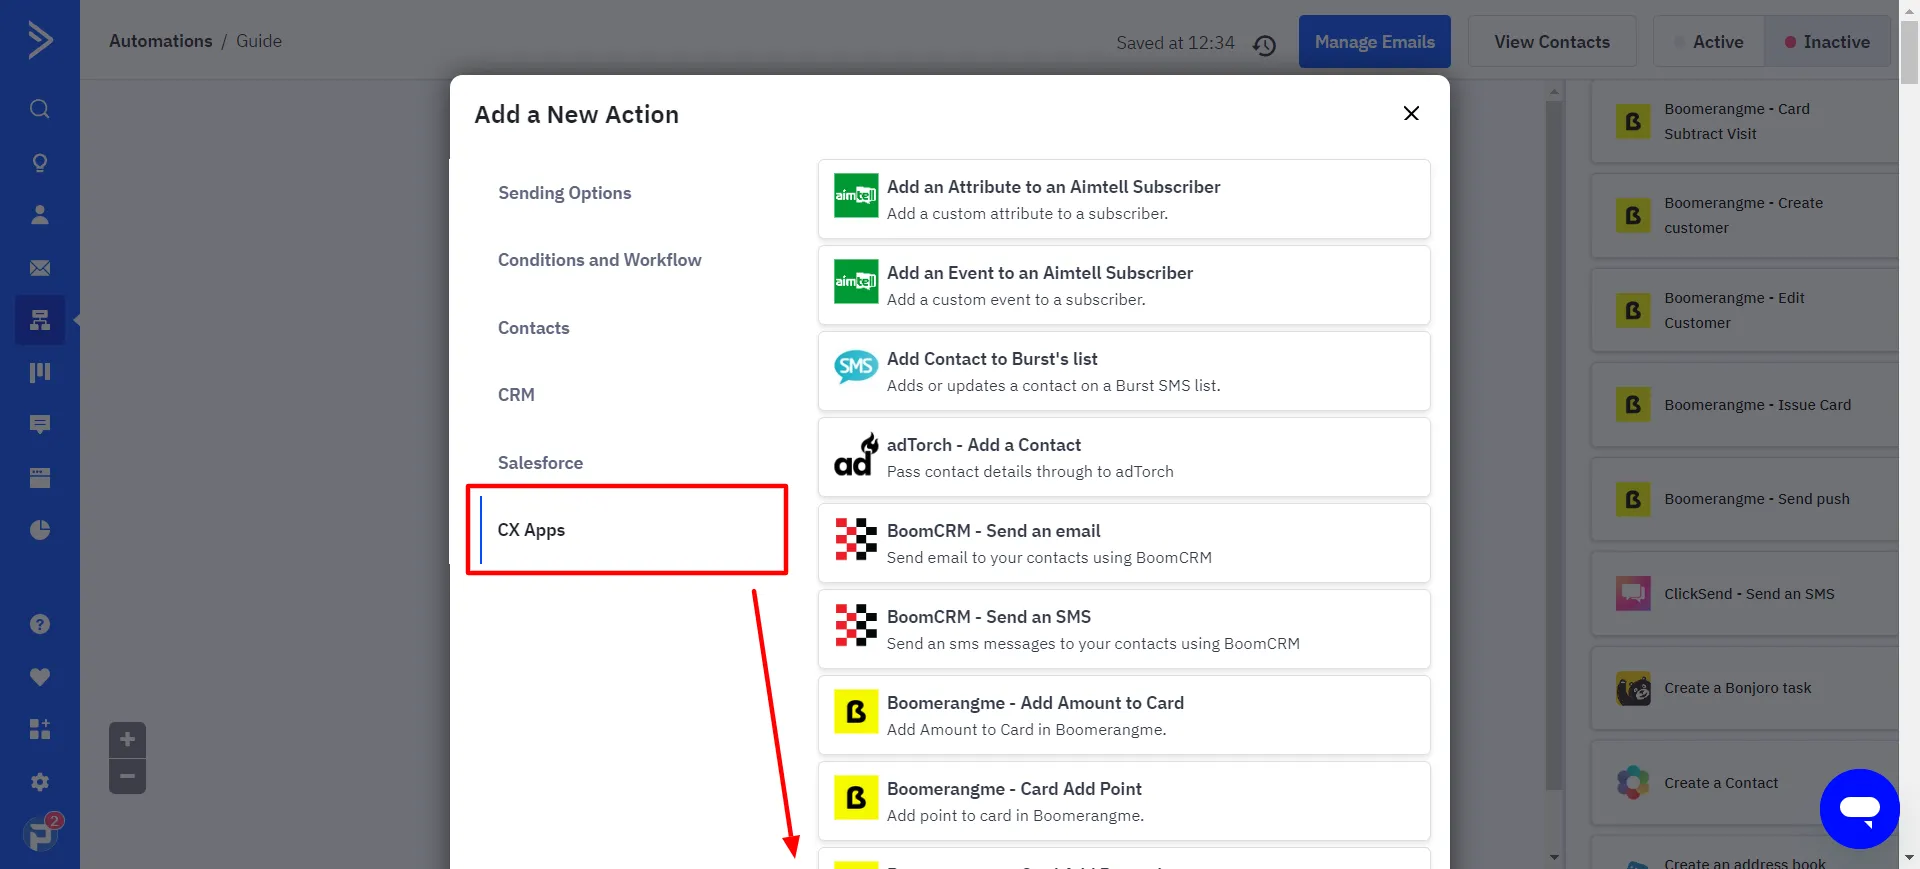
Here, you have multiple choices regarding the type of mail, including letter, postcard, and self-mailer, you want to send and whether you want to use a template within your PostGrid Dashboard account or upload a pre-designed PDF file. The list of Apps is as follows.
| Apps | Purpose |
|---|---|
 | Sending Letters with personalized template in PostGrid Dashboard |
 | Sending Letters by uploading a pre-designed PDF file as a template |
 | Sending Postcards with personalized template in PostGrid Dashboard |
 | Sending Postcards by uploading a pre-designed PDF file as a template |
 | Sending Self-Mailers with personalized template in PostGrid Dashboard |
 | Sending Self-Mailers by uploading a pre-designed PDF file as a template |
Selecting an account
Section titled “Selecting an account”Once you select the appropriate PostGrid App, you can choose your PostGrid account through the pop-up window or click on the “Add New Account” button.
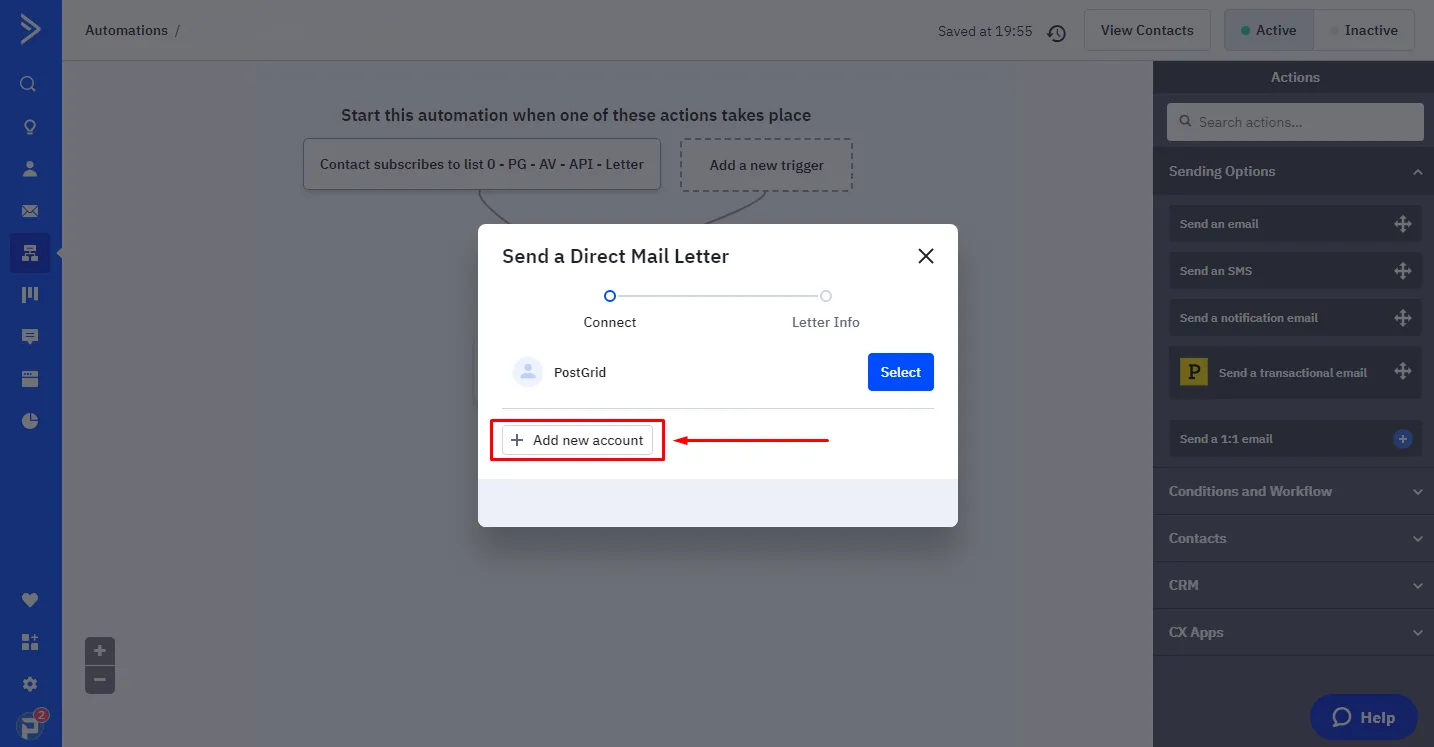
To create a new account, you need to add the API key. You can simply find your API key in your PostGrid dashboard settings page.
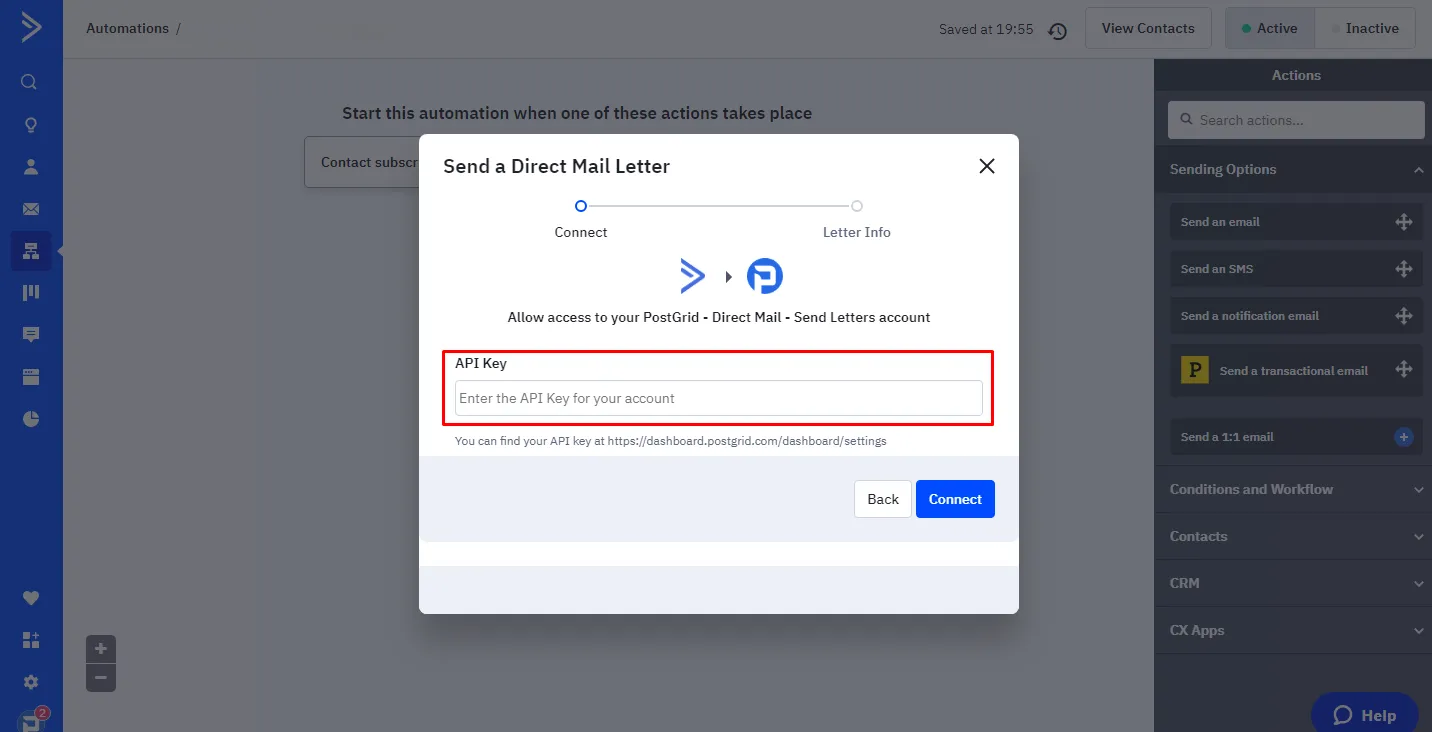
Click on the “Connect” Button, and proceed as follows.
Filling in the Recipient requirements
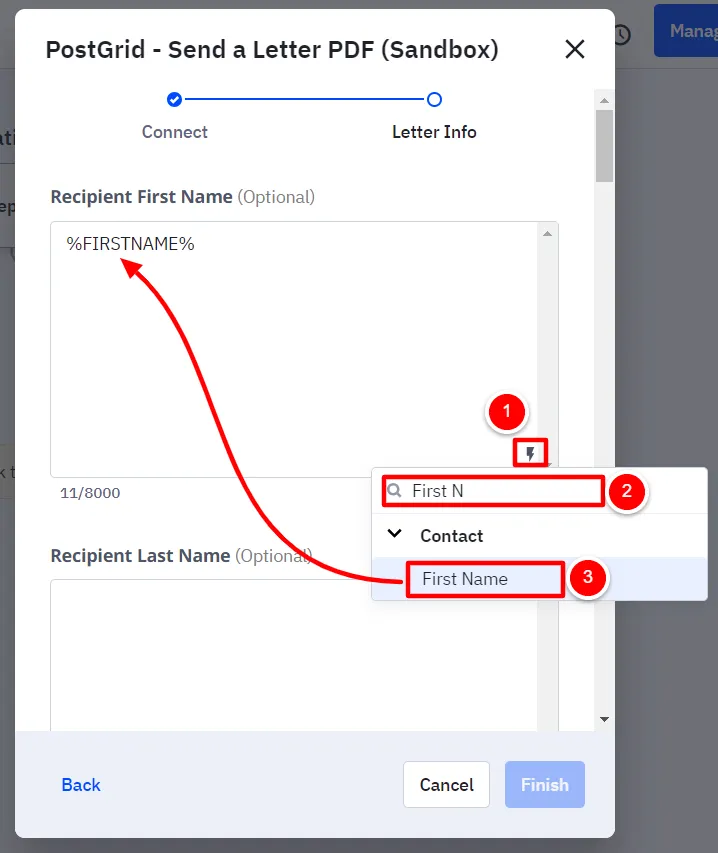
Section titled “Filling in the Recipient requirements”Now, you need to define and map the variables one by one.
Use the merge variable as %VARIABLENAME%. Ensure you use the built-in ActiveCampaign contact variable to recognize the merge variable. Follow this and fill in all the merge variables.
ActiveCampaign merge variable examples:
| Variable Name | Variable Format |
|---|---|
| Recipient First Name | %FIRSTNAME% |
| Recipient Last Name | %LASTNAME% |
| Recipient Company Name | %COMPANY_NAME% |
| Recipient Address | %ADDRESS_FULL% |
| Recipient Country Code | e.g. US, CA, GB, etc |
You can also use the Thunder Light icon to search through the ActiveCampaign variable and choose the variable as per the campaign requirements.
Filling in the Sender requirements
Section titled “Filling in the Sender requirements”You need to define Sender information for sending mail; however, the sender Address and Country code are only mandatory for sending letters and self-mailers and can be kept empty for postcards. These fields can be filled with fixed data.
- Sender First Name
- Sender Last Name
- Sender Company Name
- Sender Address
- Sender Country Code (e.g. US, CA, GB, etc)
Filling in the mailing requirements
Section titled “Filling in the mailing requirements”As you follow through setting up the Automation, you need to define the value for the following criteria for your mails.
- Mailing Class
- Future Send Date (YYYY/MM/DD)
- Description
- Address Placement (Just for Letters)
- Double Sided (Just for Letters)
- Black and White or Color (Just for Letters)
- Perforation (Just for Letters)
- Size (Just for Postcards and Self-Mailers)
Filling in the template requirements
Section titled “Filling in the template requirements”And at last, you need to define your template for your letter, postcard, or self-mailer.
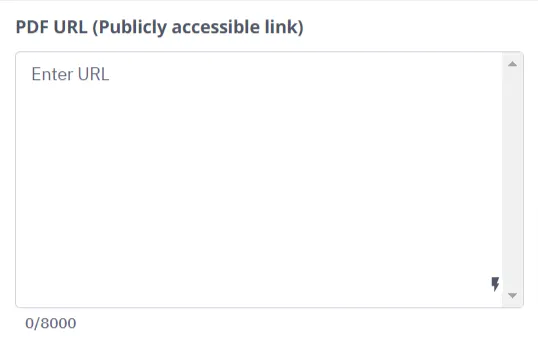
- If you opted to use a pre-designed PDF file as your template, you can simply add its URL to the automation, in the “PDF URL (Publicly accessible link)” field. To ensure your PDF file is publicly accessible, it must be hosted on a platform that does not require viewers to have an account or specific permission to view the document.
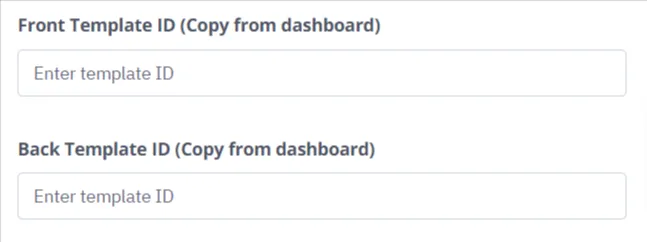
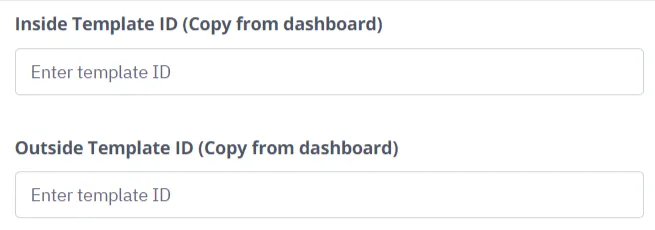
- If you opted to use an existing personalized template in your PostGrid
dashboard, you need to copy the template ID to your Automation designated
field.
-
For Letters

-
For Postcards
-
For Self-Mailers
-
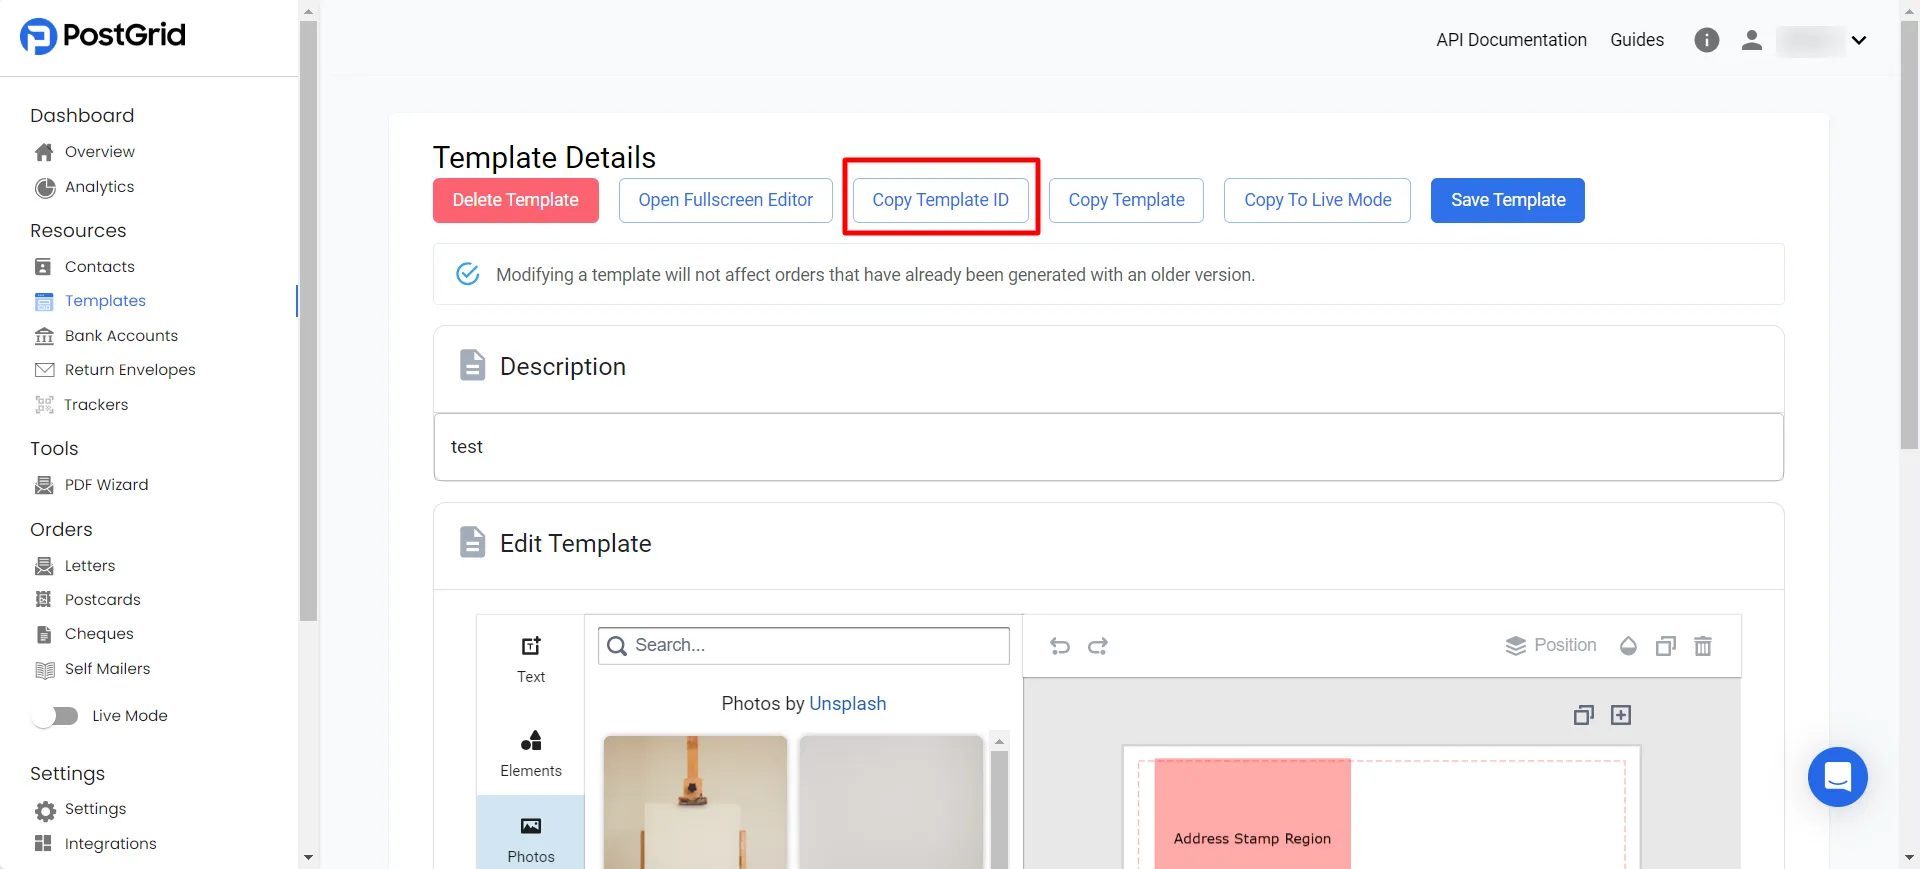
To copy the template ID, go to your PostGrid Dashboard Template page and copy the desired template ID from the template’s detail page.
PostGrid offers a highly personalized template editor that allows you to add customized variables to your templates. So here, you can map the variables you’ve defined in your template to specific fields. There are ten fields available for merging variable names and values.
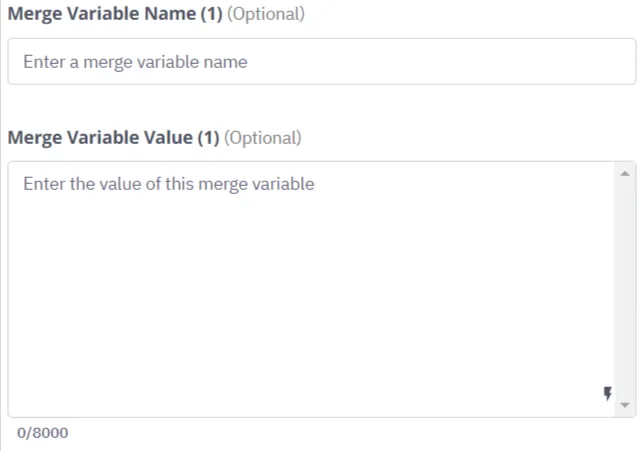
For instance, if your template contains the merge variables {{to.firstName}},
{{dealStage}}, and {{coupon}}, which for the First Name and Deal Stage
should be filled out by the ActiveCampaign contact variables, and for the Coupon
pass a fixed data of 123, you need to map as follows.
{{to.firstName}}This variable populates automatically based on Contacts information provided in the Recipients section and doesn’t need to be mapped again{{dealStage}}Merge Variable Name (1): dealStage Merge Variable Value (1): %DEAL_STAGE%{{coupon}}Merge Variable Name (2): coupon Merge Variable Value (2): 123
For more complex templates that require additional variables, you can use the “Extra Merge Variables” field. This allows for the integration of more intricate data sets into your template, making your automated communications even more tailored.
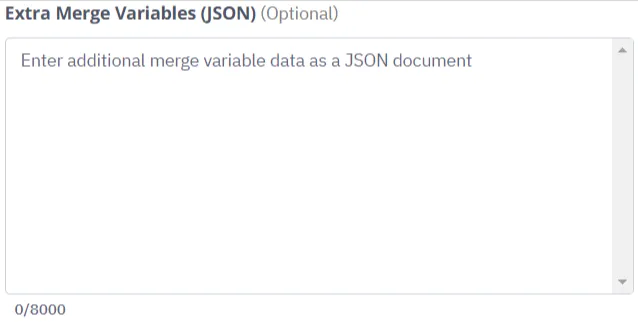
For the above example, the JSON code would be:
Extra Merge Variables (JSON):
{ "dealStage": "%DEAL_STAGE%", "coupon": "123"}Activating the automation
Section titled “Activating the automation”after completely filling all the mandatory fields in the automation, you can click on the “Finish” button, and activate your automation.
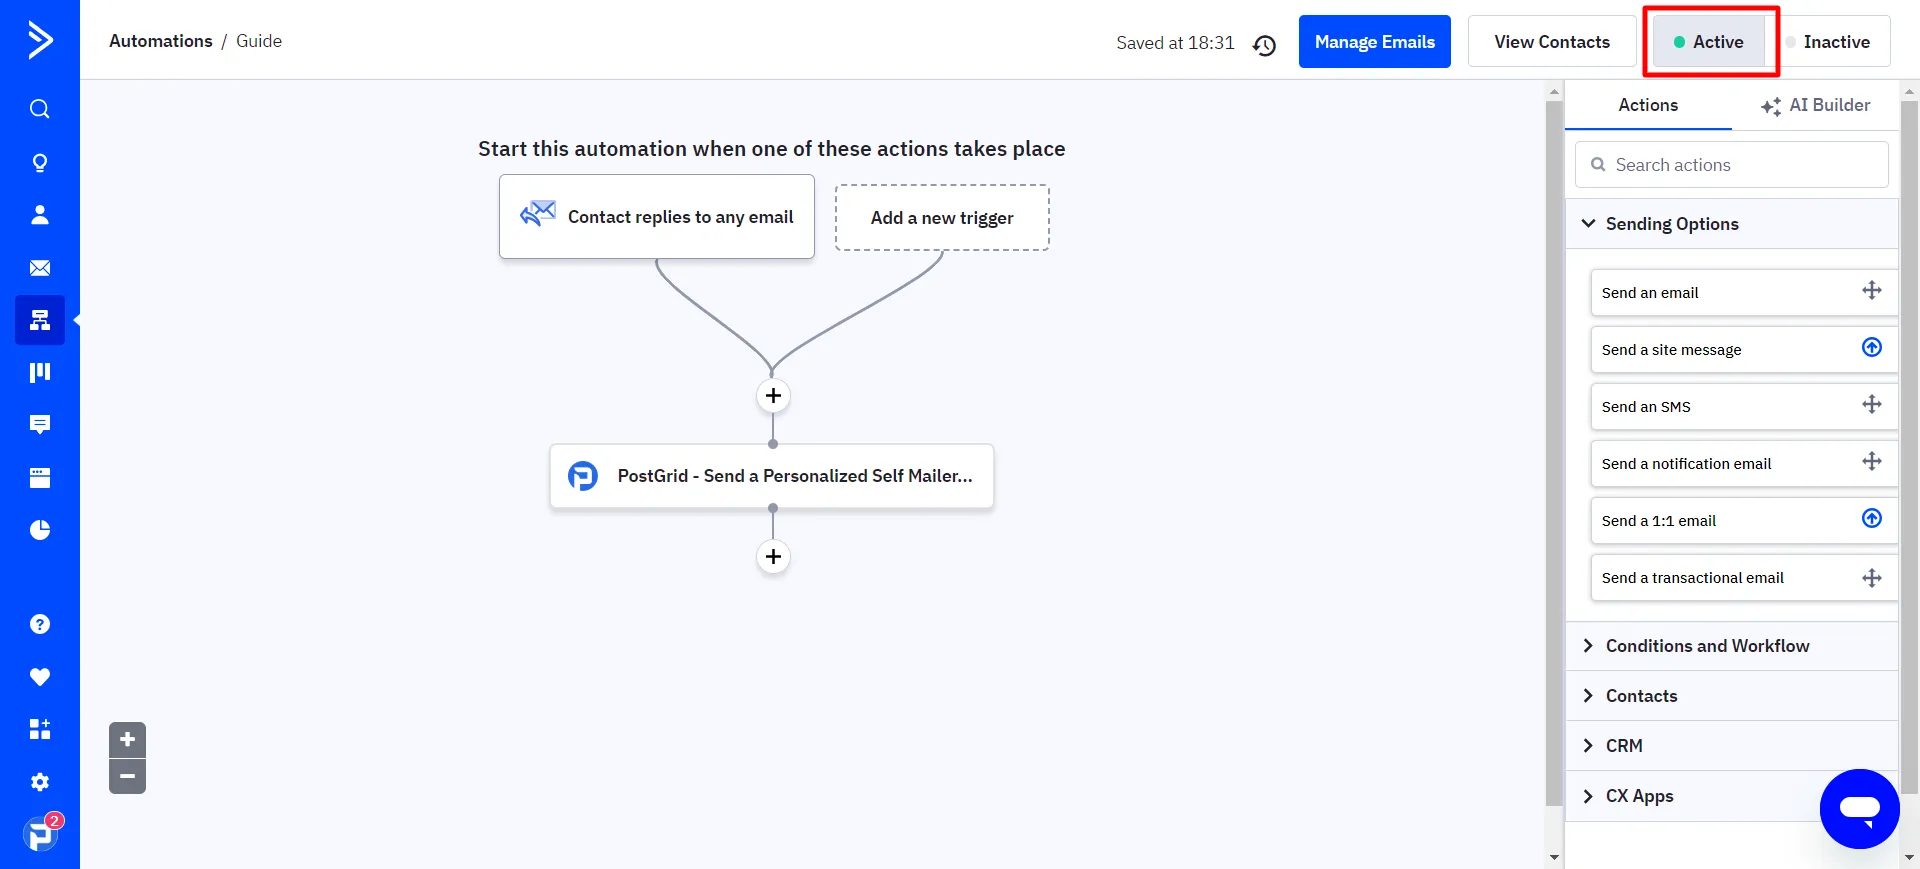
Once your automation is triggered, you can monitor the orders reflected in your PostGrid dashboard and track your orders through the process.
You can check for the logs of the PostGrid Applications in the ActiveCampaign profile and PostGrid dashboard.
To check the logs in the ActiveCampaign, you need to check the Application page for PostGrid, as follows:
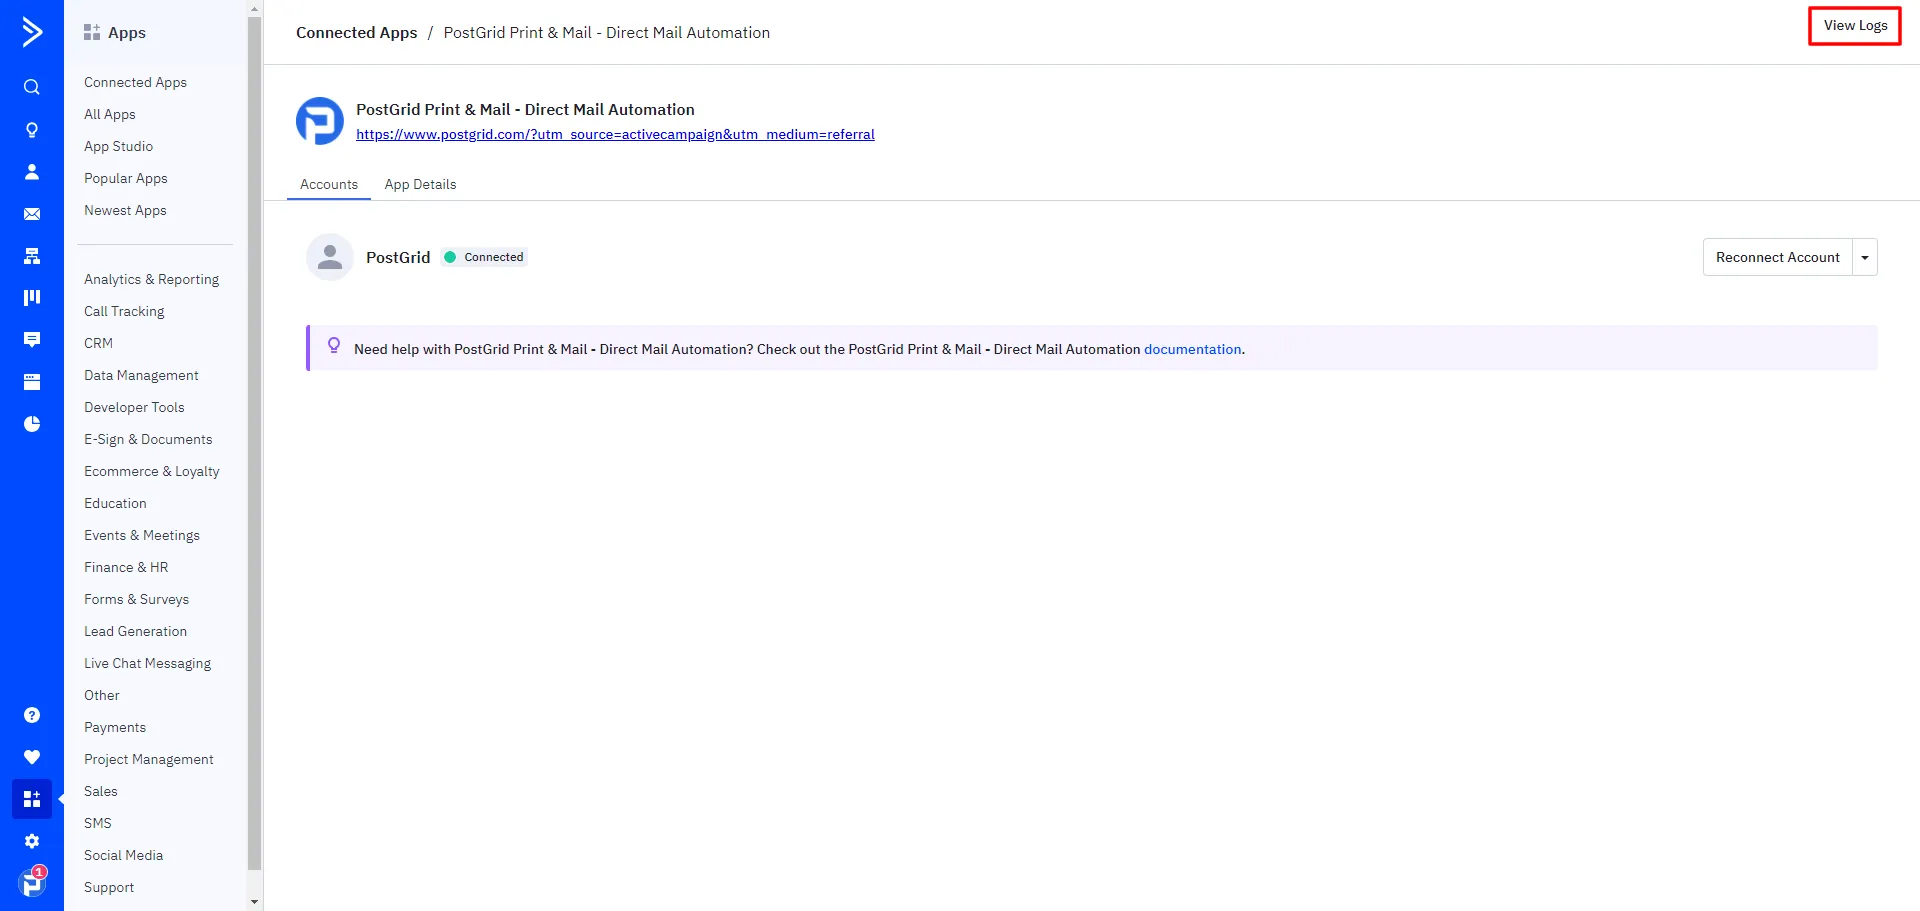
and to check the API logs in the PostGrid account, navigate to the API log page.
Moreover, by utilizing webhook integration, you can simply receive event notifications.
Now, you can access your desired PostGrid Print & Mail service through ActiveCampaign!