
Creating Custom Envelope Orders
How to order custom branded envelopes in the PostGrid dashboard and include them with your letter and cheque orders.
Custom envelopes let you send your letters and cheques in an outer envelope that carries your own branding and design instead of a plain PostGrid envelope. You design the envelope once, we review and approve the artwork, and you keep a stock of envelopes on hand that can be added to your letter and cheque orders.
When you design your envelope, follow the custom envelope design guidelines for the type you’re creating. These guidelines define the required dimensions and the clear zones your artwork must respect — artwork that doesn’t follow them will be rejected during review.
Because custom envelopes are printed and kept in stock ahead of time, you must order them before you send the mail you want them used on, and each order has a minimum quantity of 5,000 envelopes.
📘 Don’t see Custom Envelopes in your dashboard? This feature is enabled per account. If the Custom Envelopes option isn’t available under Resources, reach out to your account manager or our support team to have it turned on.
Viewing your custom envelopes
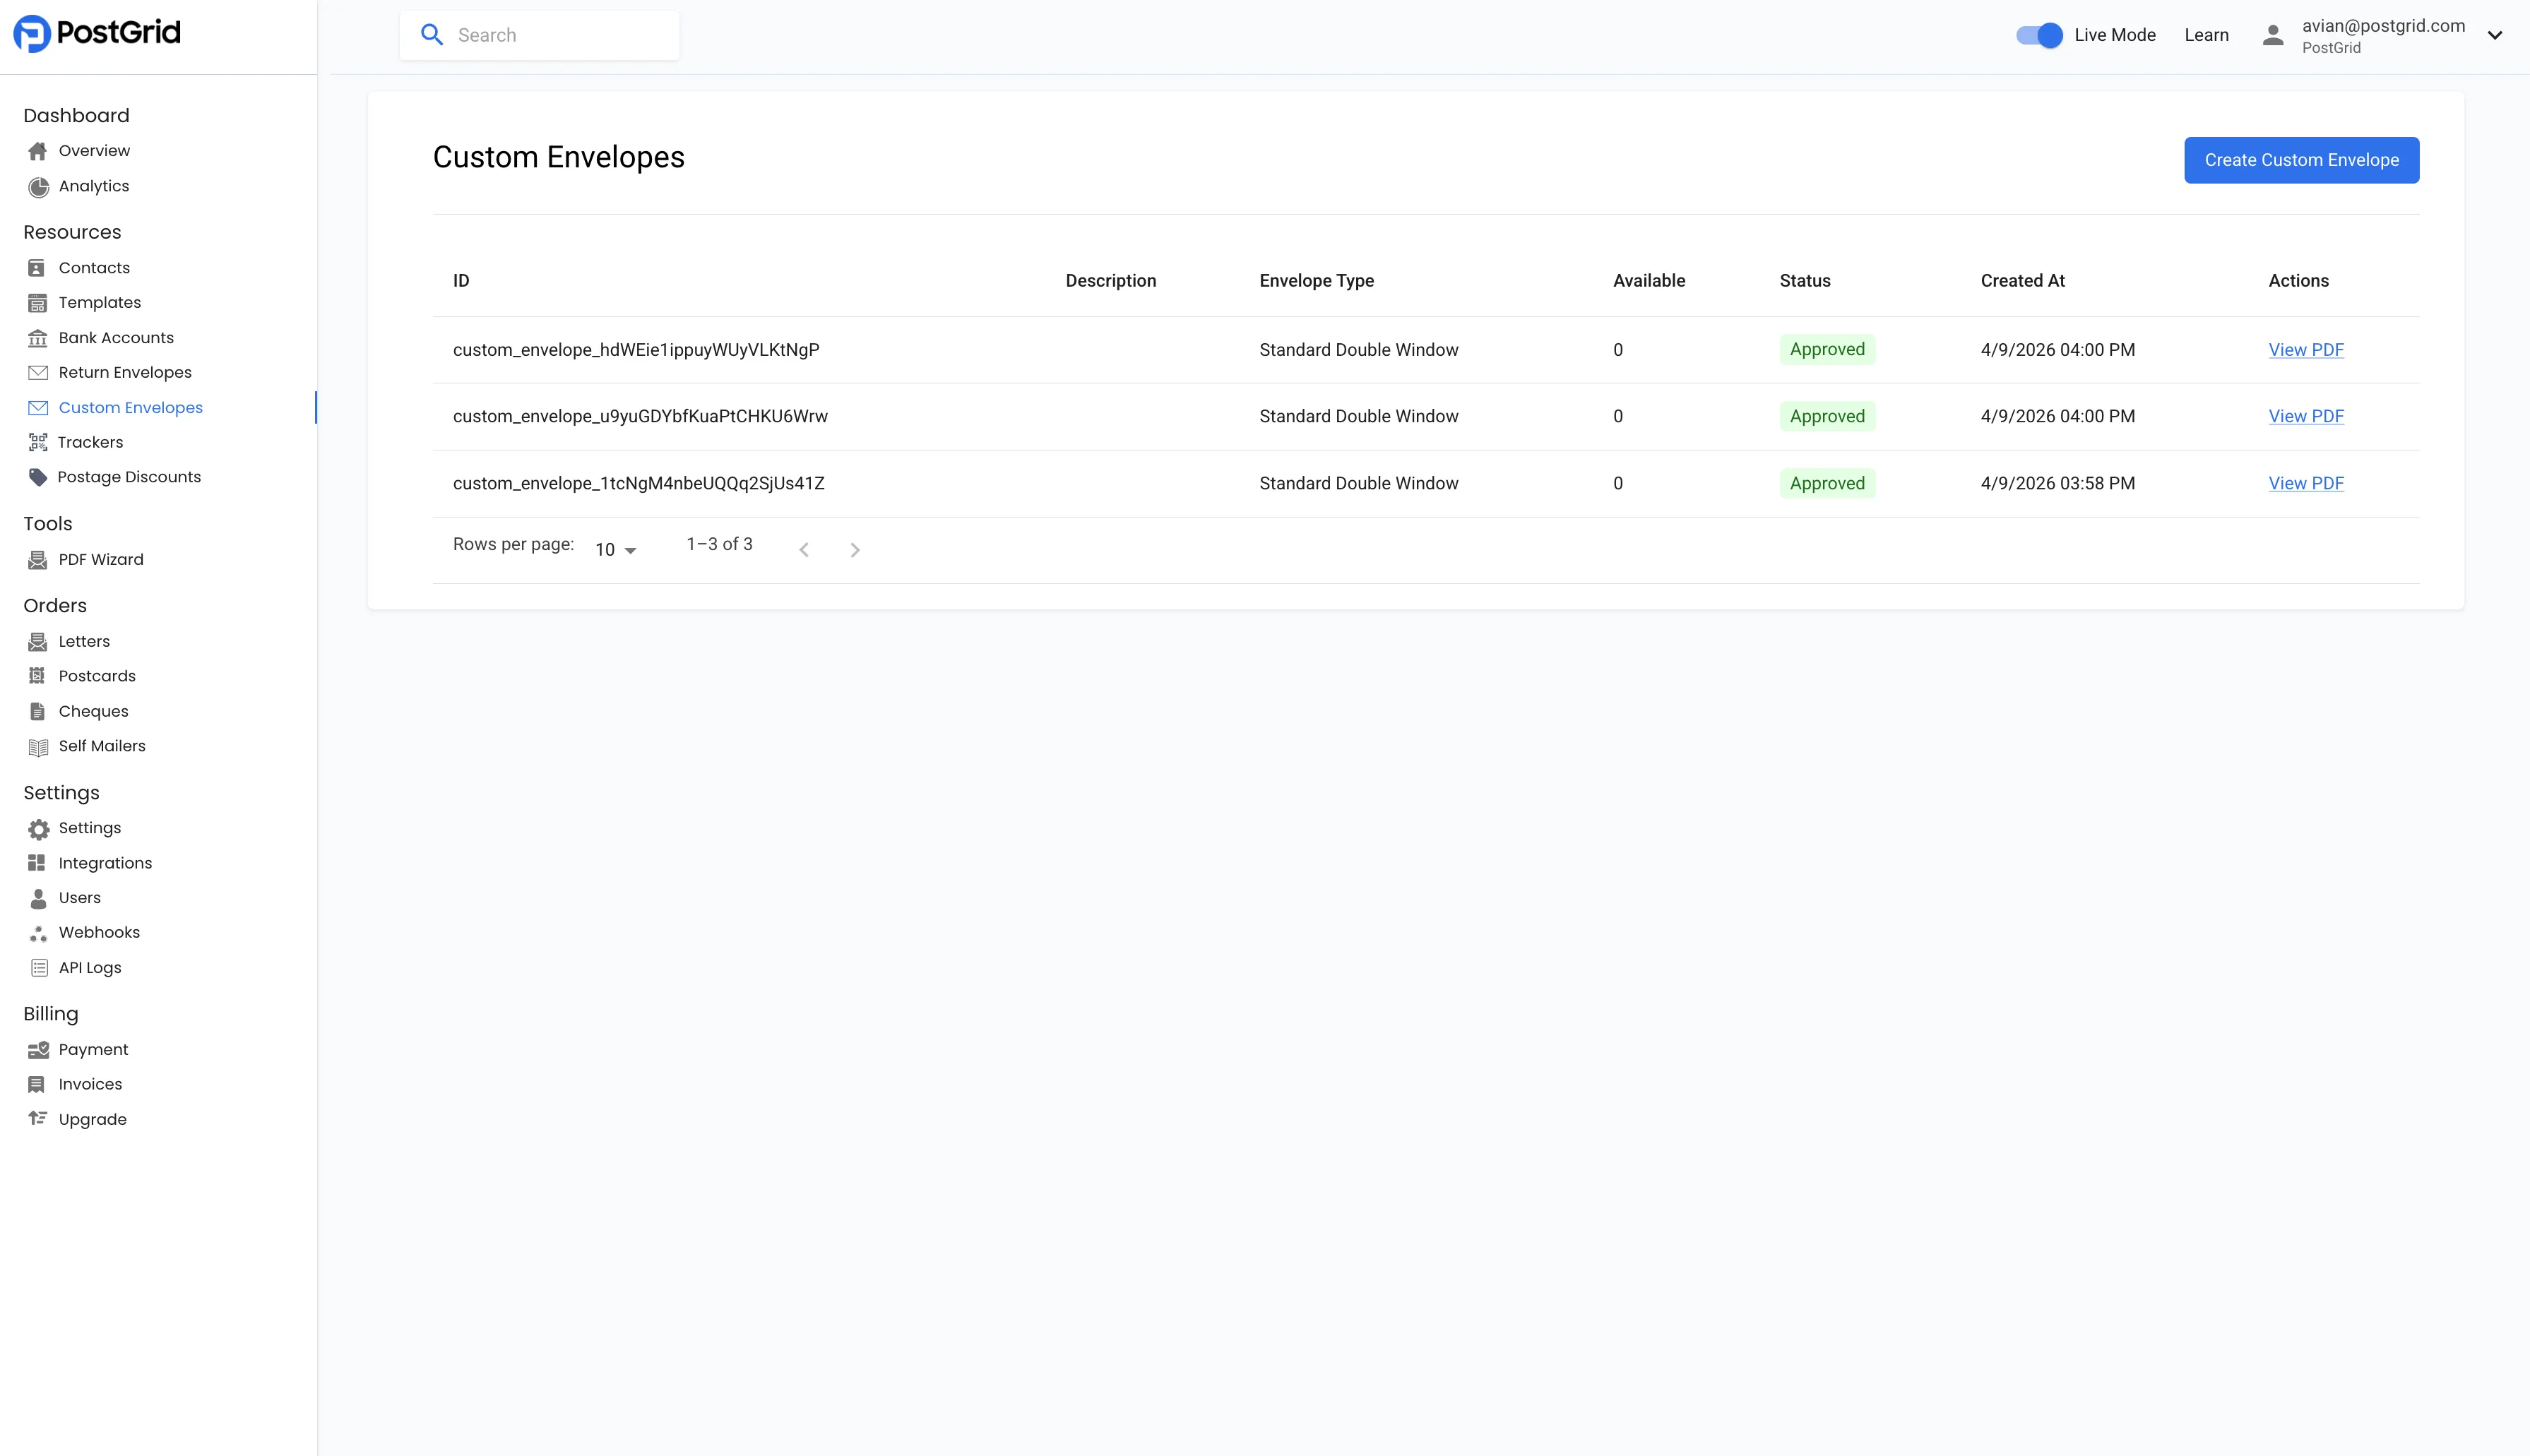
Section titled “Viewing your custom envelopes”Go to Resources → Custom Envelopes in the left navigation. This page lists every custom envelope you’ve created, along with its envelope type, available quantity, and status. Use the search bar at the top to find a specific envelope by its description. To start a new design, click Create Custom Envelope in the top-right corner.
Creating a custom envelope
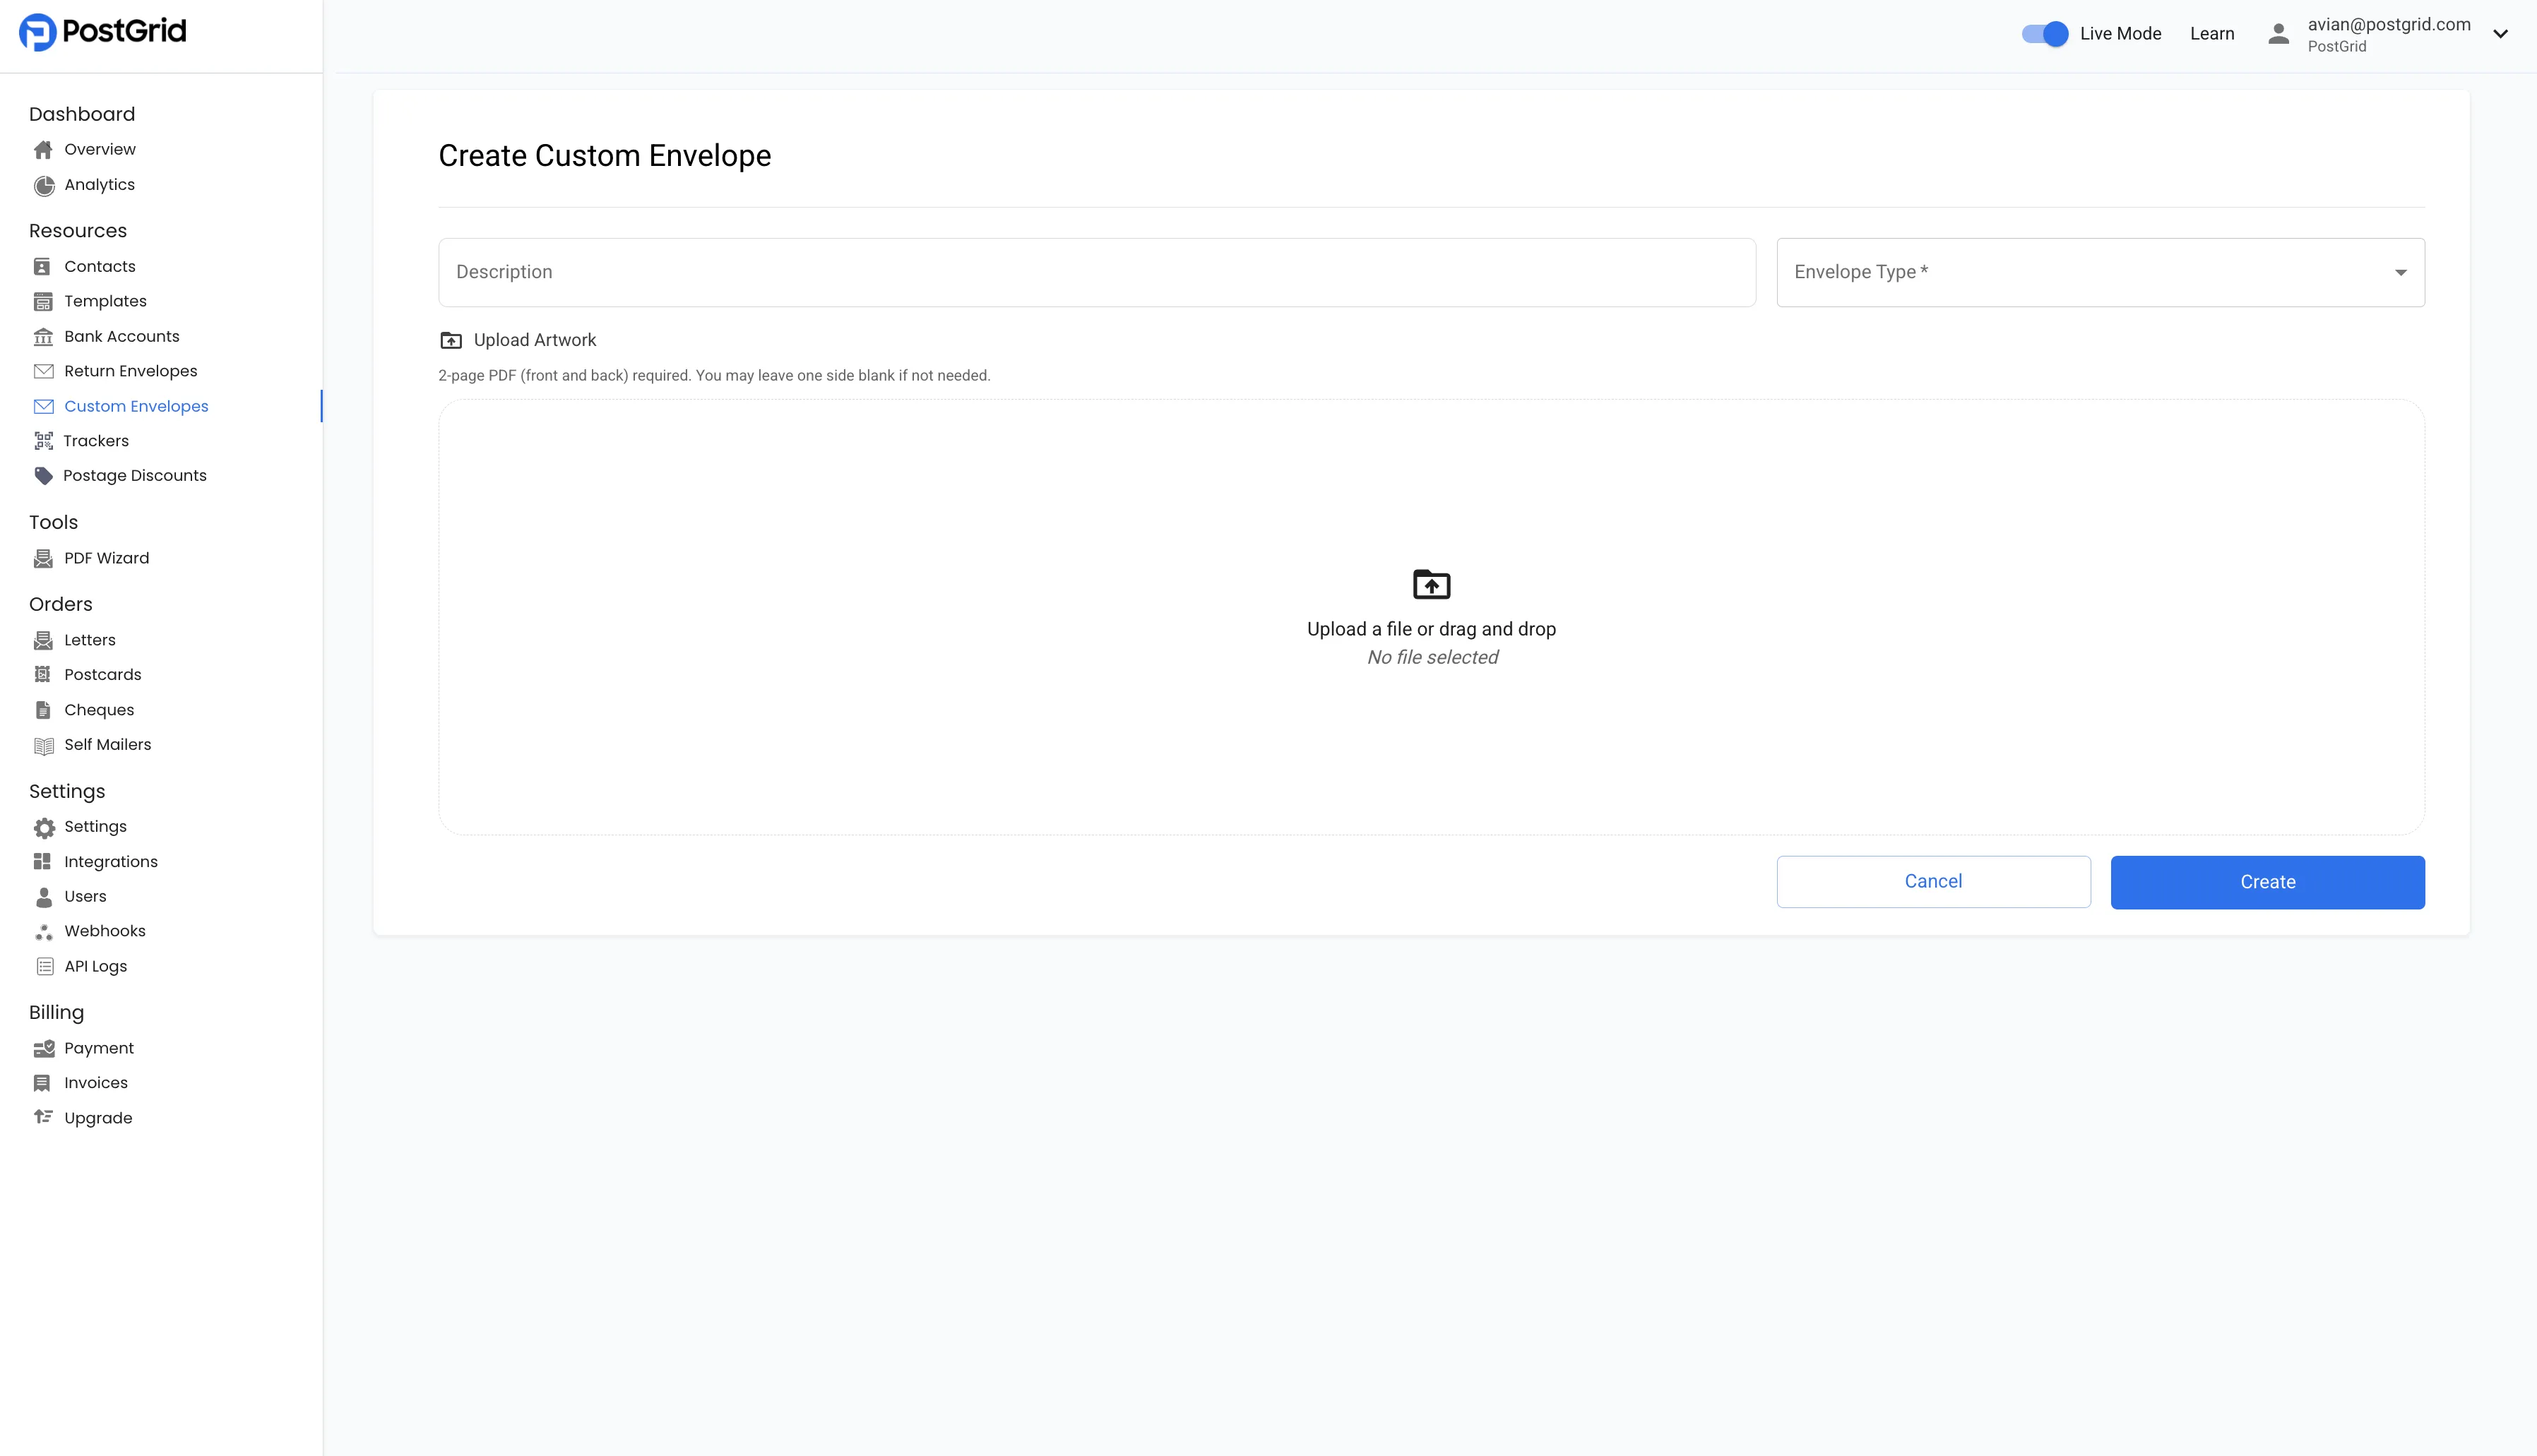
Section titled “Creating a custom envelope”On the create page, fill in the following:
- Description (optional) — a label to help you recognize this envelope later, e.g. “Q1 Statements – branded”.
- Envelope Type (required) — choose how the address windows are laid out. Standard Single Window has one window that shows the recipient address printed on your letter or cheque. Standard Double Window has two windows that show both the recipient address and your return (sender) address.
- Artwork (required) — upload a 2-page PDF containing the front and back of the envelope. You may leave one side blank if you only need to print on one. For the sharpest print quality, any images in the PDF should be at least 300 DPI.
When designing your artwork, keep your branding clear of the address window areas so the printed addresses remain fully visible. Artwork that covers a window or other restricted area will be rejected during review.
Click Create when you’re done.
Artwork review and approval
Section titled “Artwork review and approval”After you create a custom envelope, its status is set to Pending while we review the artwork against the print guidelines for the chosen envelope type. Once the review is complete, the status changes to one of:
- Approved — the design is ready and you can start ordering envelopes.
- Rejected — the artwork couldn’t be used (for example, because content overlapped an address window or other restricted area). Hover over the status to see the reason, then create a new custom envelope with corrected artwork.
Ordering envelopes
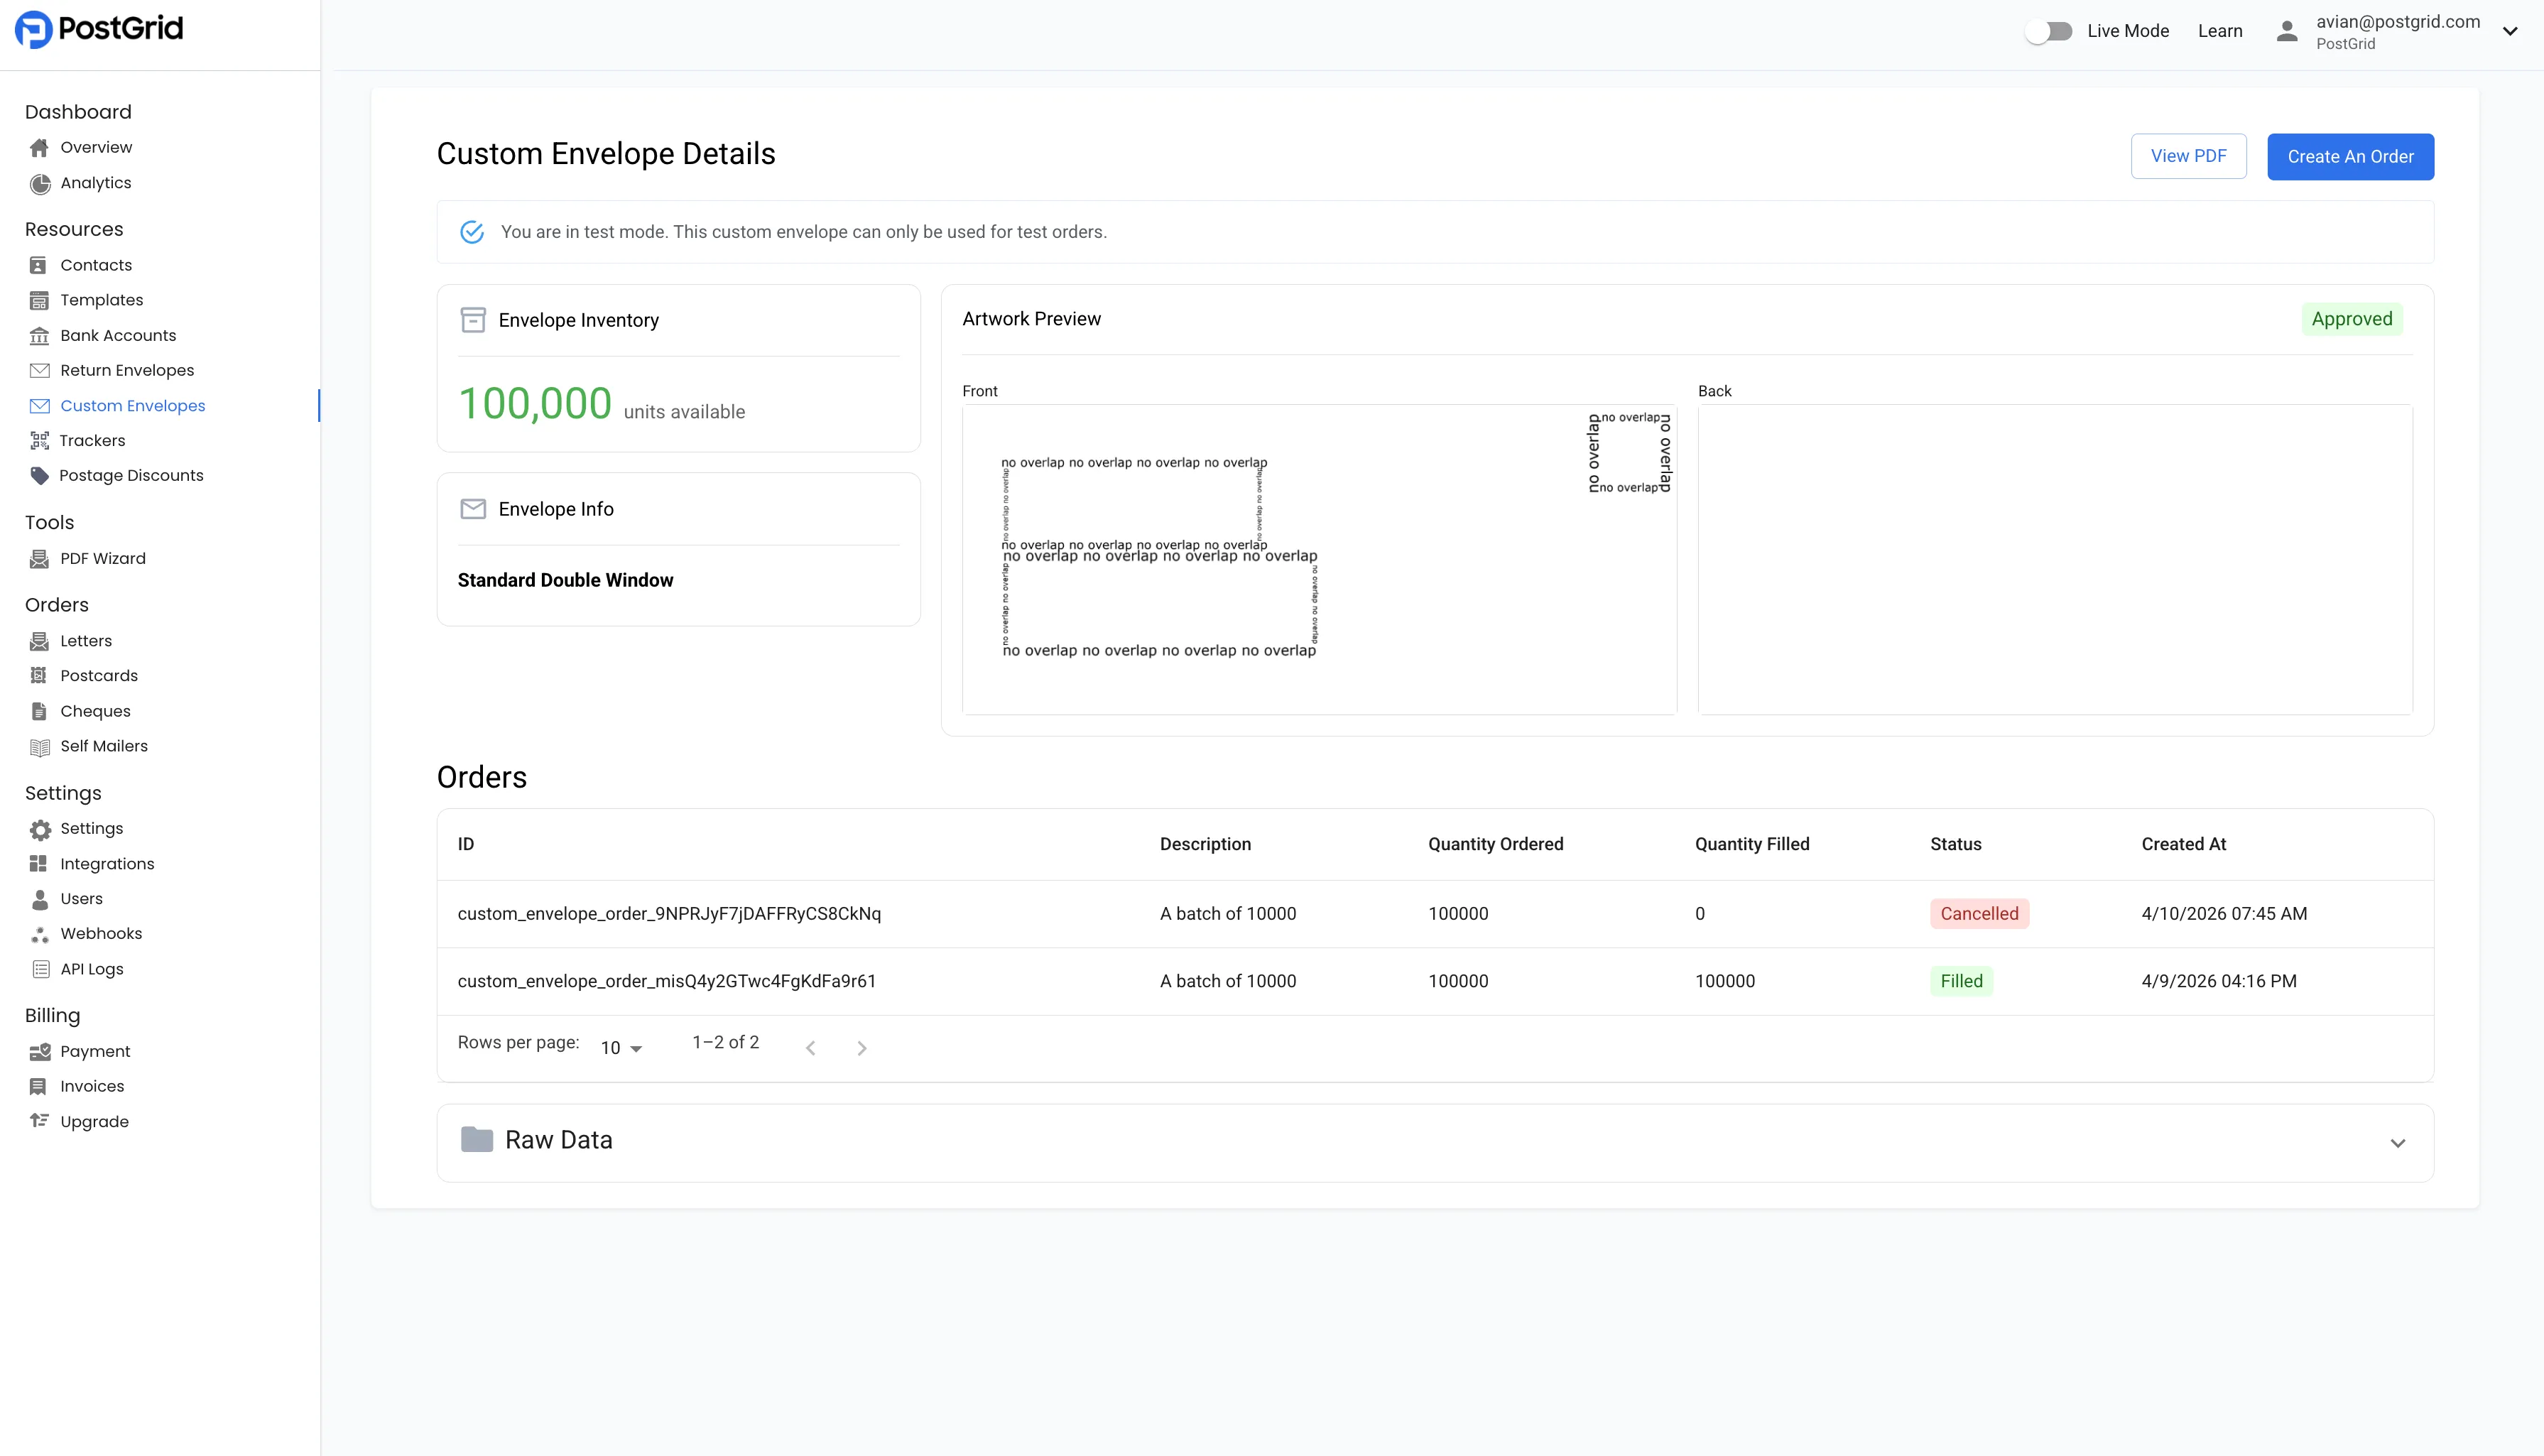
Section titled “Ordering envelopes”Once a custom envelope is Approved, click into it to open its detail page. Here you’ll see how many envelopes are currently available, a preview of the front and back artwork, the envelope type, and a list of your orders.
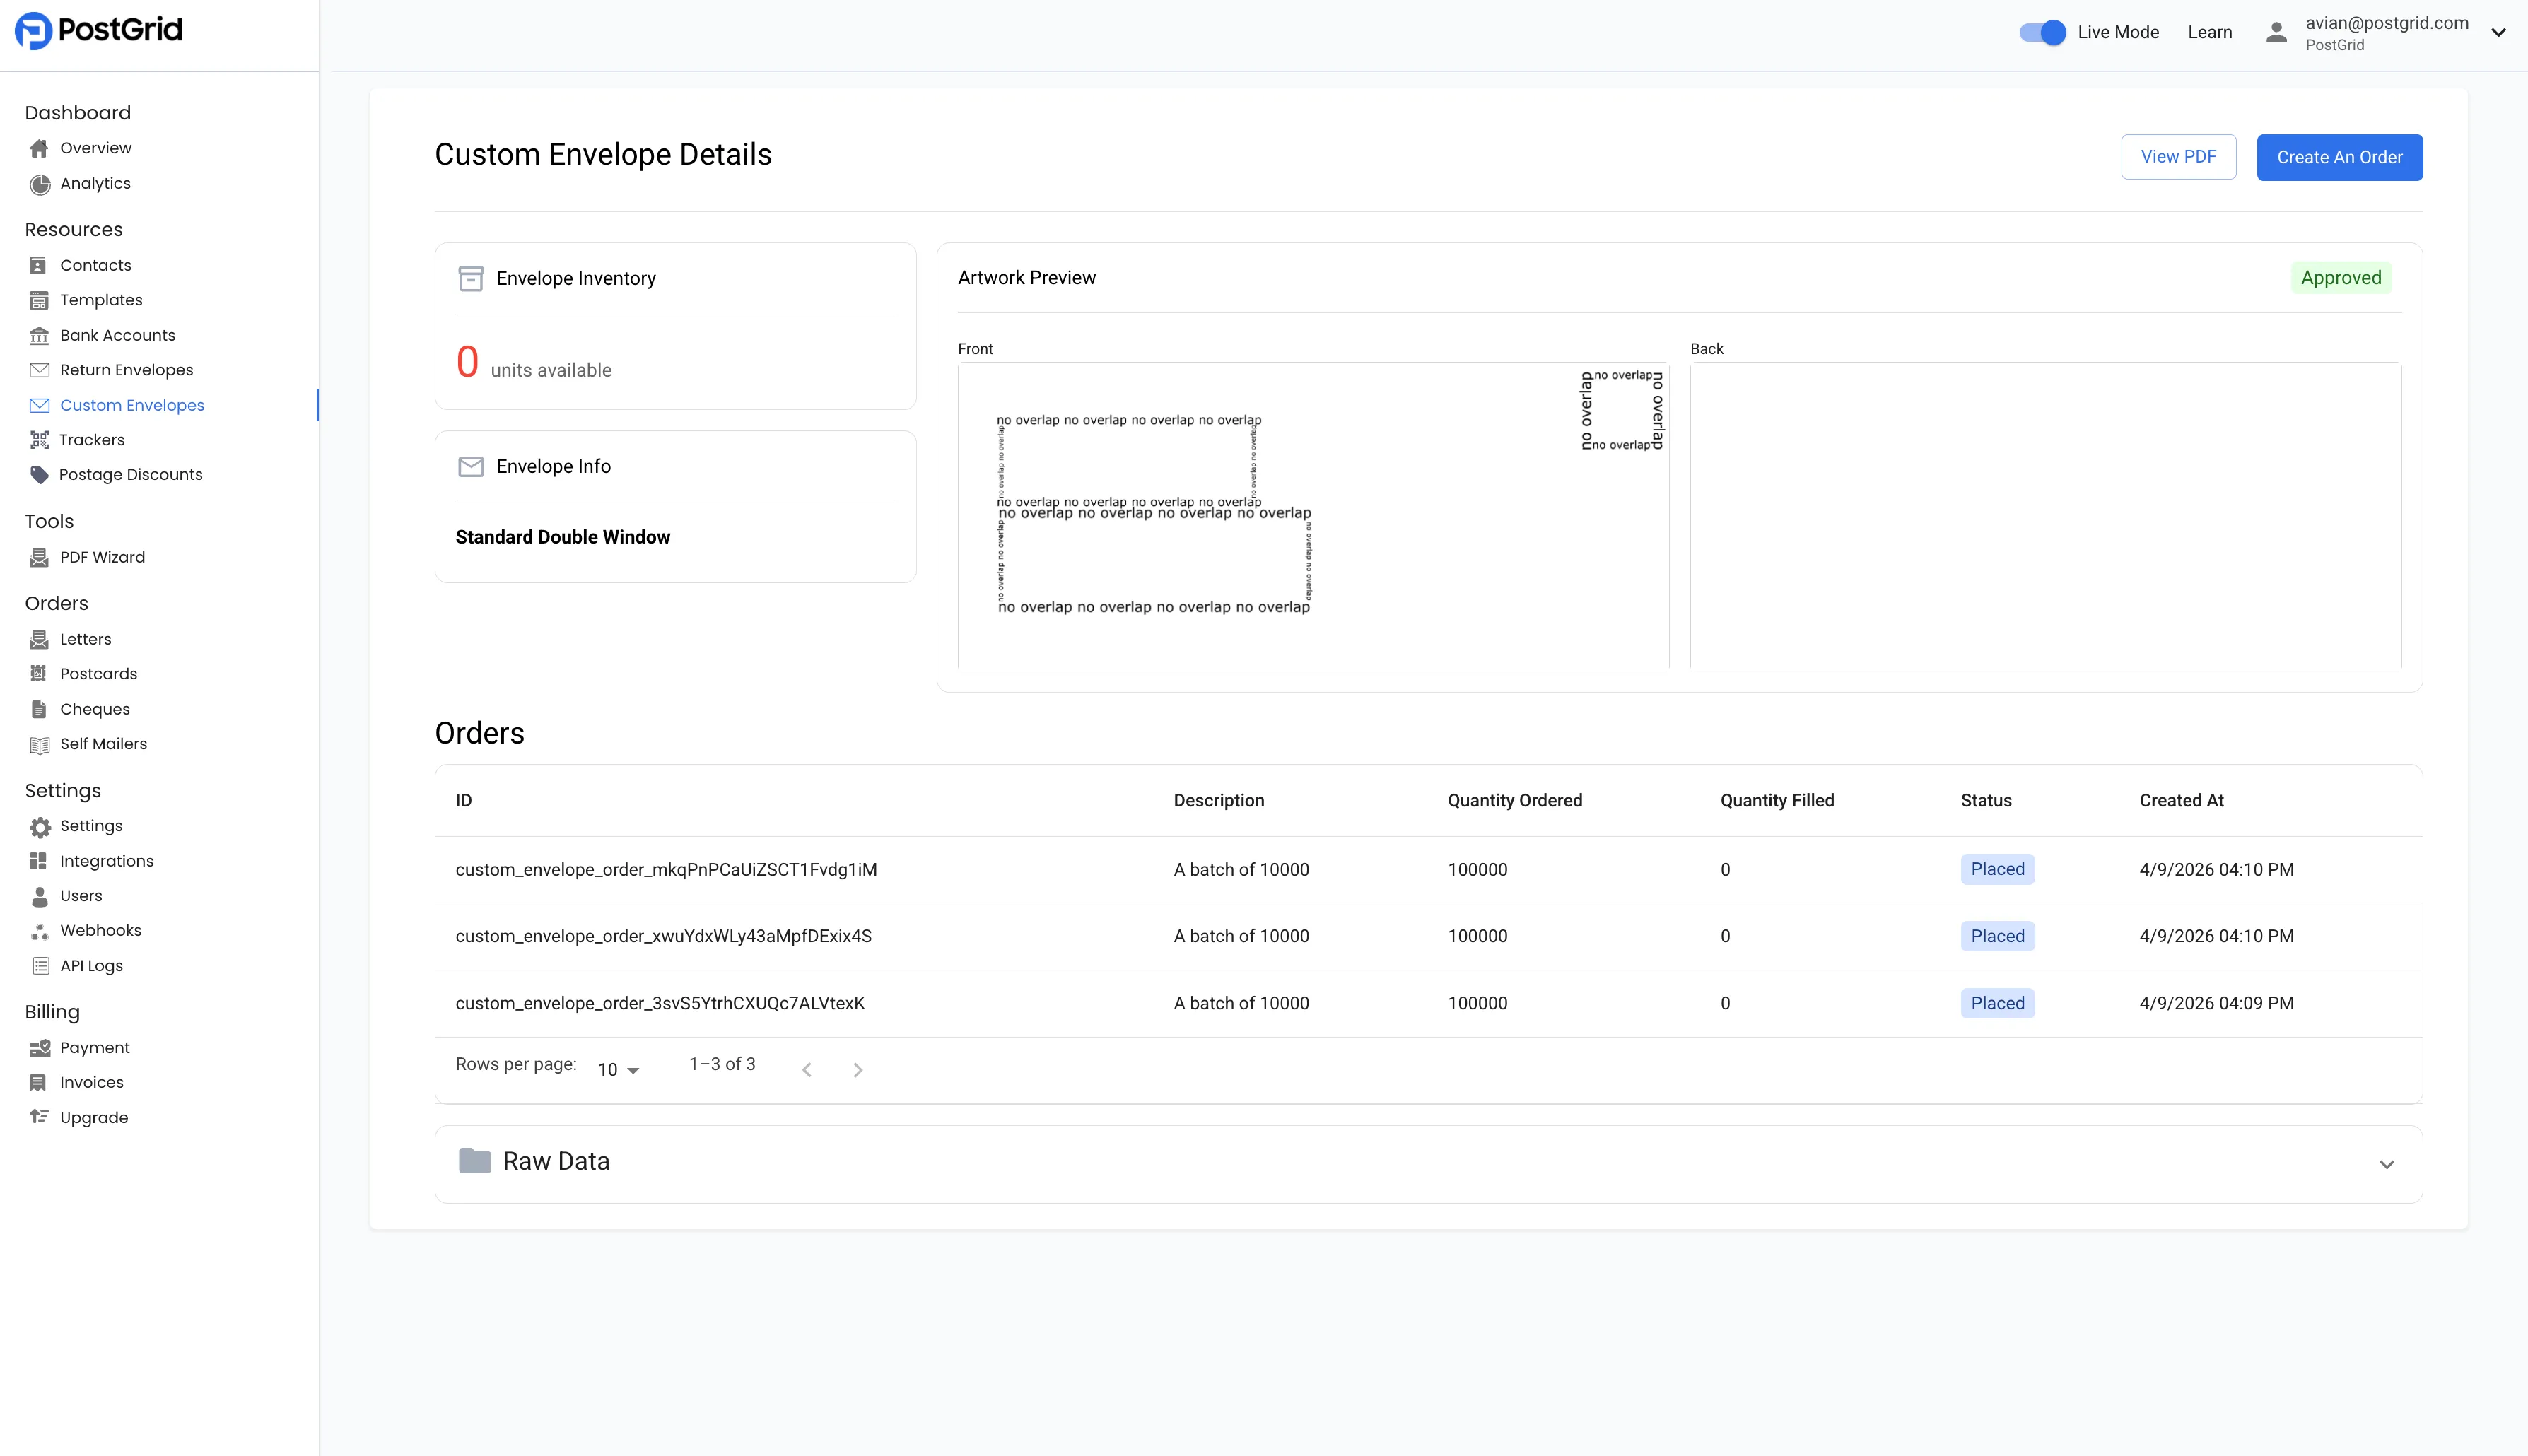
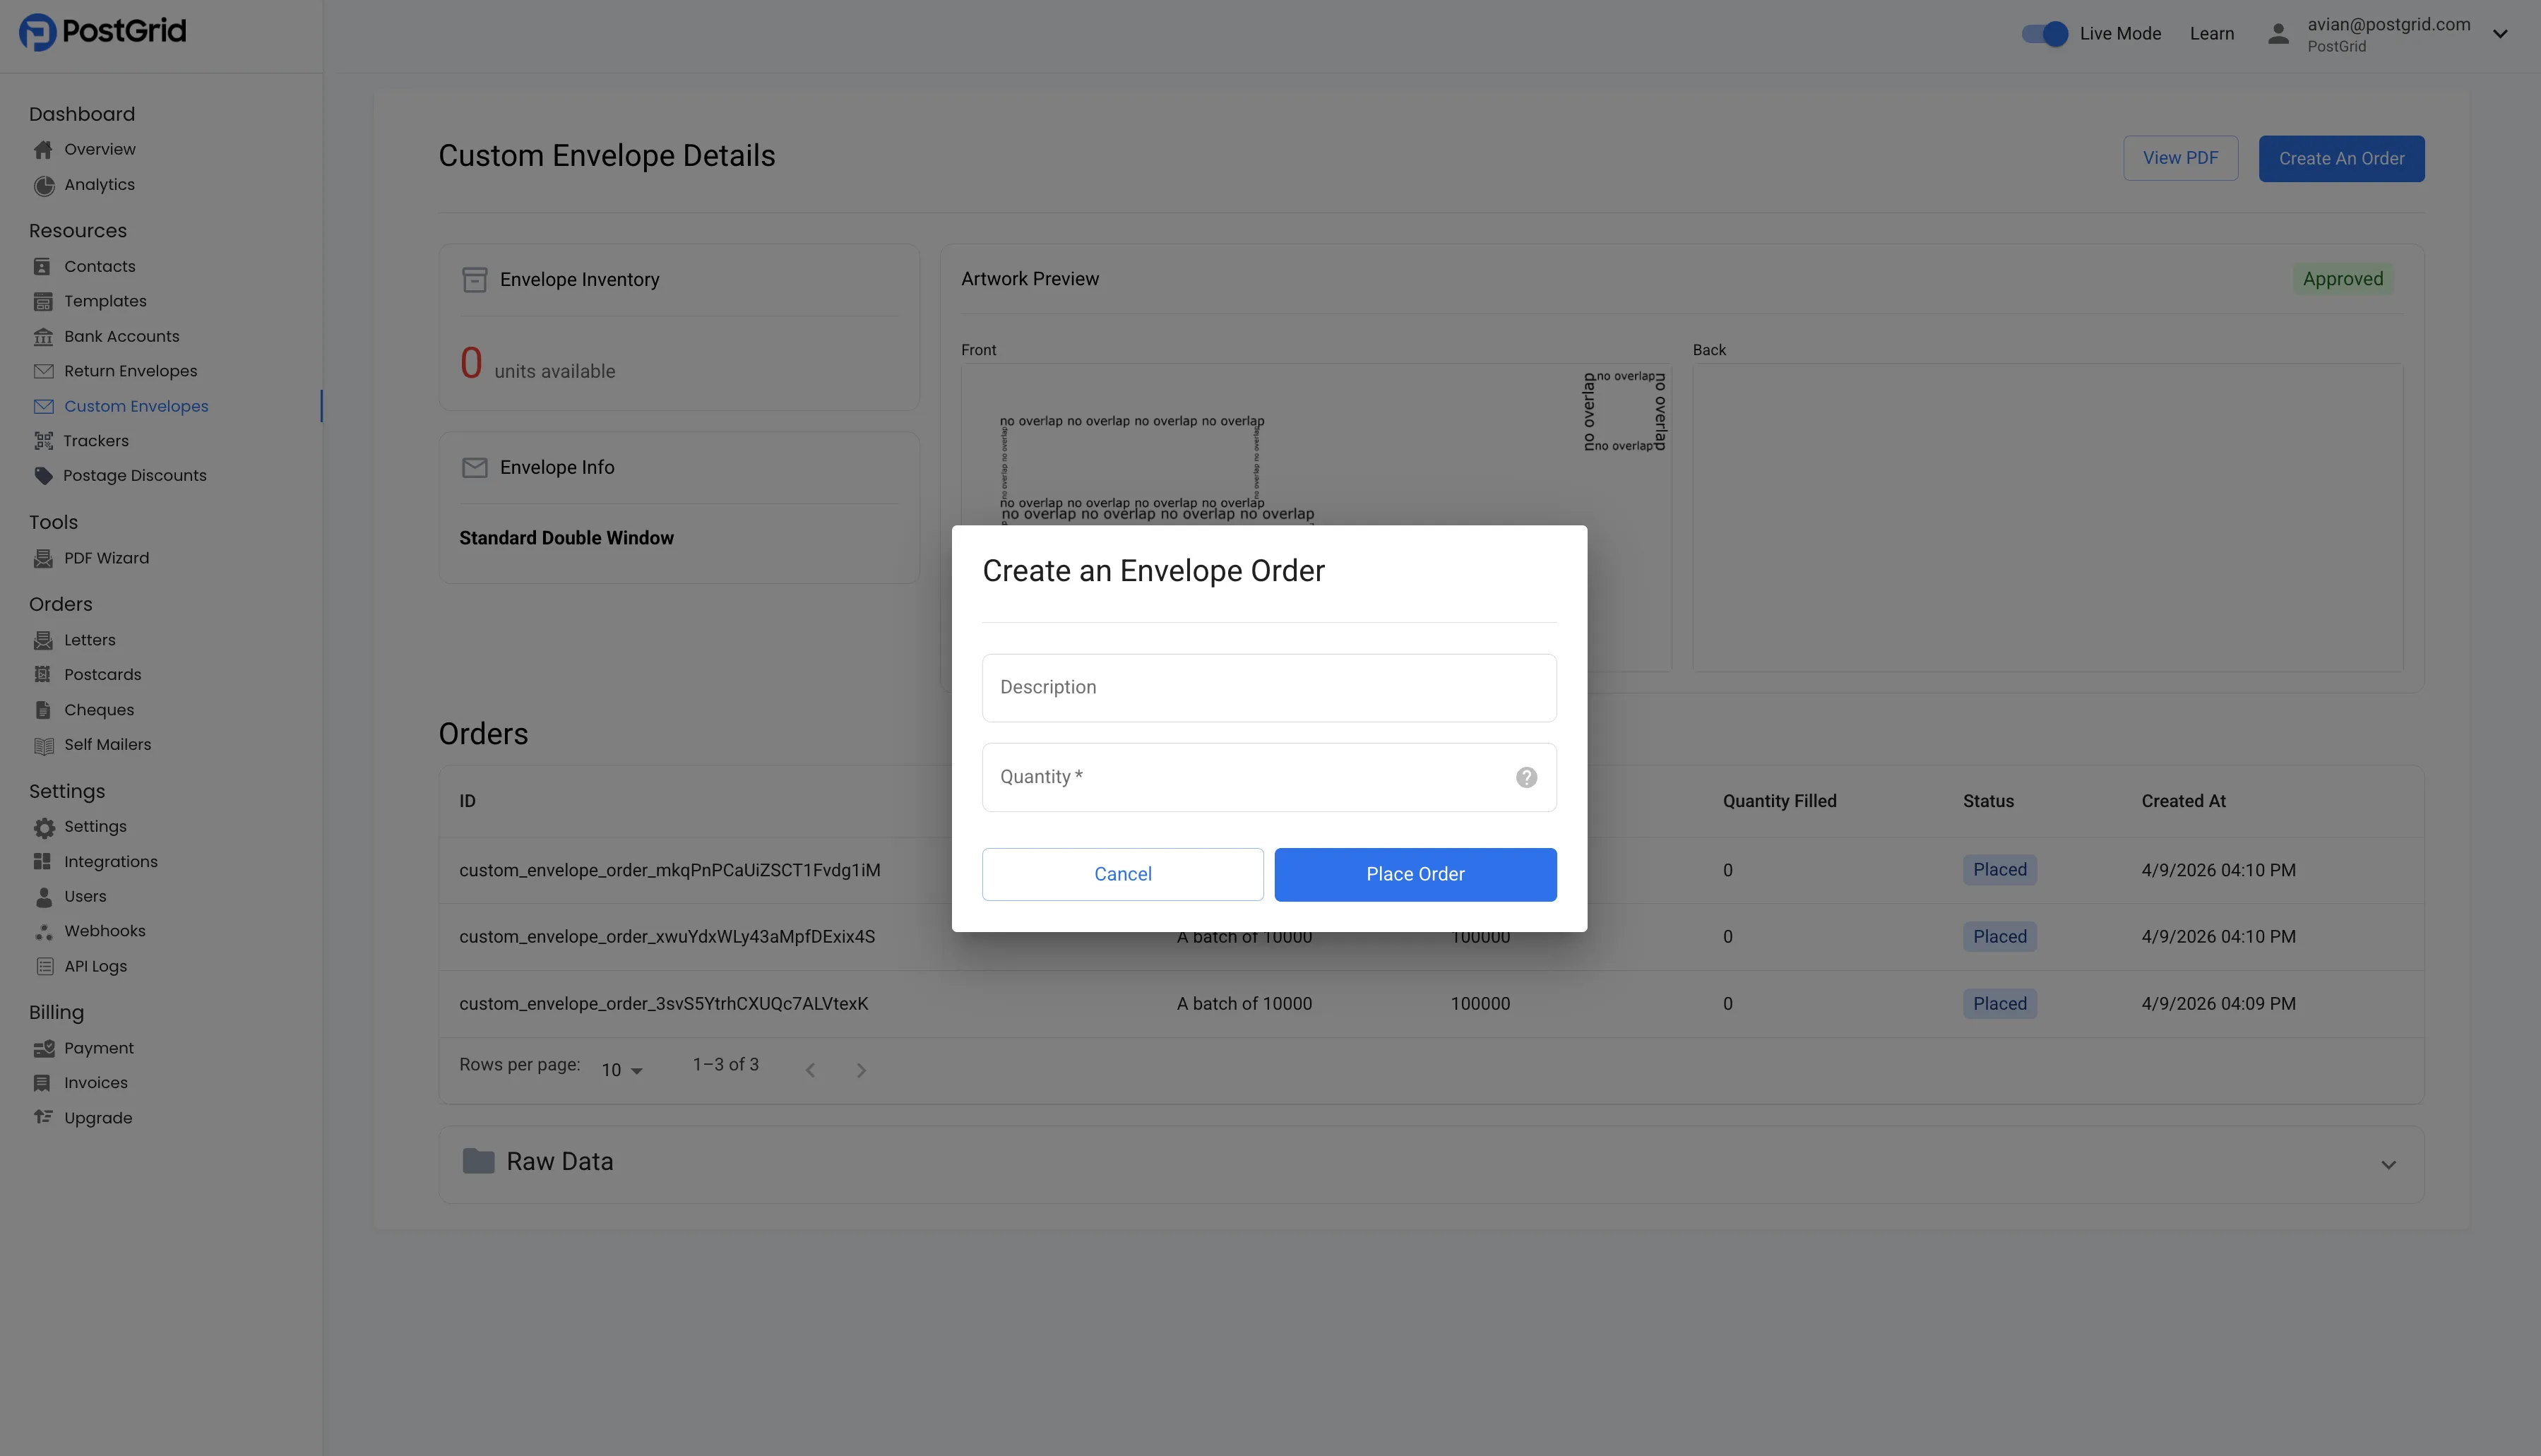
A newly approved design starts with zero envelopes available. To stock up, click Create An Order in the top-right corner. In the pop-up:
- Description (optional) — a note to help you identify this batch.
- Quantity (required) — the number of envelopes to order. A minimum of 5,000 is required.
Click Place Order to submit.
Order statuses
Section titled “Order statuses”Each order moves through the following statuses, shown in the Orders table:
- Placed — your order has been received. You can still cancel an order while it’s in this status.
- In progress — your envelopes are being printed and prepared.
- Filled — your envelopes are ready. The quantity is added to your available inventory for this design.
- Cancelled — the order was cancelled and won’t be fulfilled.
As orders are filled, the units available count at the top of the page goes up, reflecting the stock you can use on your mailings.
Using a custom envelope on a mailing
Section titled “Using a custom envelope on a mailing”When you create a letter or cheque order, select your design from the Select Envelope drop-down. The list shows each envelope along with how many units are available. If a design is out of stock you can still select it, but note that this may delay your mailing until more envelopes are available, so we recommend keeping enough stock on hand for your expected volume.
Frequently asked questions
Section titled “Frequently asked questions”What’s the difference between a custom envelope and a return envelope?
A custom envelope is the outer envelope your mail is sent in, carrying your own design. A return envelope is a pre-paid envelope you include inside the mailing for the recipient to mail something back to you.
Is there a minimum order?
Yes — each envelope order has a minimum quantity of 5,000.
Why was my artwork rejected?
The most common reason is that part of the design overlaps an address window or another restricted area. Hover over the Rejected status to see the specific reason, then create a new custom envelope with corrected artwork.
Can I edit an envelope after it’s approved?
No. To change a design, create a new custom envelope and upload the updated artwork for review.
Can I cancel an order?
You can cancel an order only while it’s in the Placed status. Once it moves to In progress, it can no longer be cancelled.