Sending triggered based mailings using Salesforce FLOWS
Set up Salesforce Flows to automatically trigger PostGrid mailings based on CRM events, such as record changes or scheduled actions.
Using Salesforce’s FLOW functionality, you can send out mailings based on various triggers. These include instances when a contact is updated, a new lead is created, or a deal is closed.
Configuring the trigger set-up
Section titled “Configuring the trigger set-up”1. Click on the Setup icon on the main screen and then click on Setup
Section titled “1. Click on the Setup icon on the main screen and then click on Setup”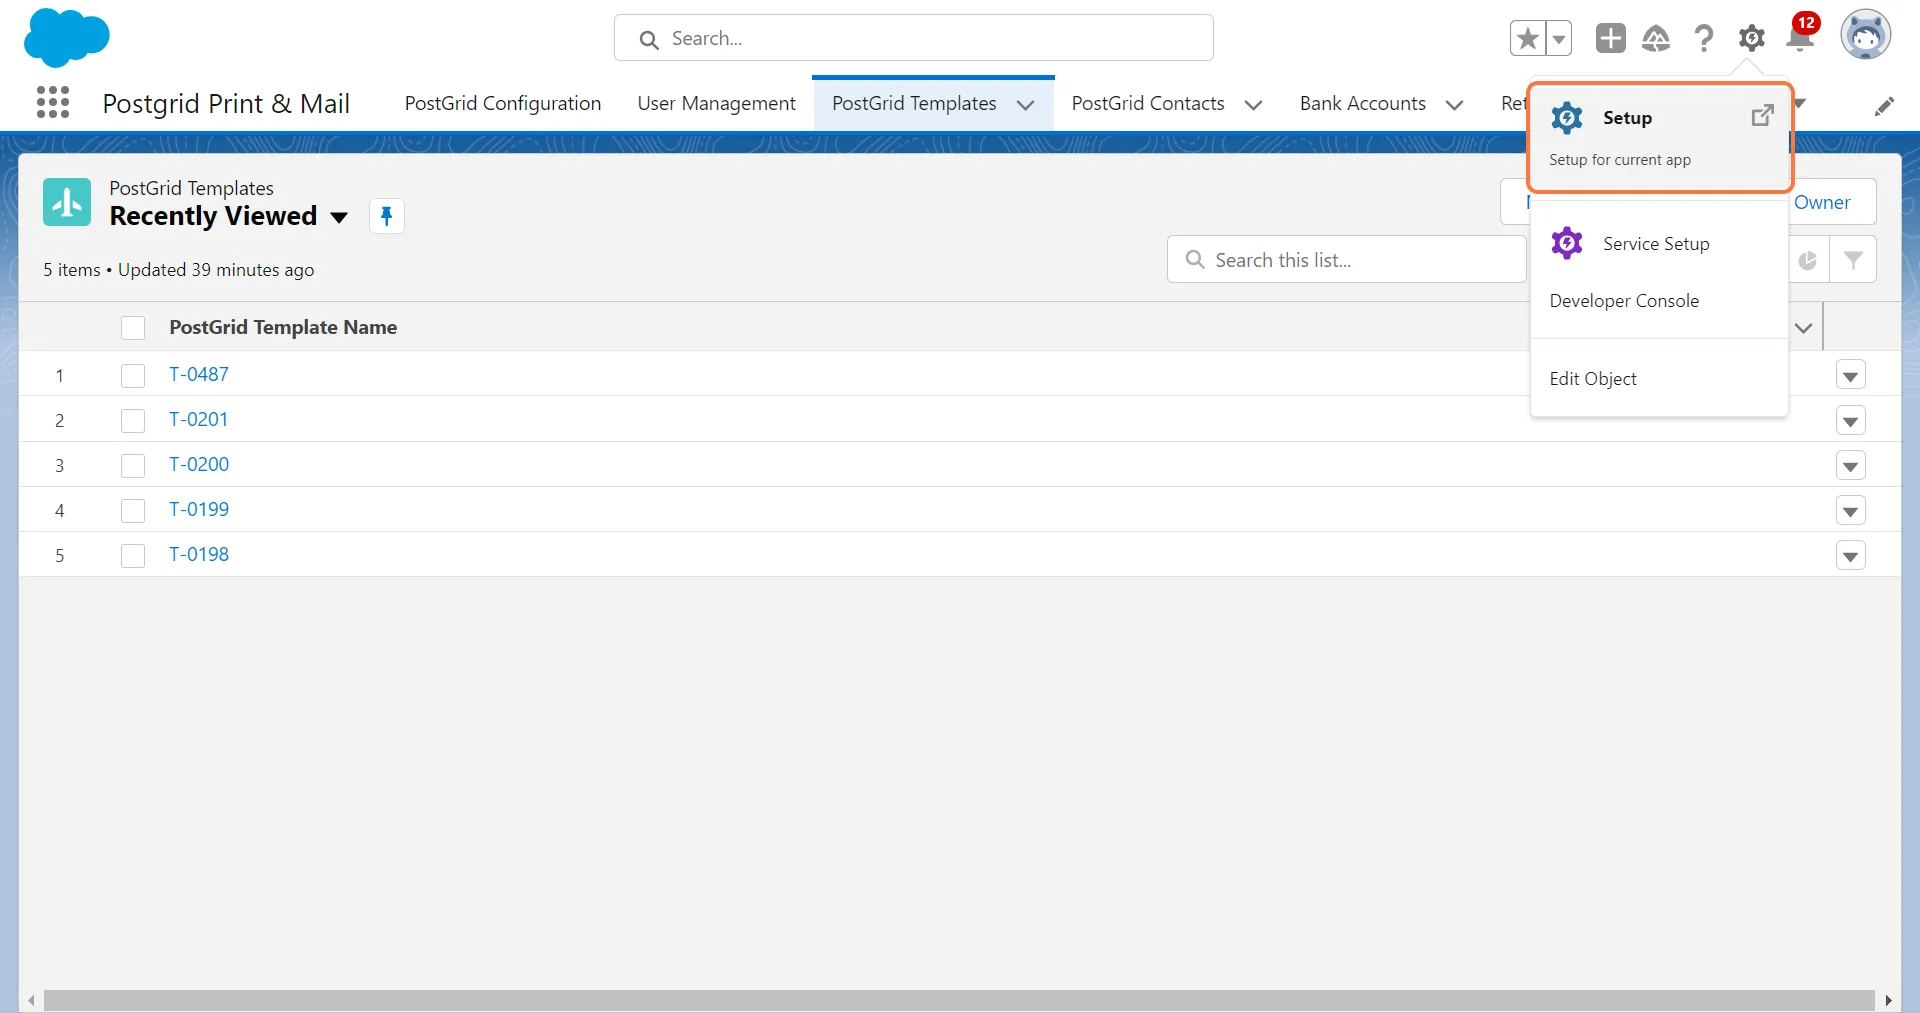
2. Search for “FLOW” in the Quick Find and click on Flows
Section titled “2. Search for “FLOW” in the Quick Find and click on Flows”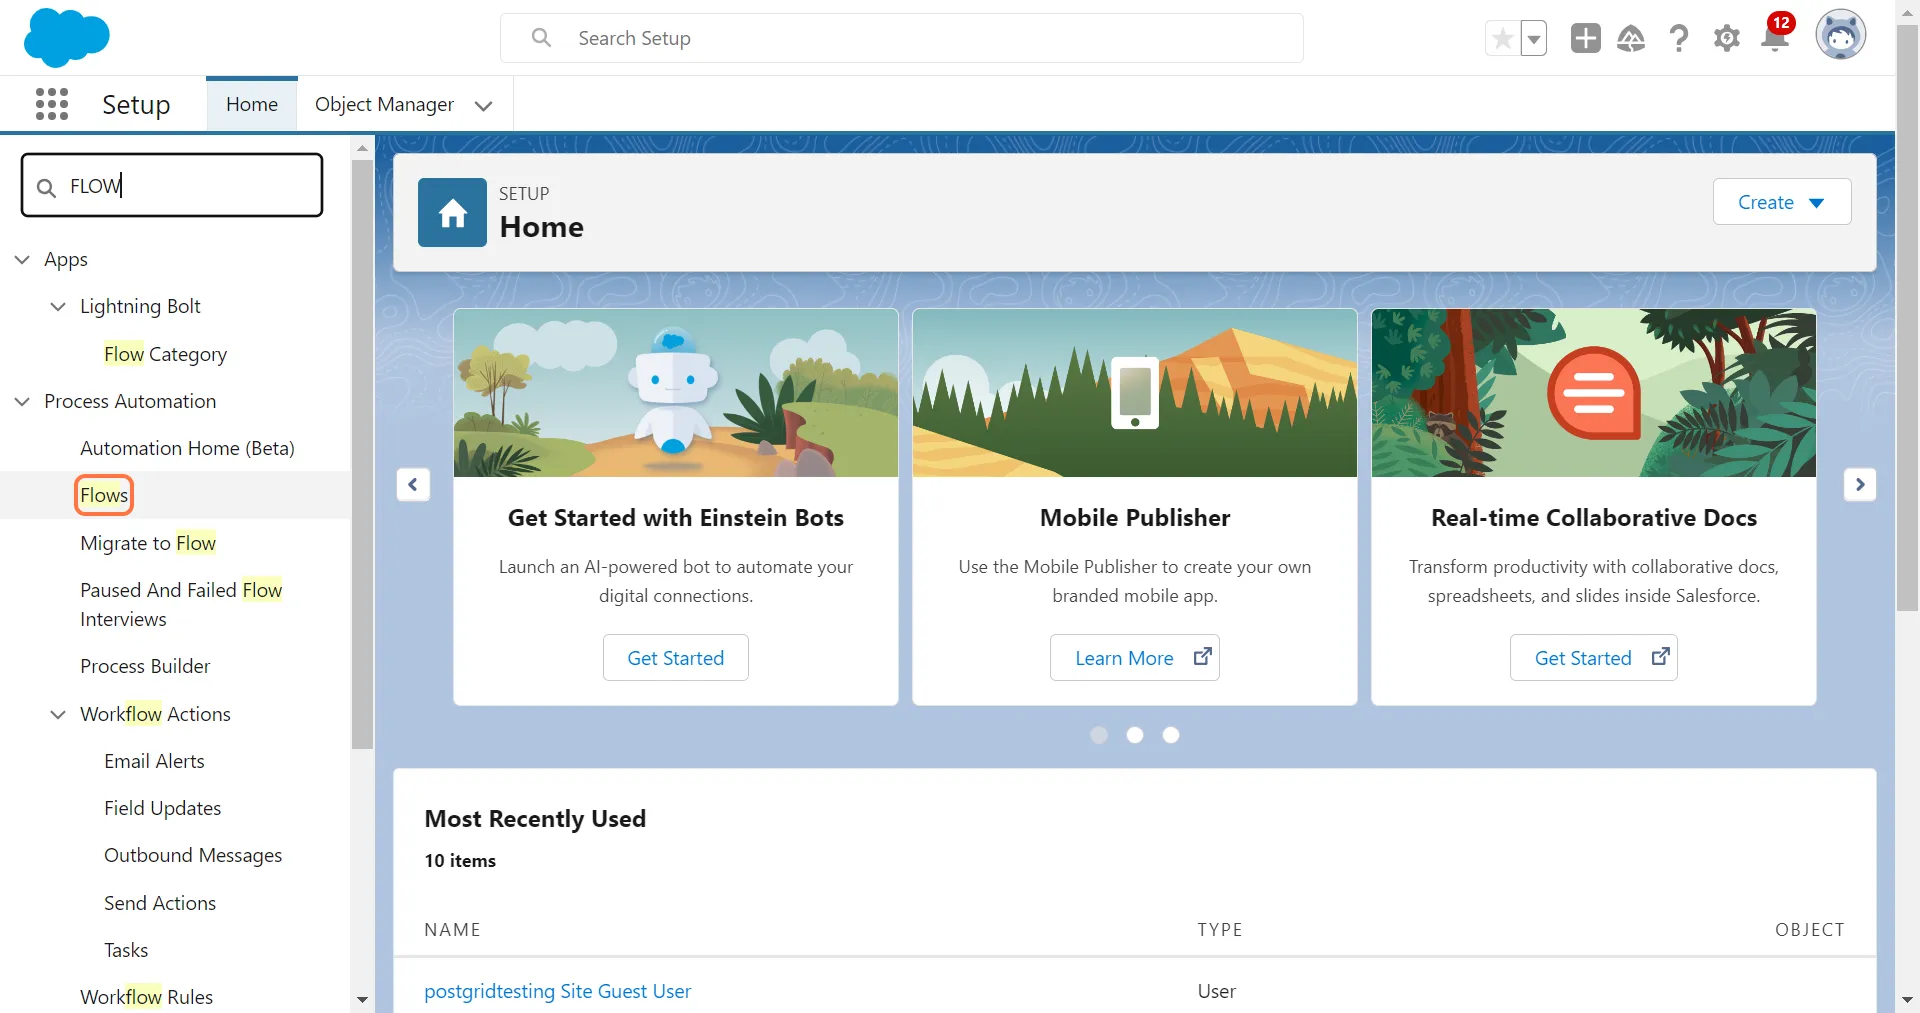
3. Click on “New Flow”
Section titled “3. Click on “New Flow””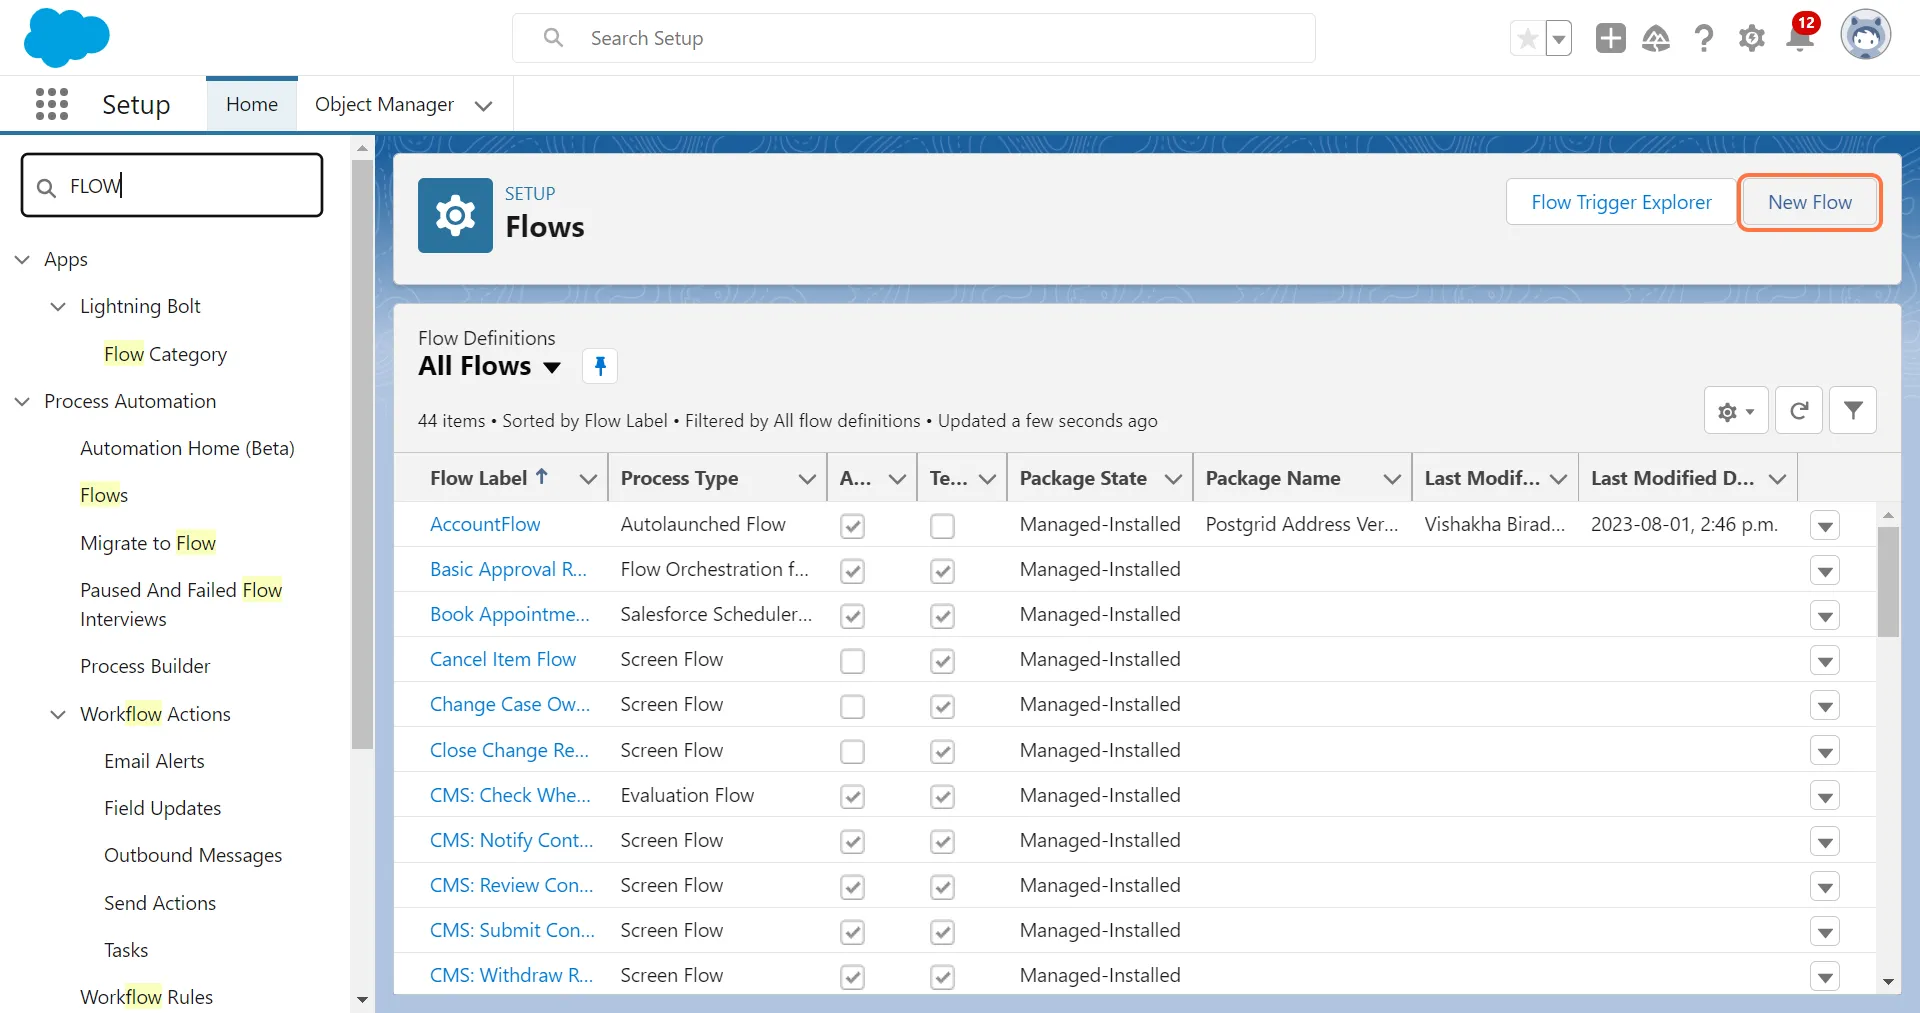
4. Select a Trigger type and click on “Create”
Section titled “4. Select a Trigger type and click on “Create””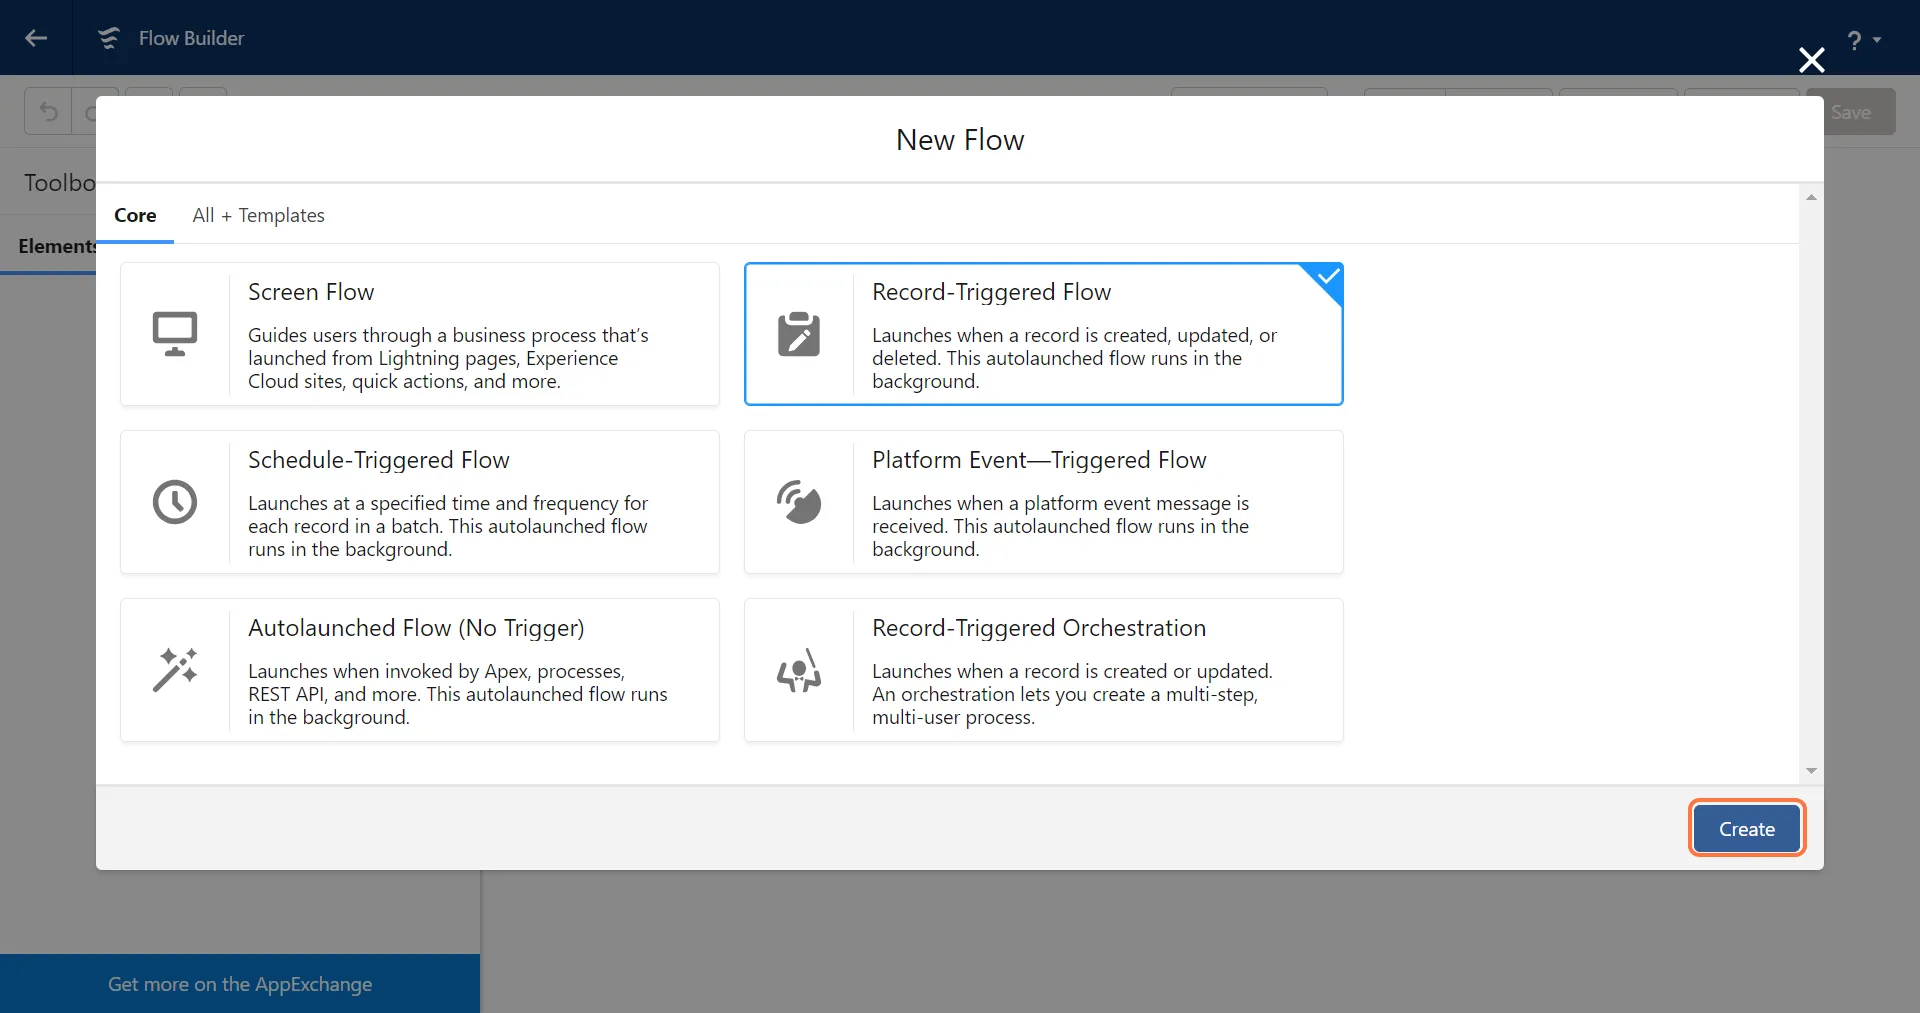
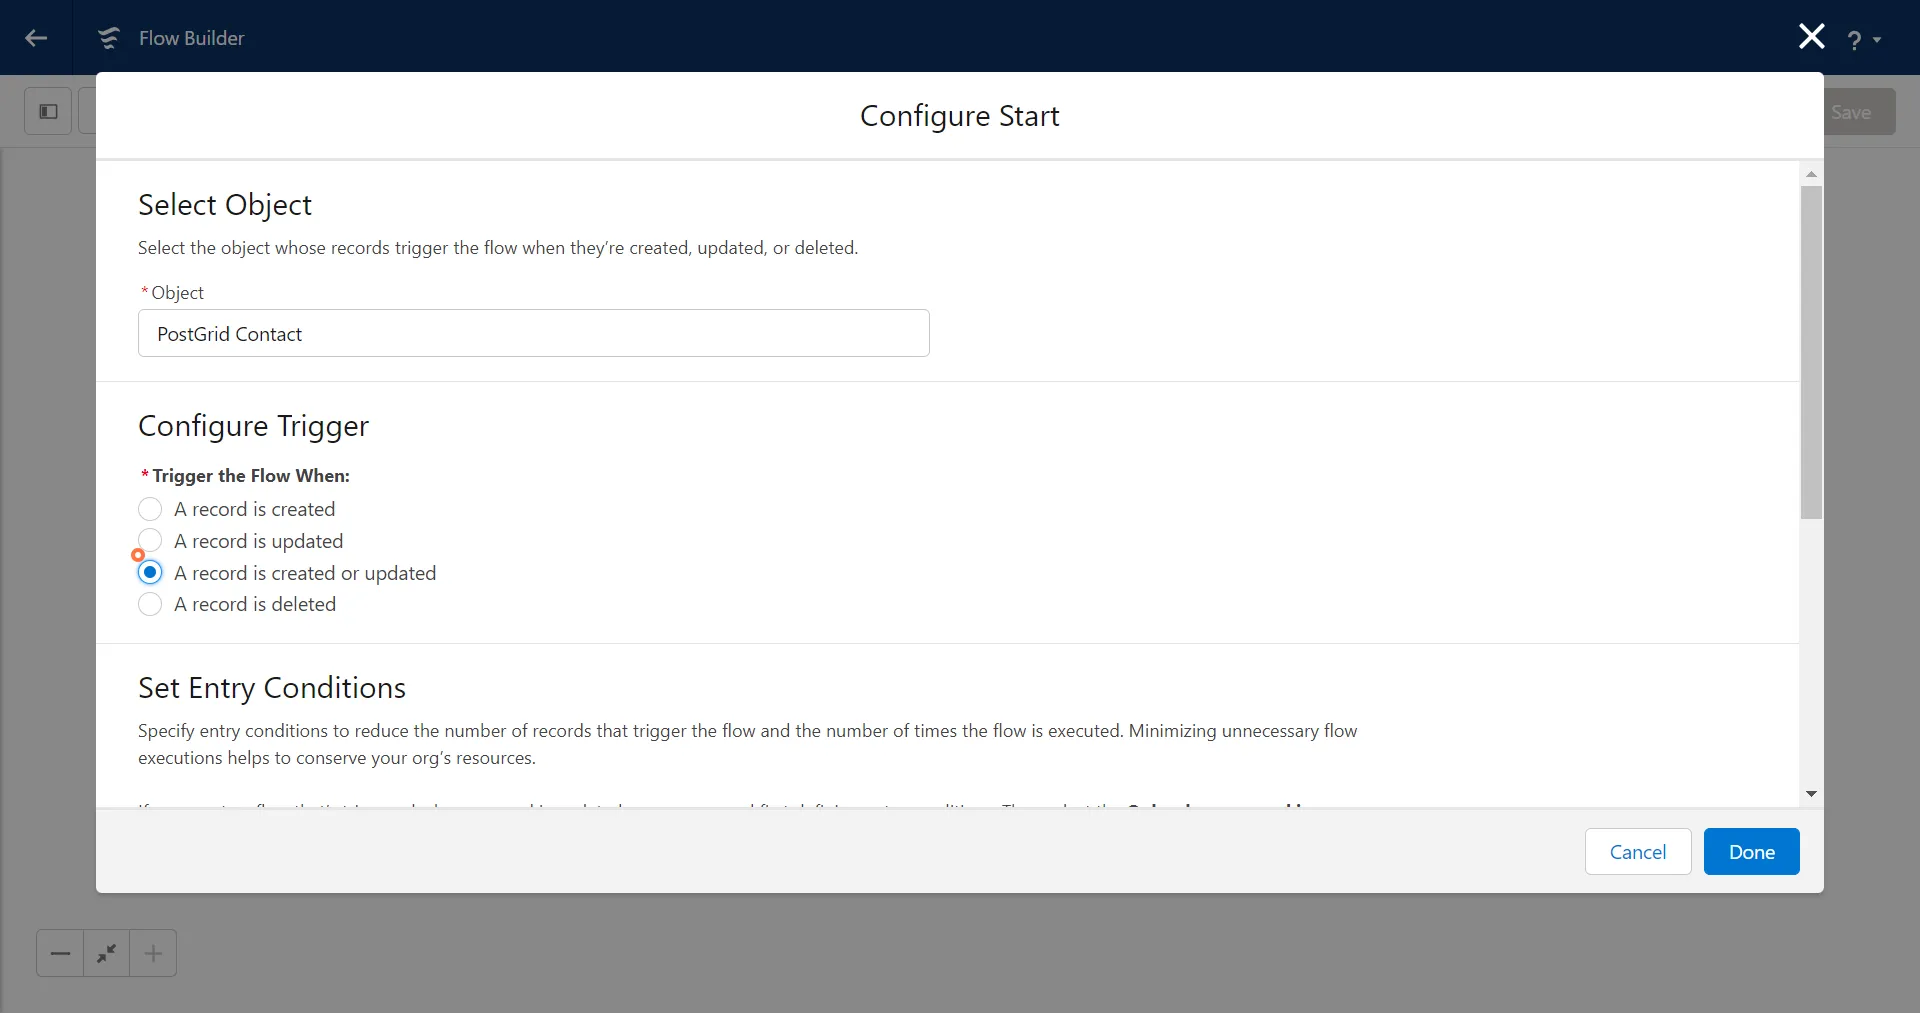
5. Select the Custom Object for which you want to trigger the flow
Section titled “5. Select the Custom Object for which you want to trigger the flow”
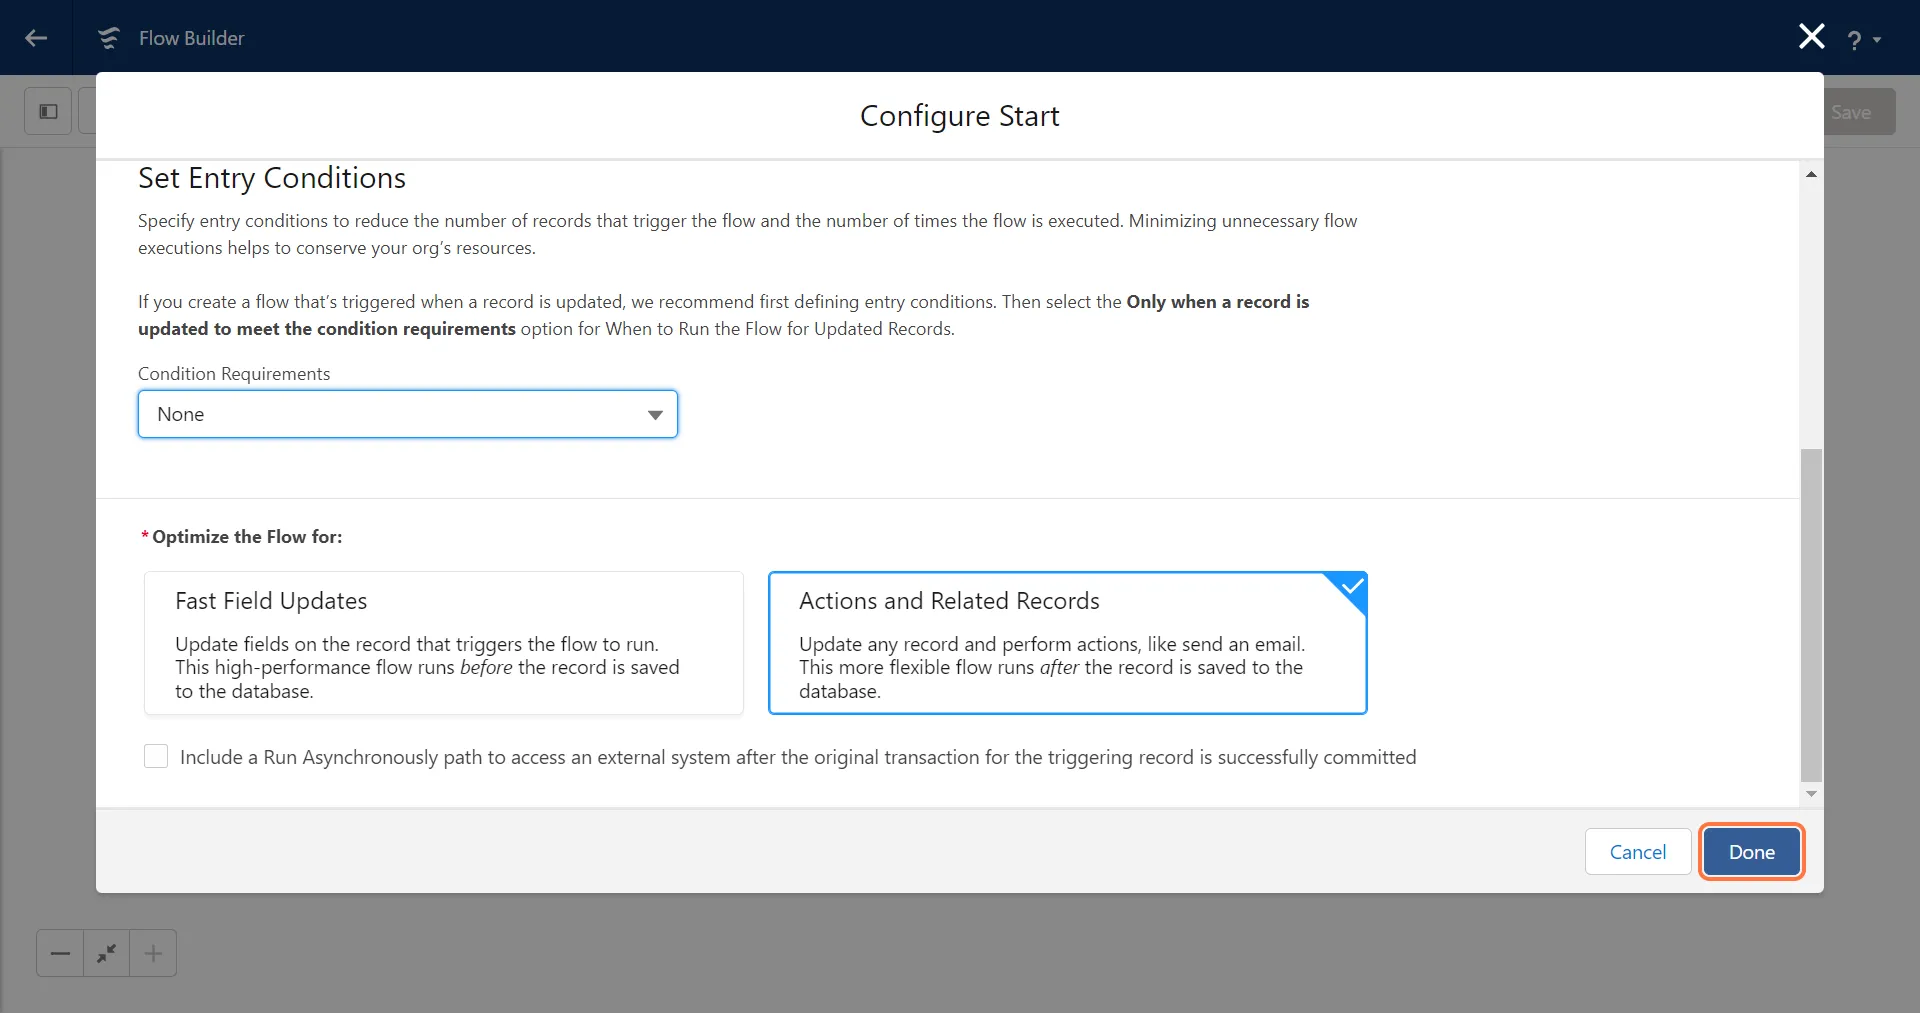
6. Configure the Trigger and Set Entry Conditions. Once the trigger is configured click on Done
Section titled “6. Configure the Trigger and Set Entry Conditions. Once the trigger is configured click on Done”You can set any condition that you want to, for example, you want to trigger the flow for a contact from a specific country.
Configuring the mailing requirements
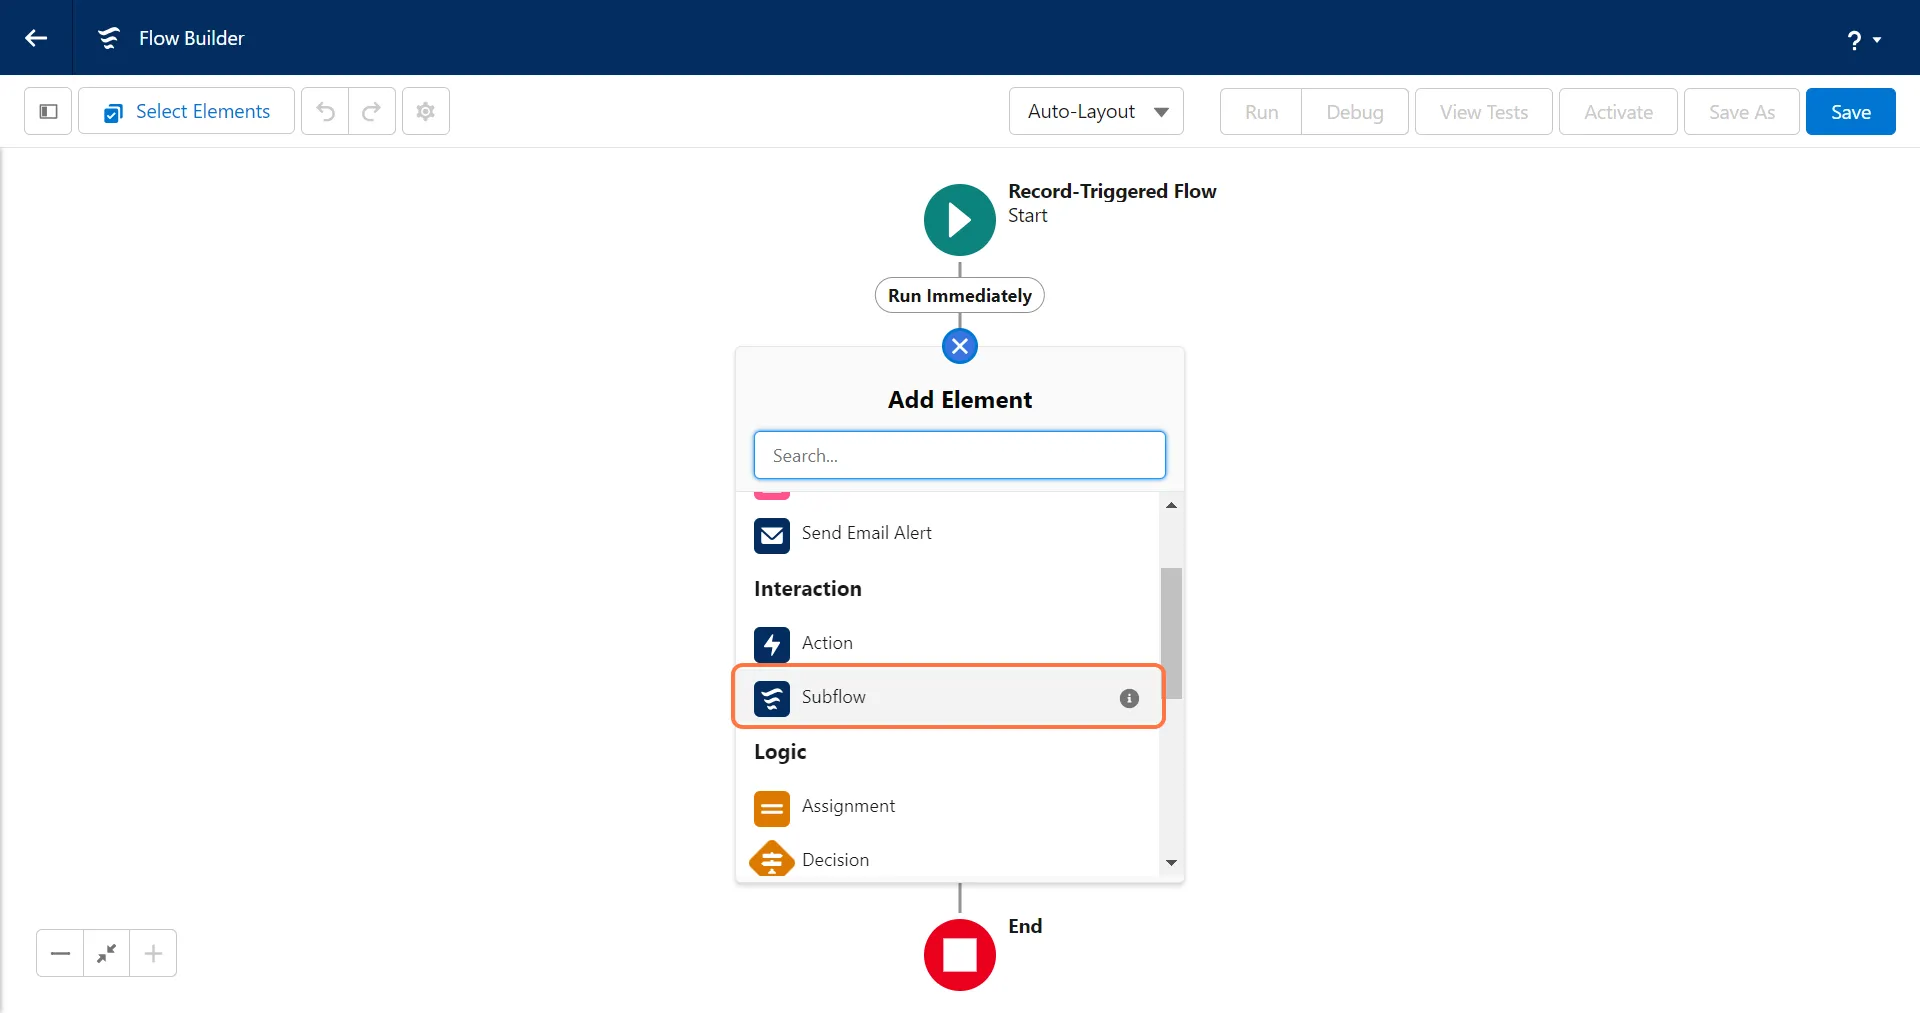
Section titled “Configuring the mailing requirements”1. Click on the ”+” sign and select “Subflow” in Interaction
Section titled “1. Click on the ”+” sign and select “Subflow” in Interaction”
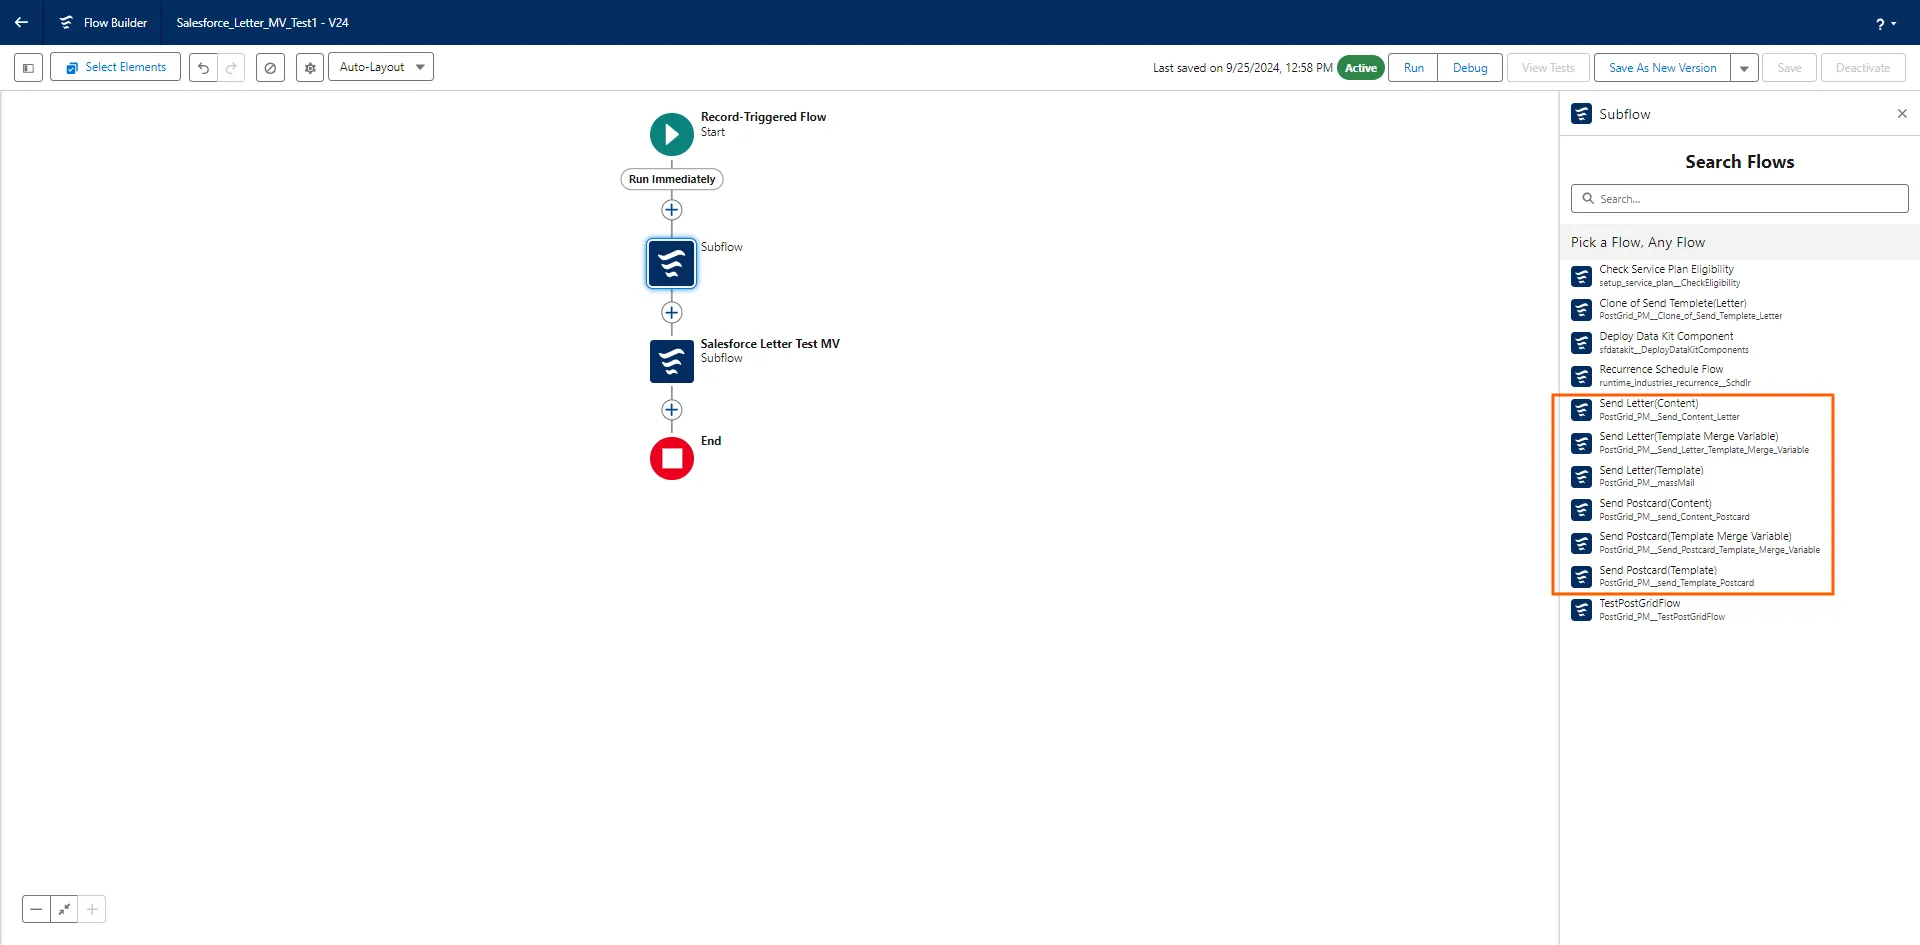
Select the relevant Subflow
Section titled “Select the relevant Subflow”- If you are using a PDF please select “Send Letter(Content)” or “Send Postcard(Content)”
- If you are using an HTML template please select “Send Letter(Template)” or “Send Postcard(Template)”
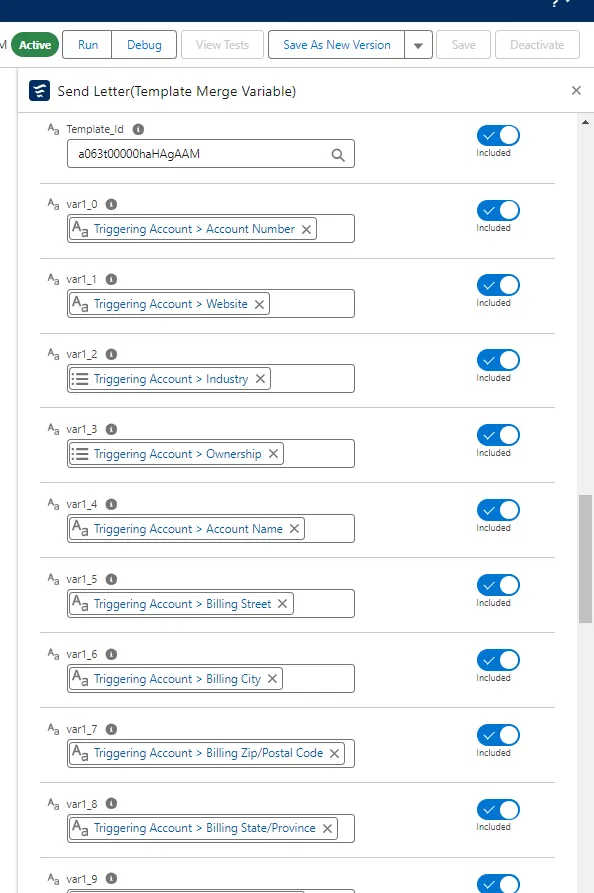
- If you are using an HTML template with merge variables please select “Send Letter(Template Merge Variable)” or “Send Postcard(Template Merge Variable)“
2. To set any Input Values, first switch the toggle to include the input
Section titled “2. To set any Input Values, first switch the toggle to include the input”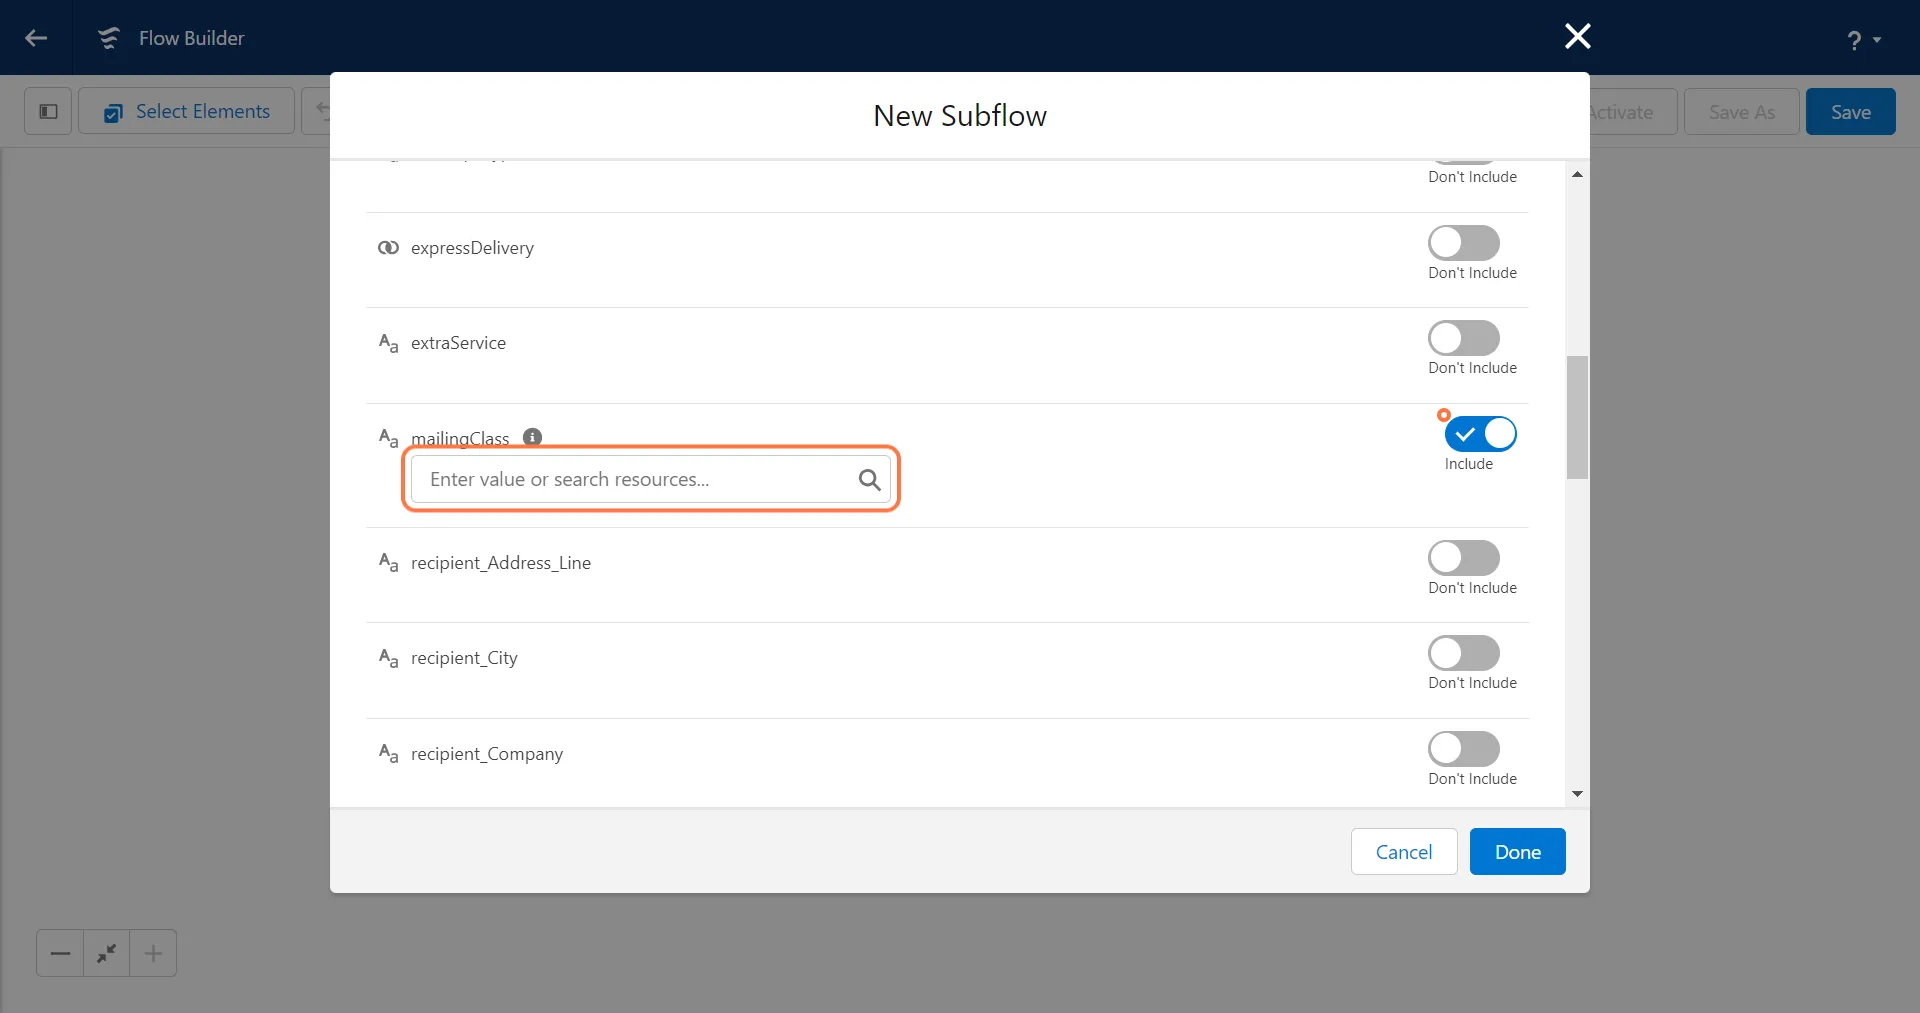
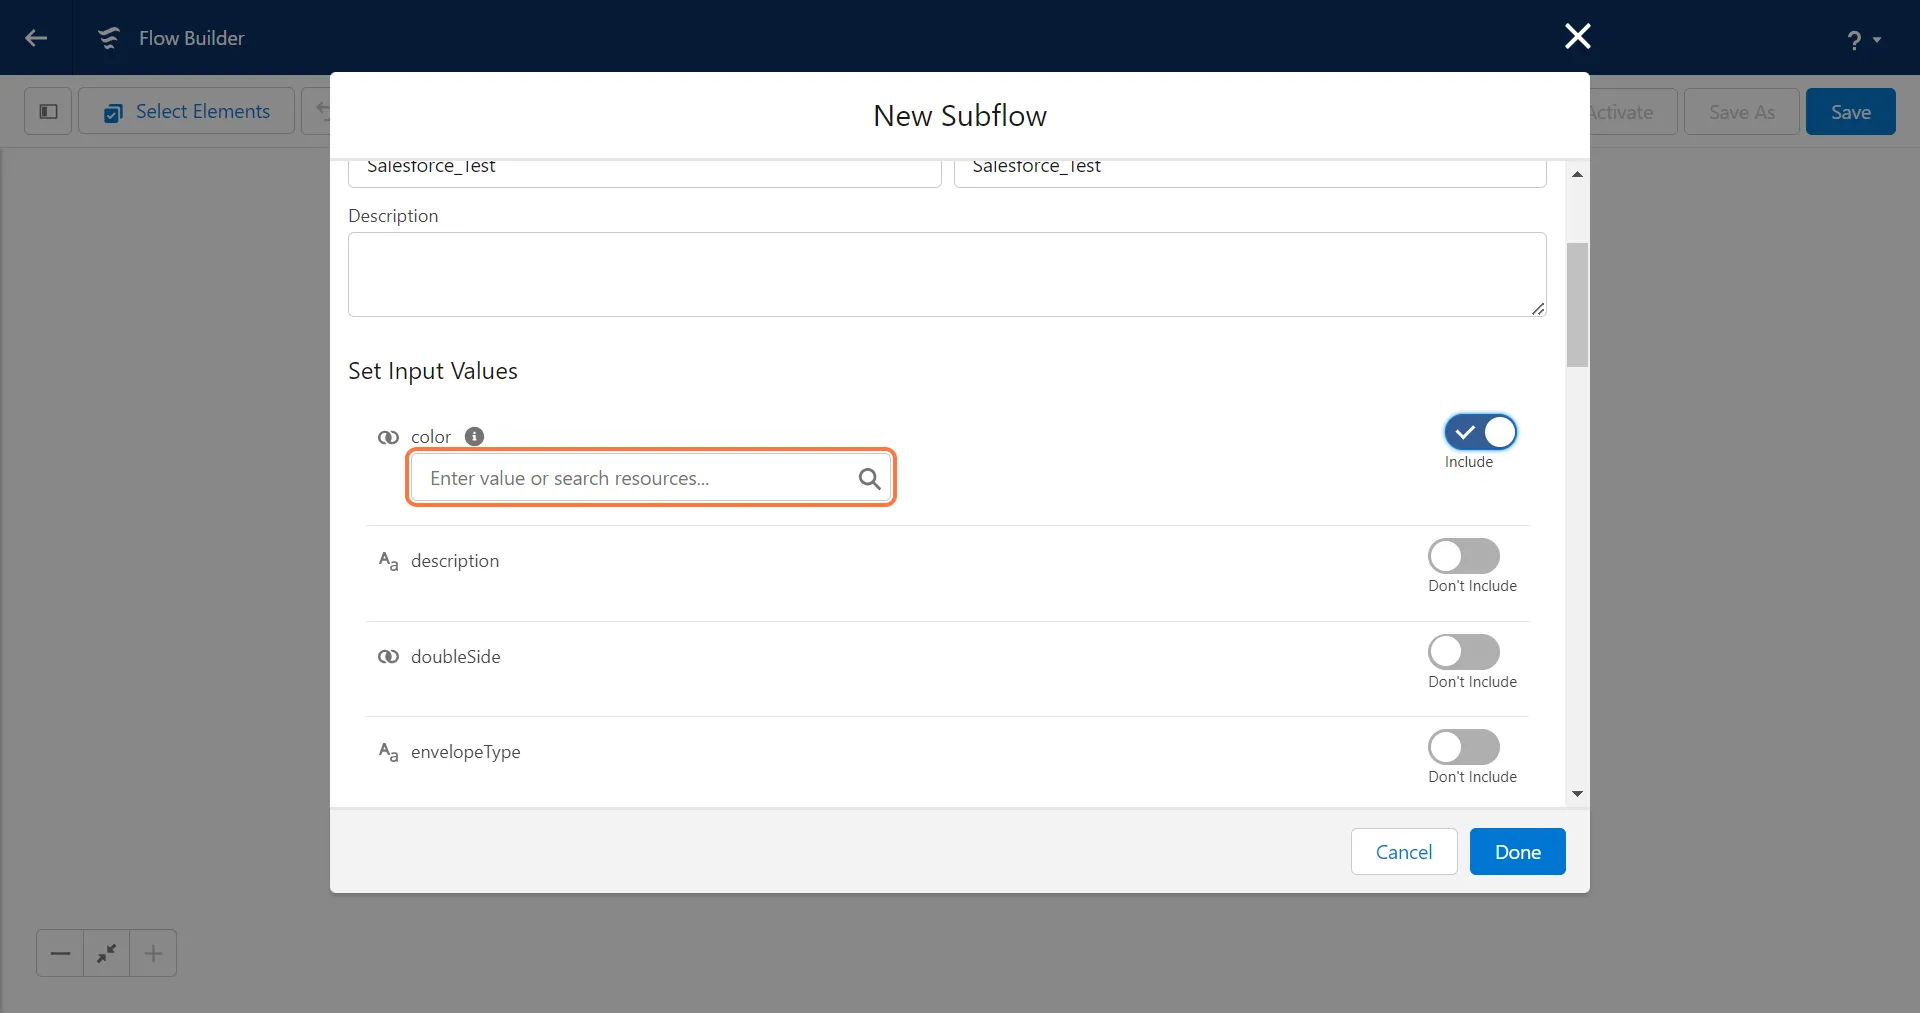
3. Set up the Input values for the additional services
Section titled “3. Set up the Input values for the additional services”The additional services include, Select a return envelope, Envelope type, Page Size, Extra Service, Mailing Class, Color, Double Sided, Insert Blank Page for Address, Perforate First Page and Express Delivery.
Due to Salesforce constraints, the input values for the following fields must be entered manually as text rather than mapping the global variable constants (True/False).
- addressPlacement:
- top_first_page - to add the address on the top of the first page
- Insert_blank_page - to add the to and from address fields on a blank page
- extraService:
- certified - to send as certified mail
- certified_return_receipt - to send as certified mail with a return receipt
- registered - to send as registered mail
- perforatedPage: 1
- mailingClass:
- standard_class
- first_class
By default, all mail is sent as First Class or the fastest non-express postage available in the destination country. You can override this for a lower postage fee by supplying a mailingClass parameter with the value standard_class
Setting up the Recipient Details
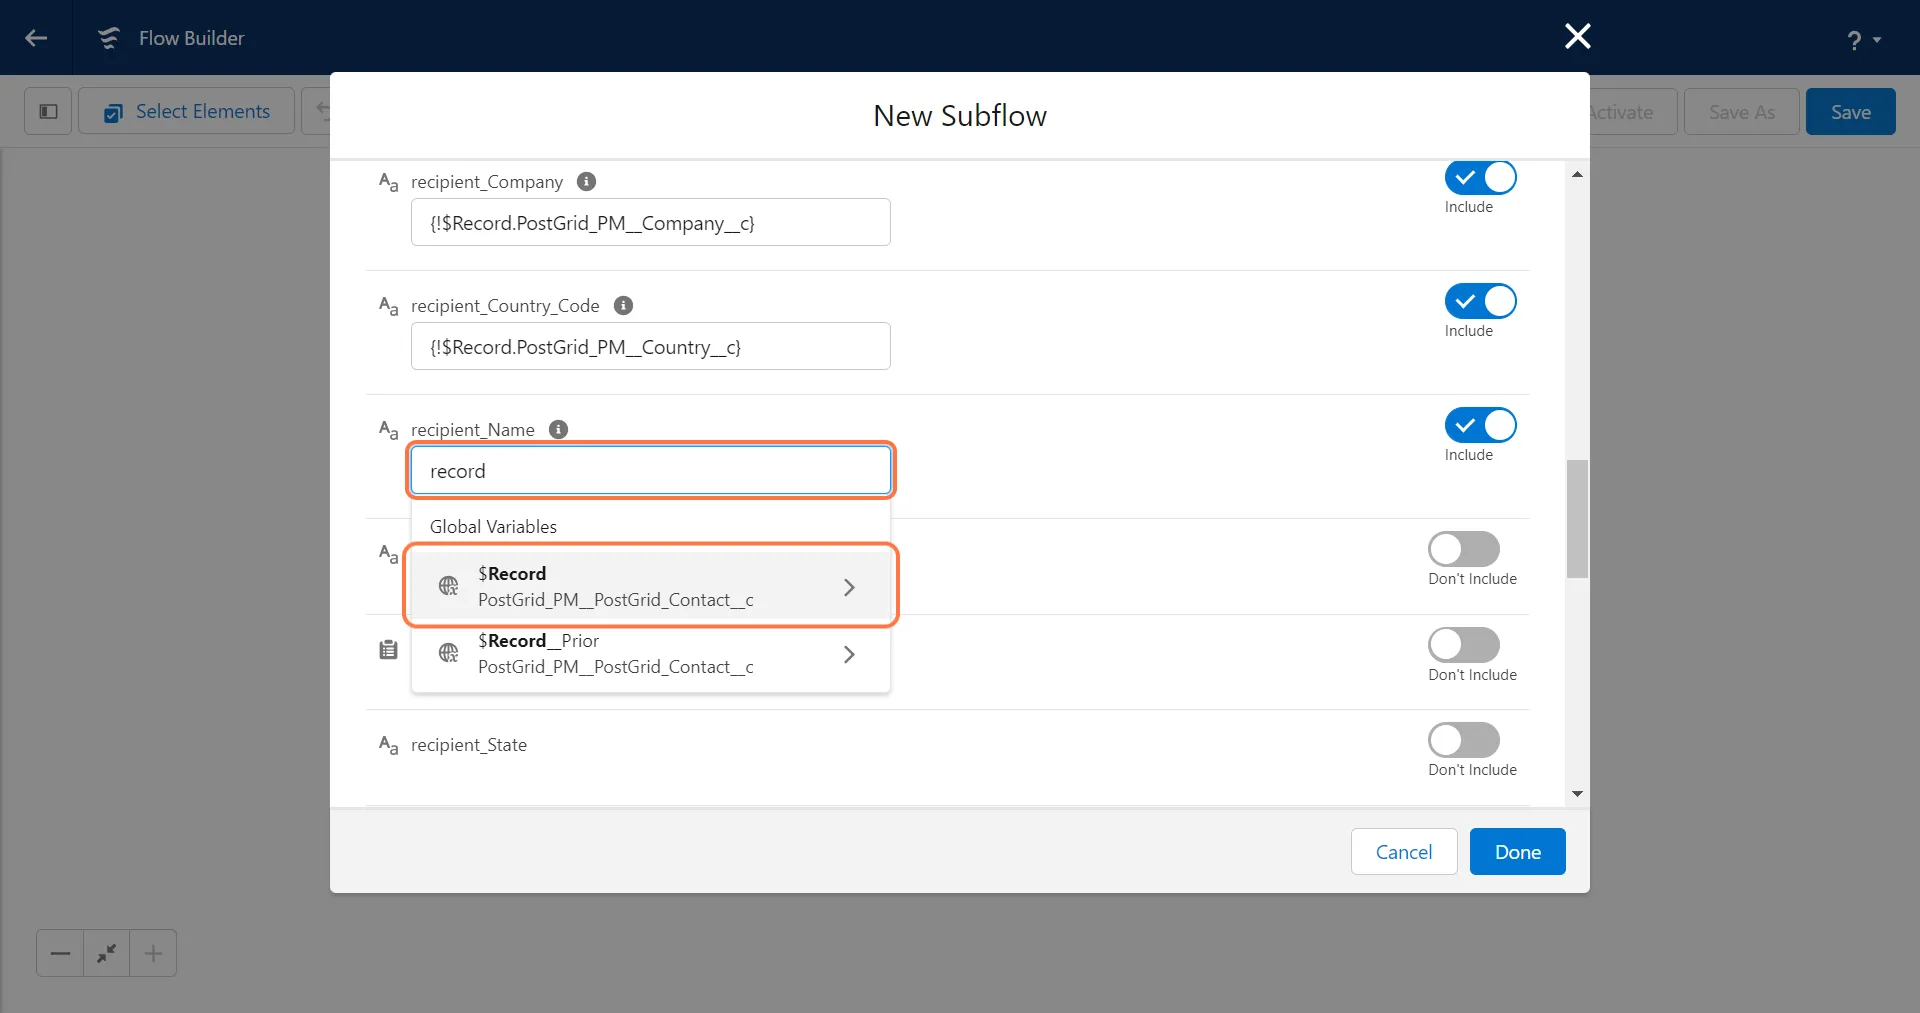
Section titled “Setting up the Recipient Details”1. Add the object record ID for each recipient field
Section titled “1. Add the object record ID for each recipient field”Please note that capturing the record ID is important to ensure that the correct information is captured whenever an object is created or updated.
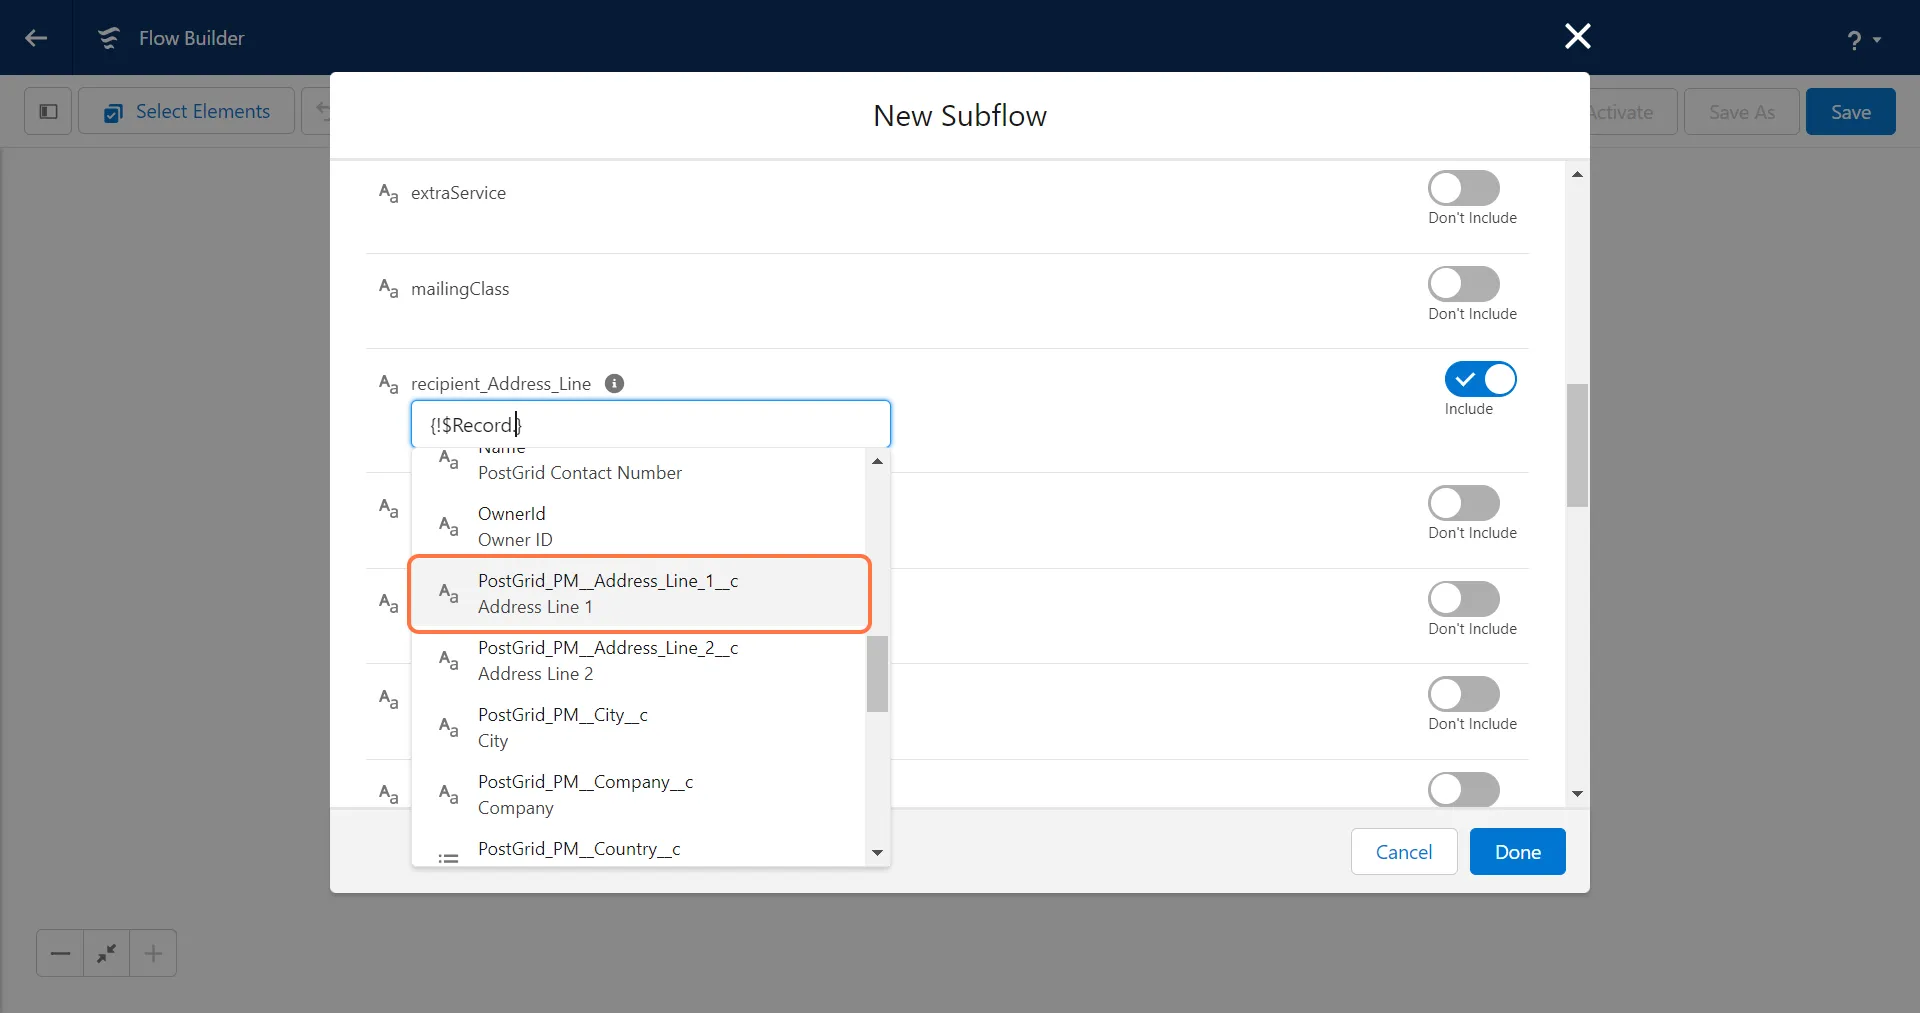
2. Configure all the recipient fields
Section titled “2. Configure all the recipient fields”To ensure accurate delivery of the mail, please make sure that all required fields for the recipient address are properly configured.
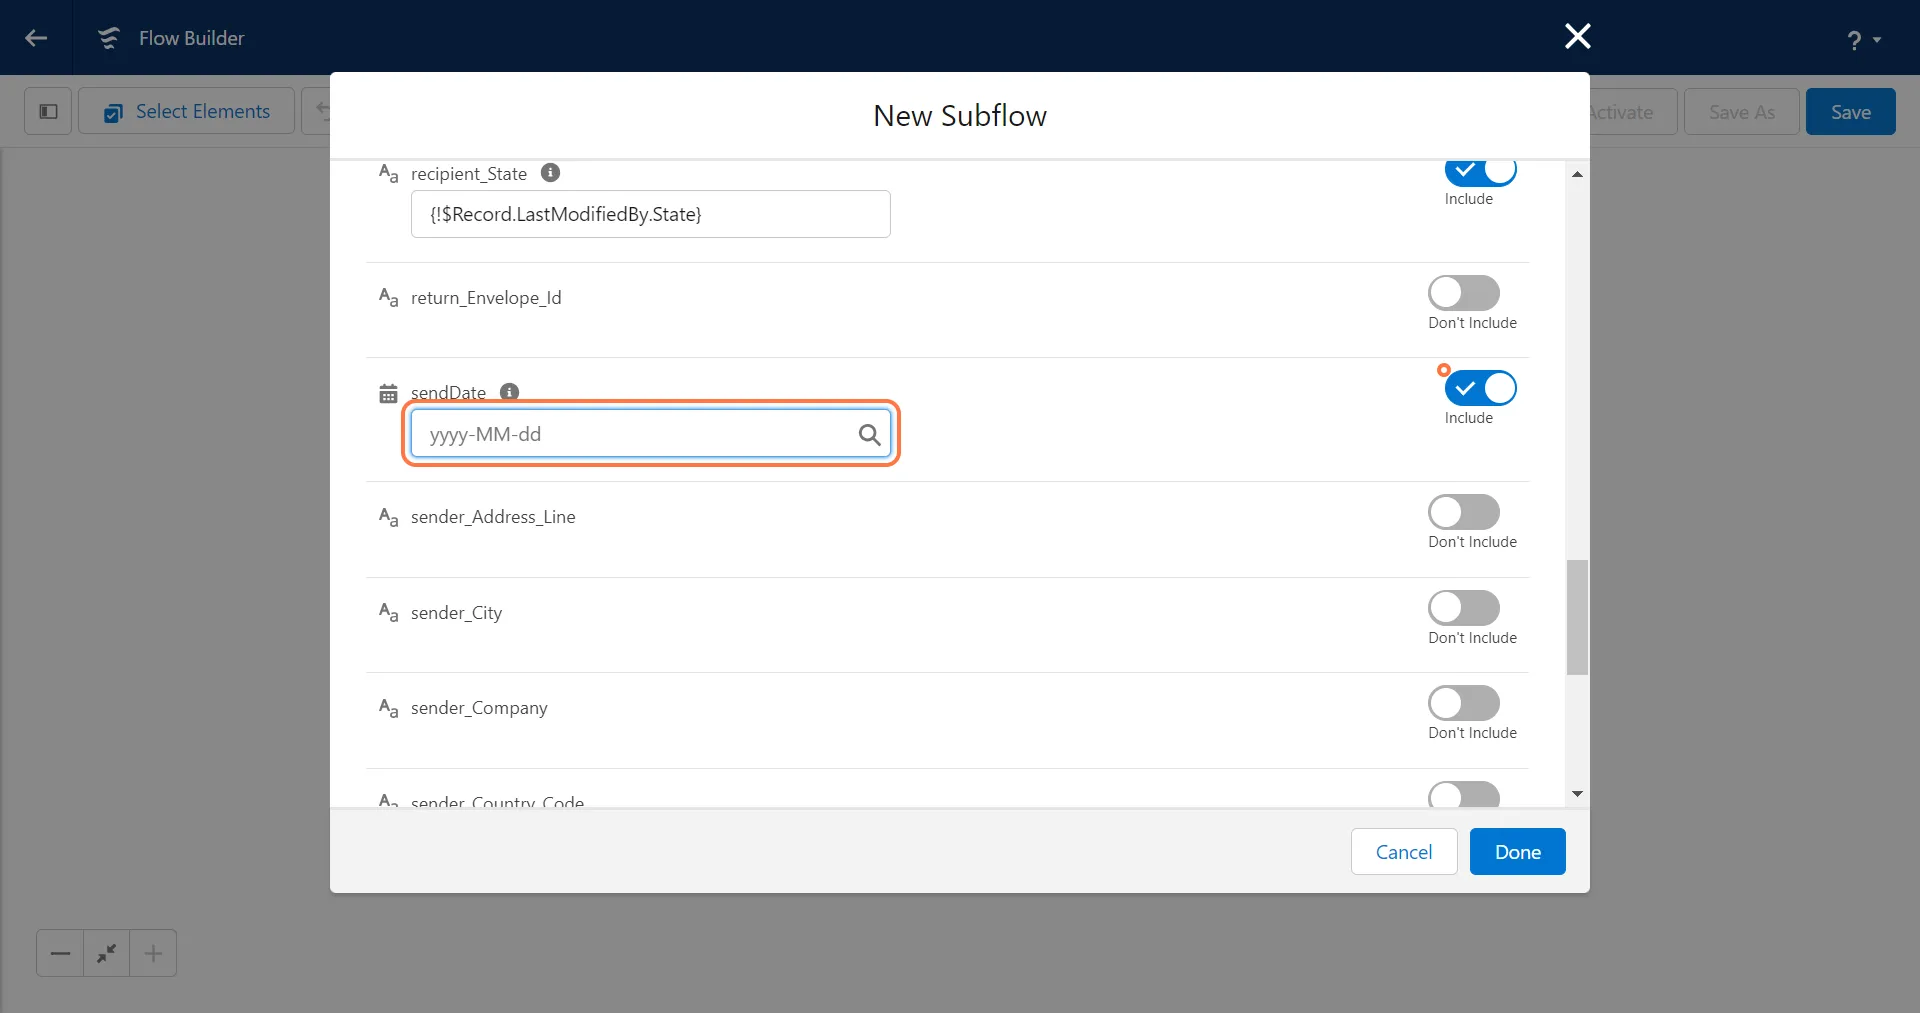
3. Add a Send Date
Section titled “3. Add a Send Date”If a valid future date is provided, it can be added as the sendDate. If no value is provided, the default sendDate will be set as today+2.
Configuring the Sender Address
Section titled “Configuring the Sender Address”For adding the sender address first create a contact in Salesforce or use an existing record in Salesforce.
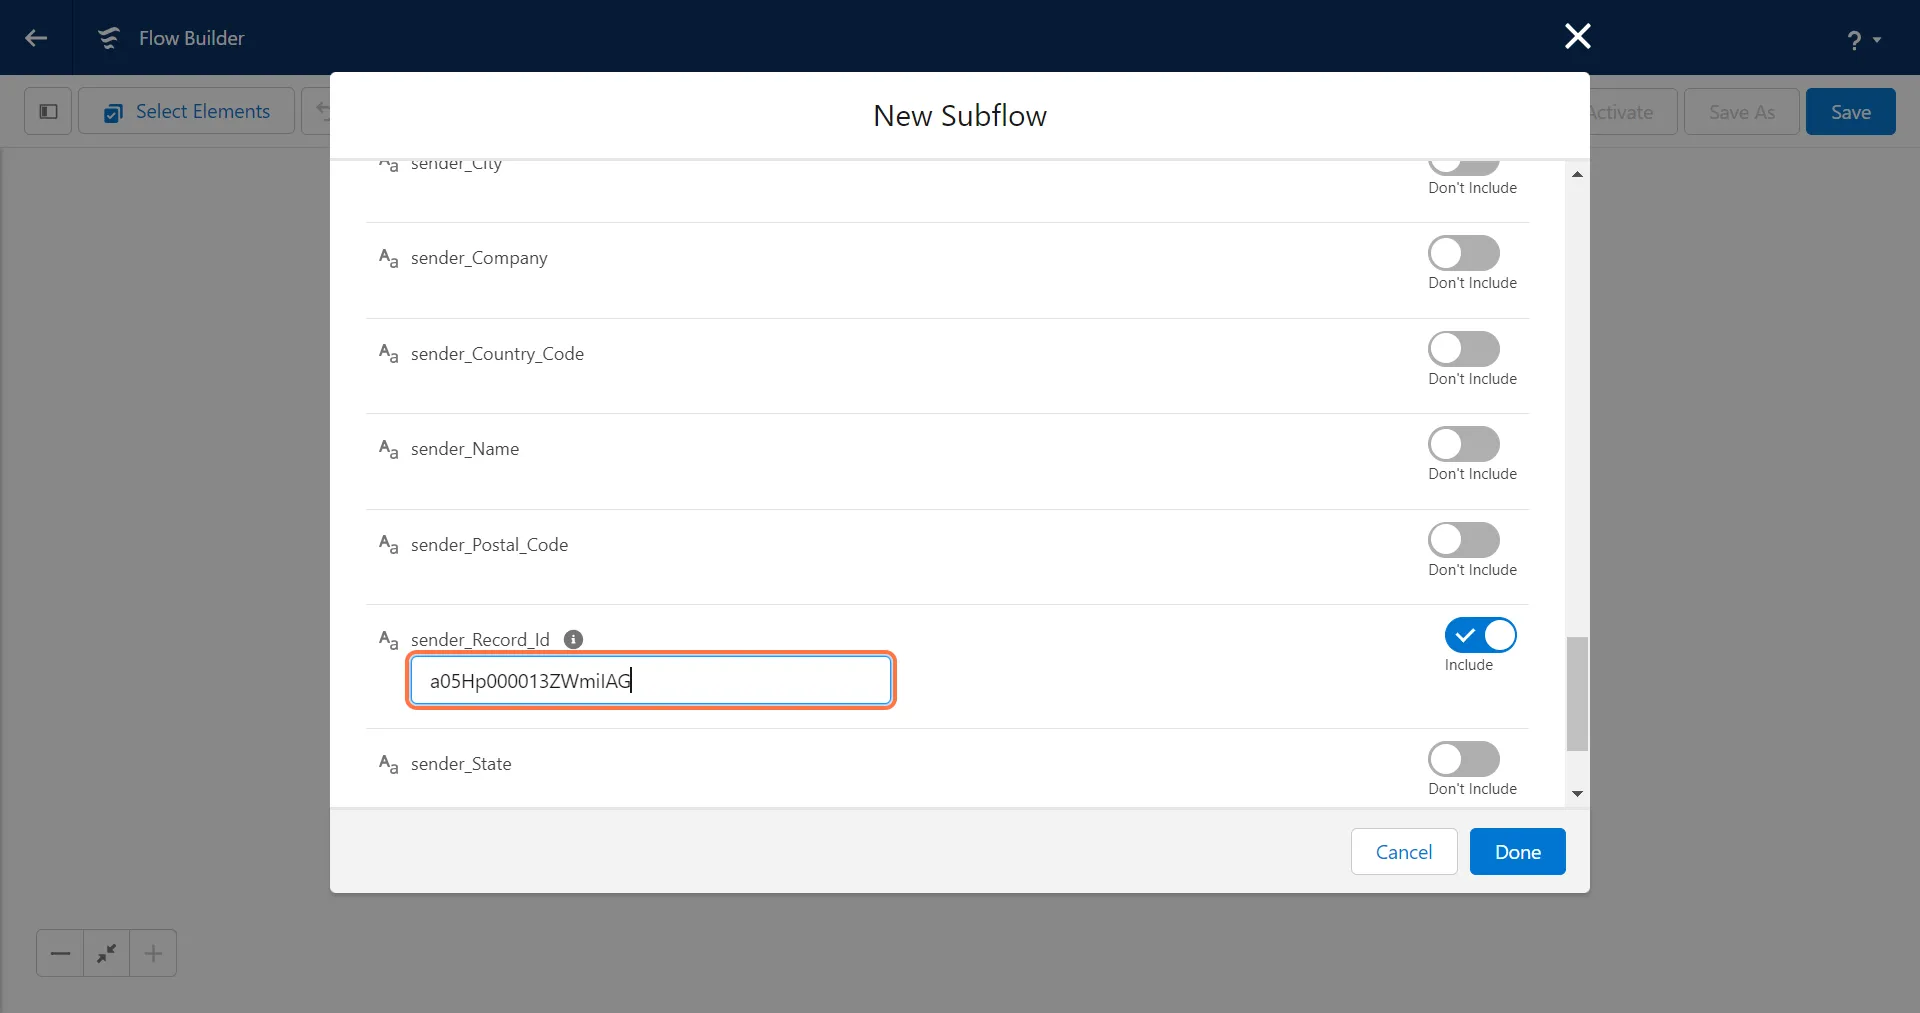
You can either manually input the values for each field or alternatively, you can directly add a sender_Record_Id. To add the contact ID for the sender, you first need to deploy the contact on the PostGrid platform.
Please note that Sender Address is mandatory for sending letters, but optional for sending postcards.
Adding “sender_Record_Id”
Section titled “Adding “sender_Record_Id””1. Click on PostGrid contacts to get the record ID for the sender address
Section titled “1. Click on PostGrid contacts to get the record ID for the sender address”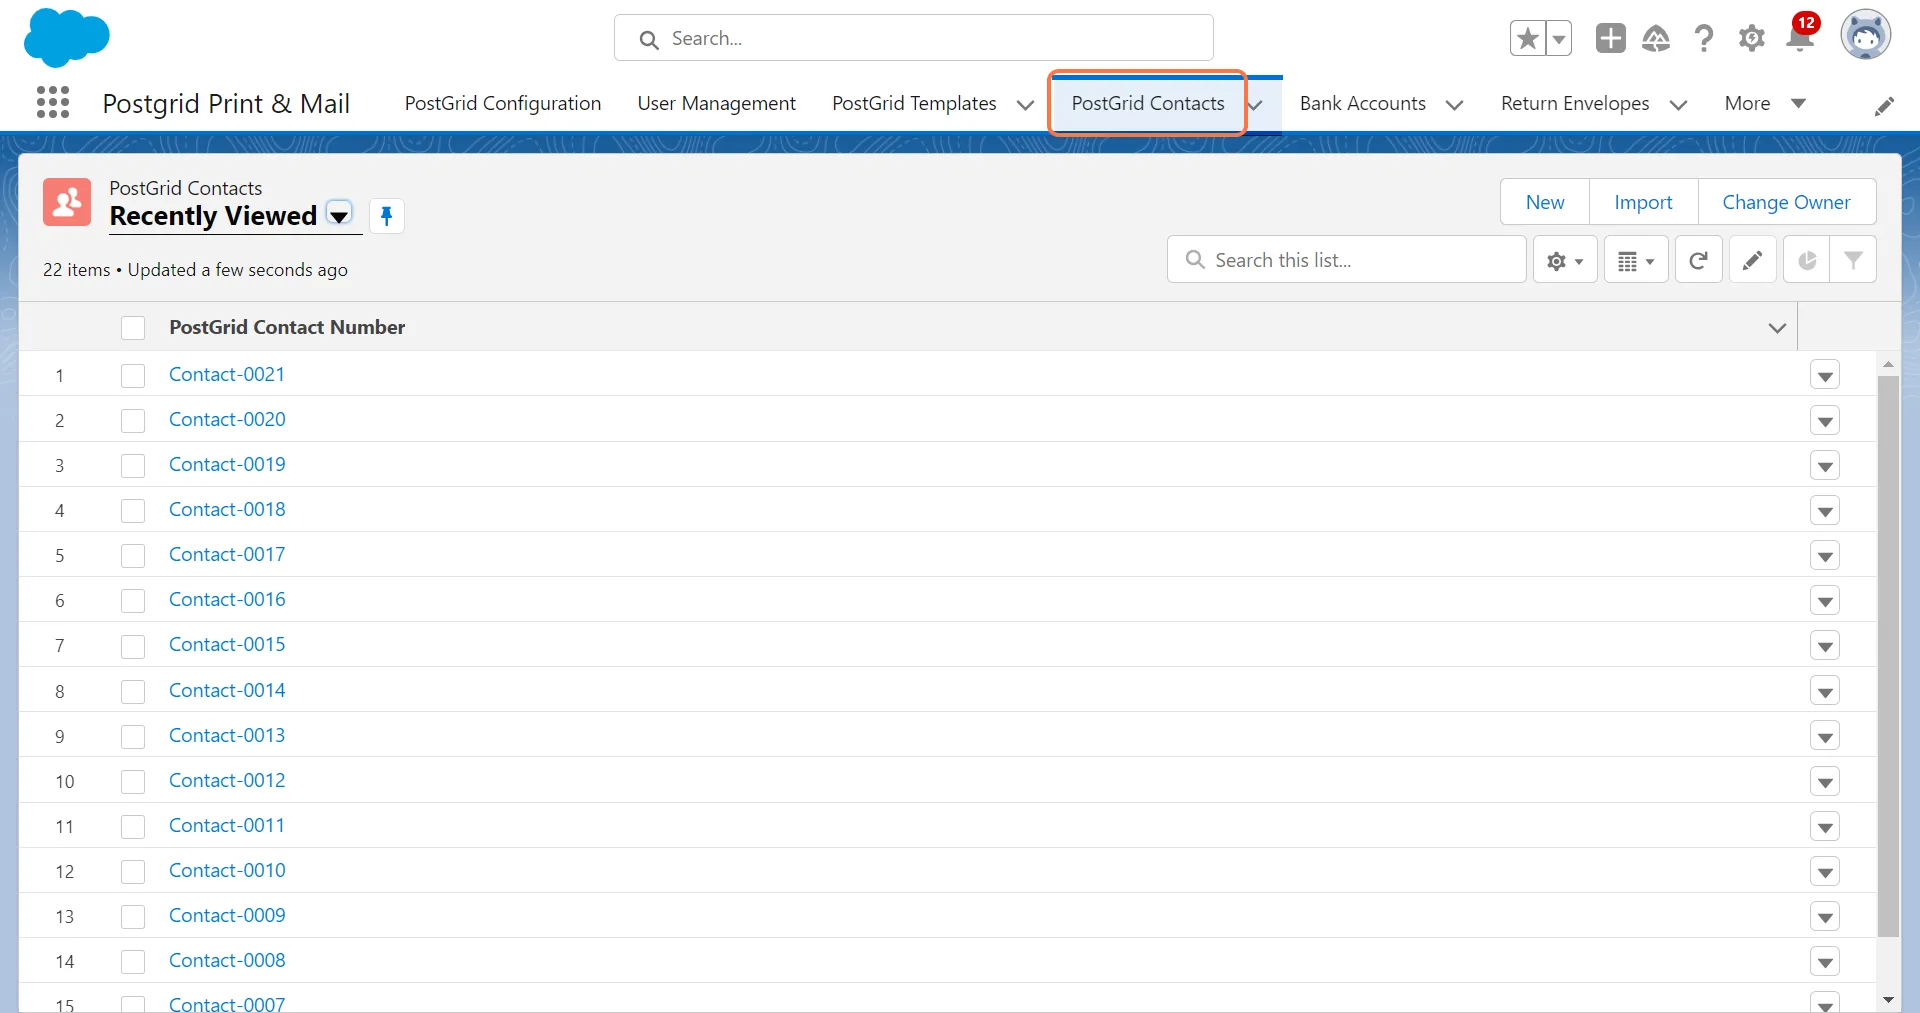
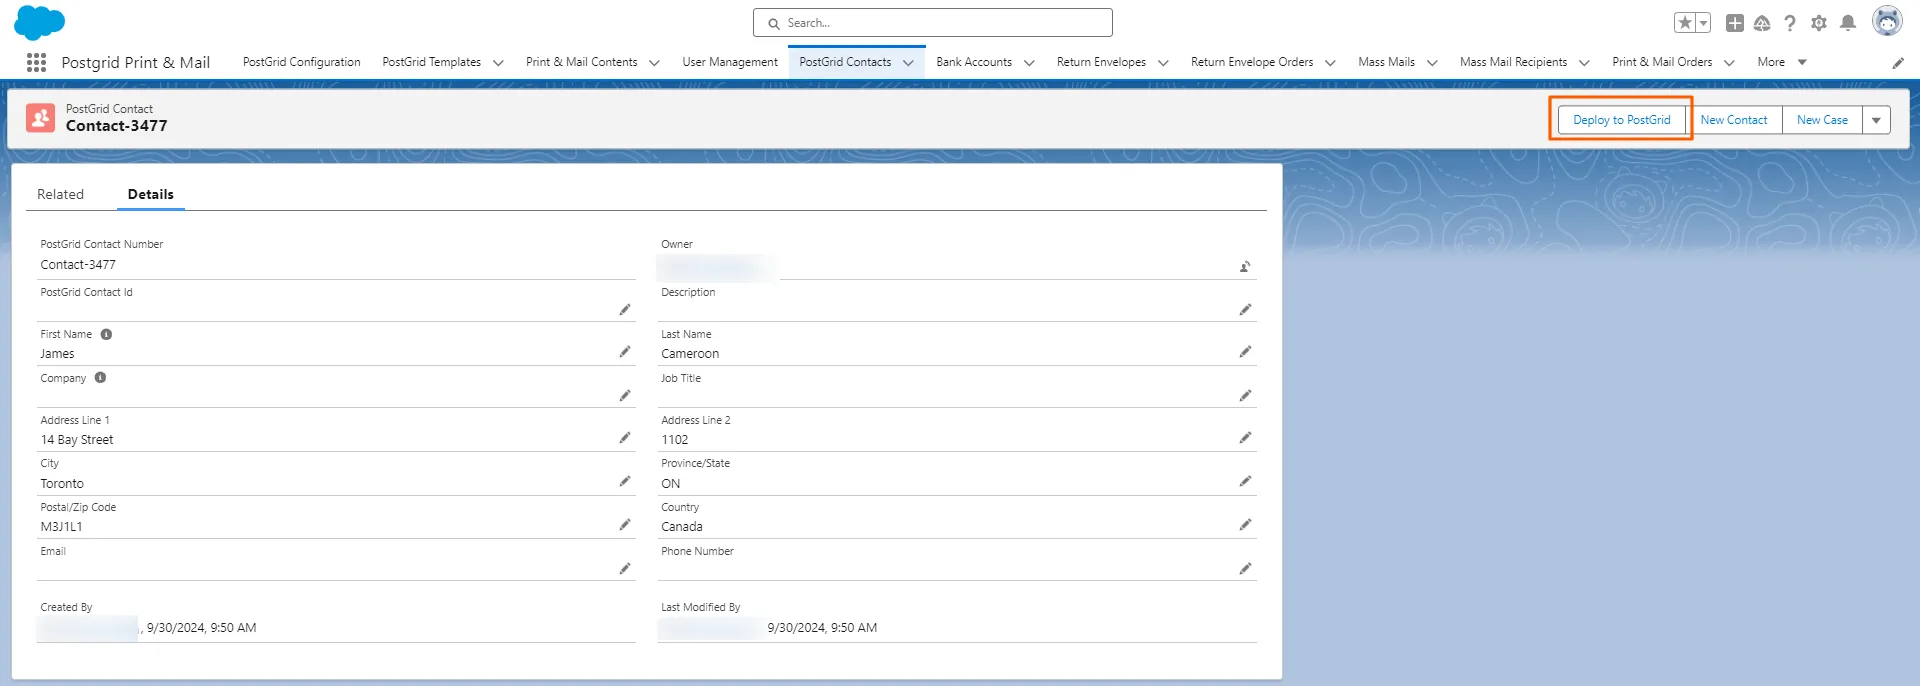
2. Click on the desired contact
Section titled “2. Click on the desired contact”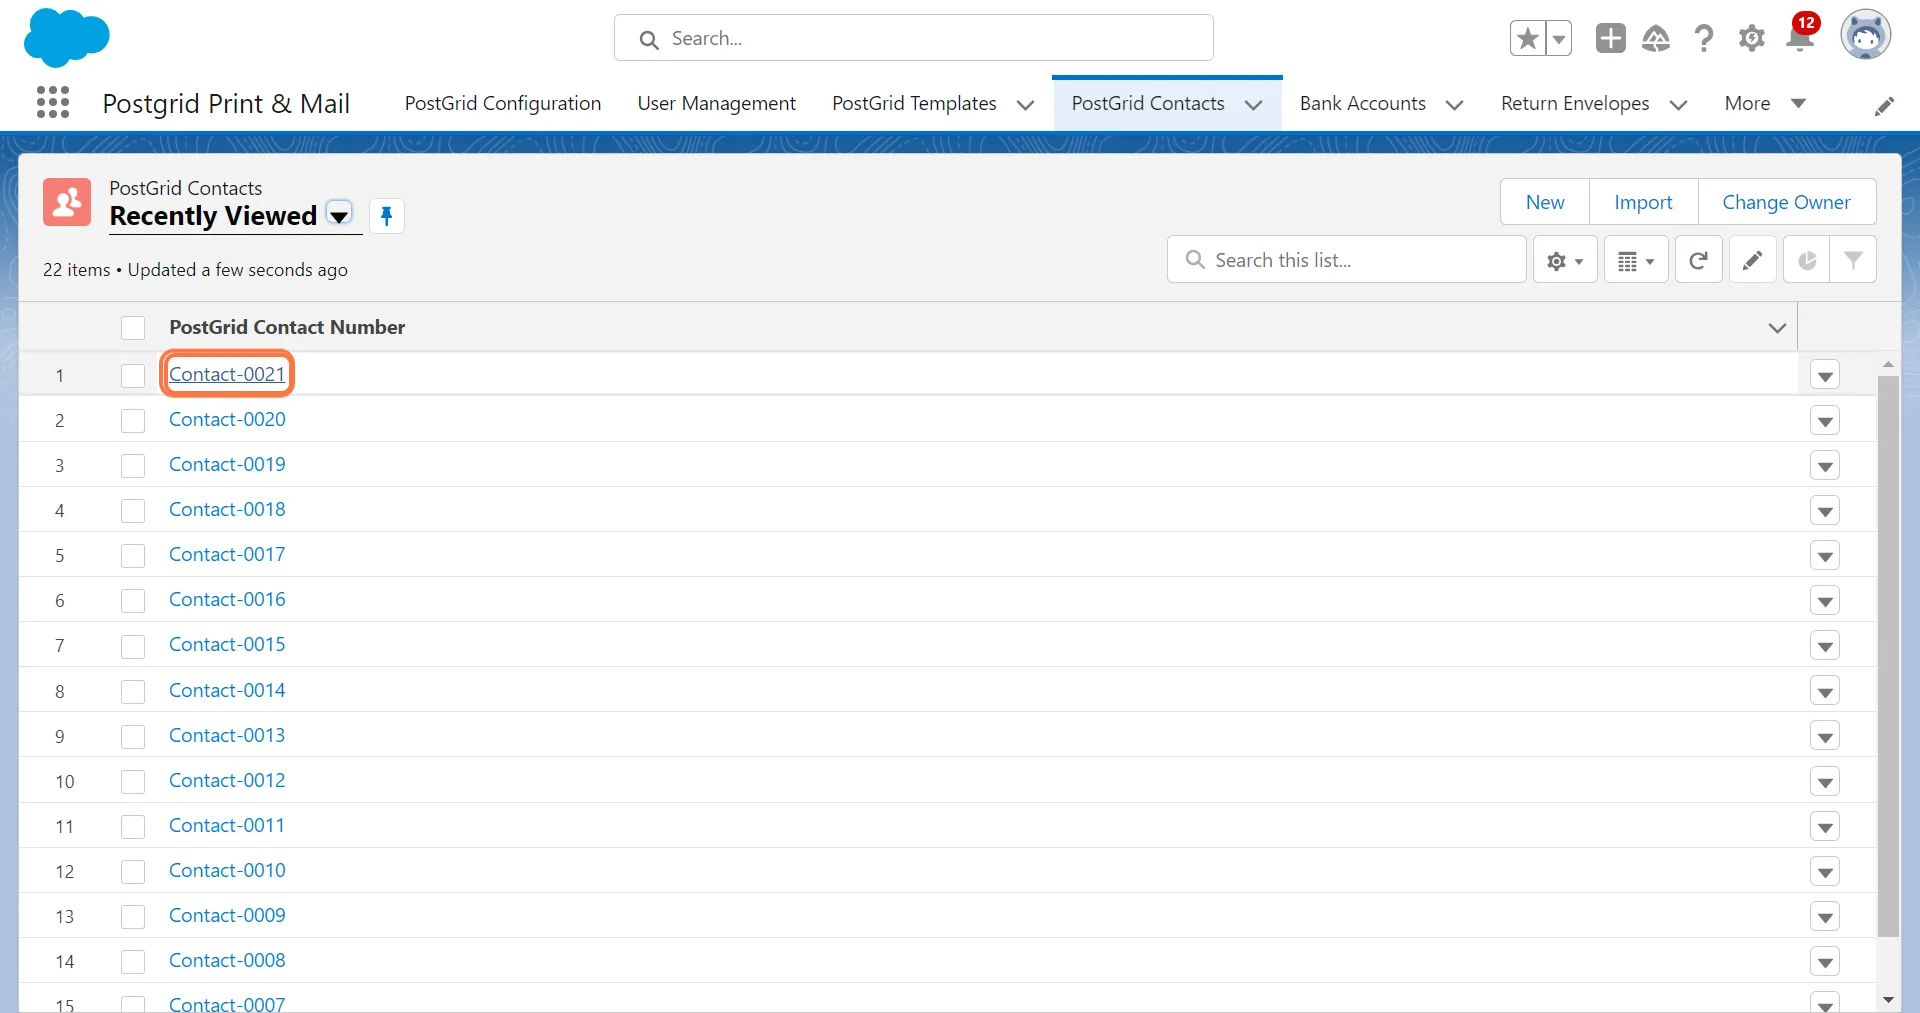
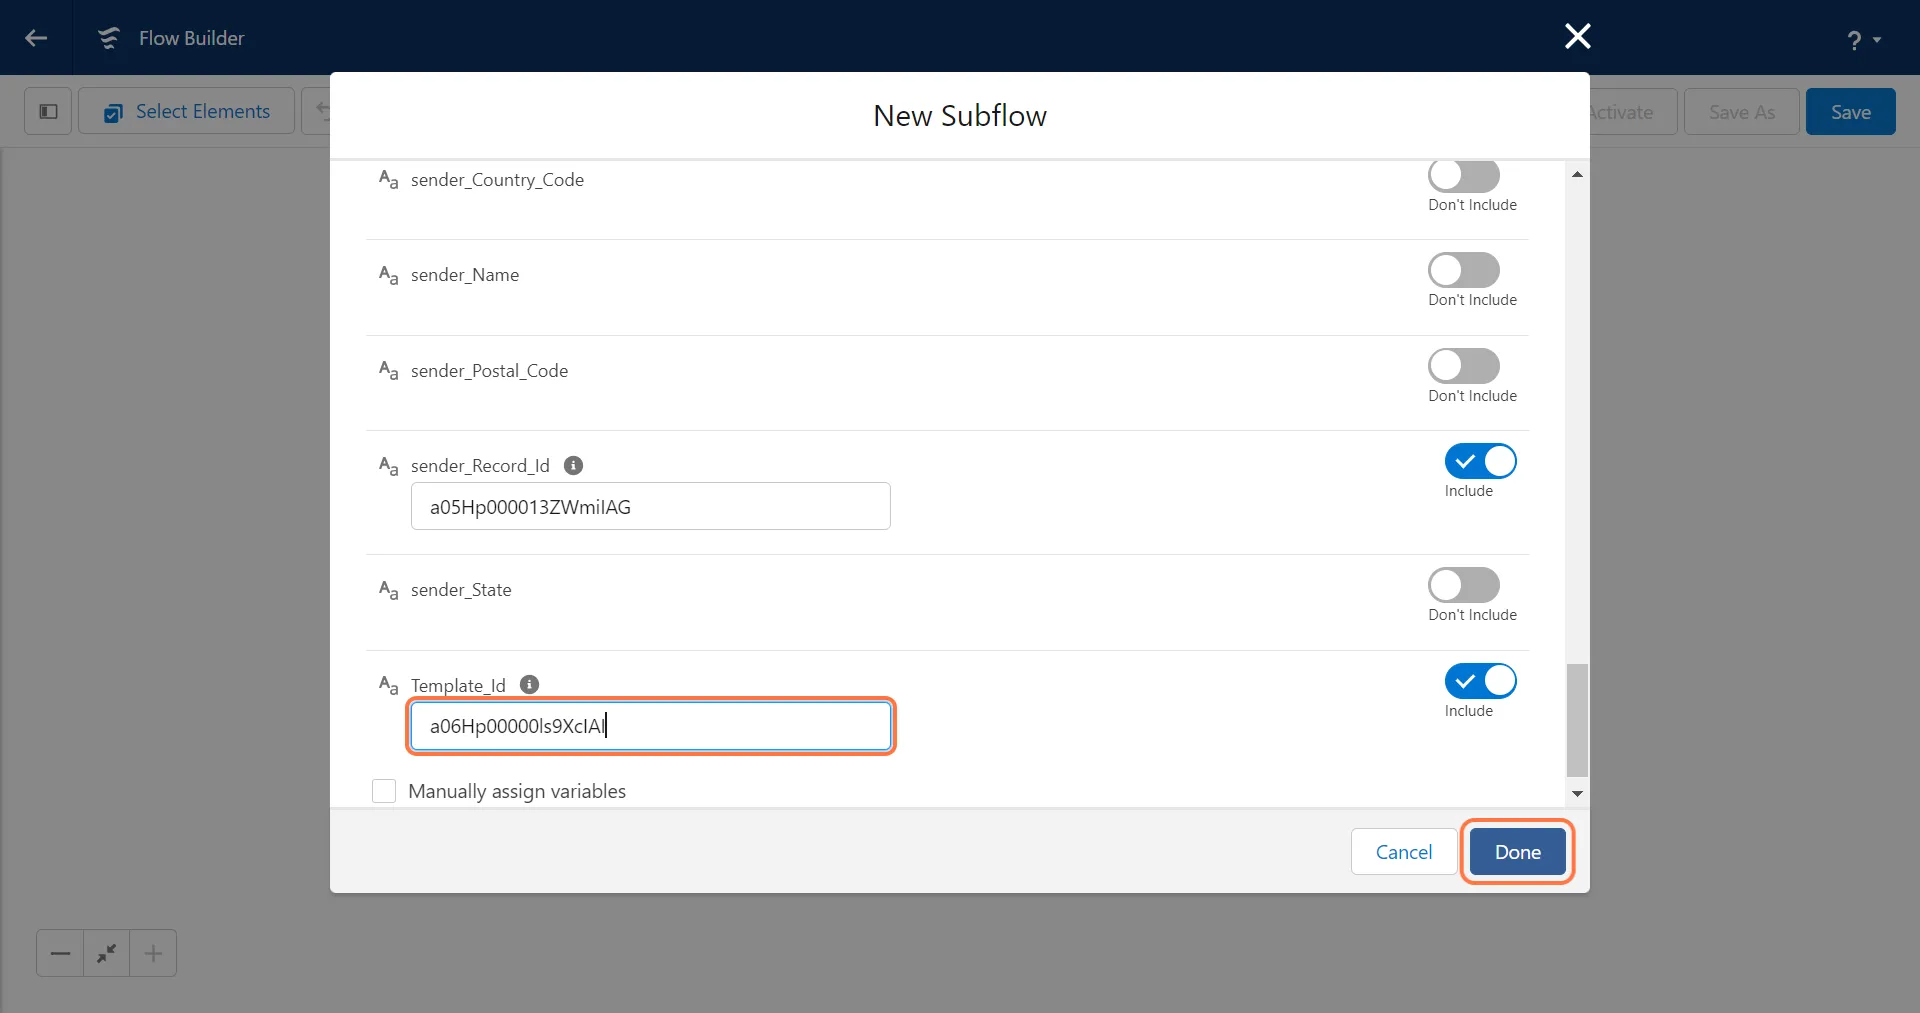
3. Copy the contact ID from the browser URL and paste the contact Id in the sender_Record_Id field
Section titled “3. Copy the contact ID from the browser URL and paste the contact Id in the sender_Record_Id field”
If you are manually entering the country code for the receiver or sender, please ensure that it is in the ISO 3166 format.
- United States of America: US
- Canada: CA
- United Kingdom: GB
- Australia: AU
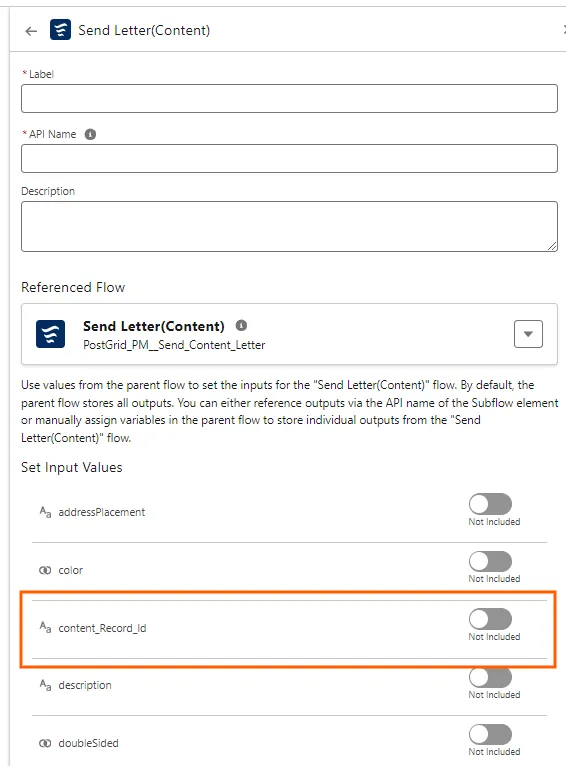
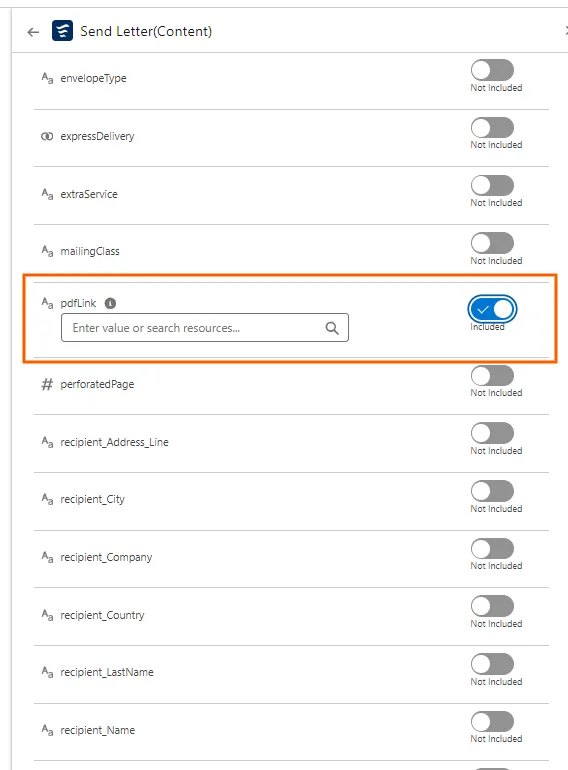
Configuring the PDF/Template
Section titled “Configuring the PDF/Template”Using a PDF
Section titled “Using a PDF”- You can either add a content_Record_ID to the Subflow or you can also pass any downloadable link to the pdfLink.
- If you provide both, a PDF link and the content ID then priority will be given to the PDF link.
Using an HTML template
Section titled “Using an HTML template”If you are using an HTML template, you first need to create a template in Salesforce. Similar to adding the contact ID for the sender, for the template you first need to deploy the template on the PostGrid platform.
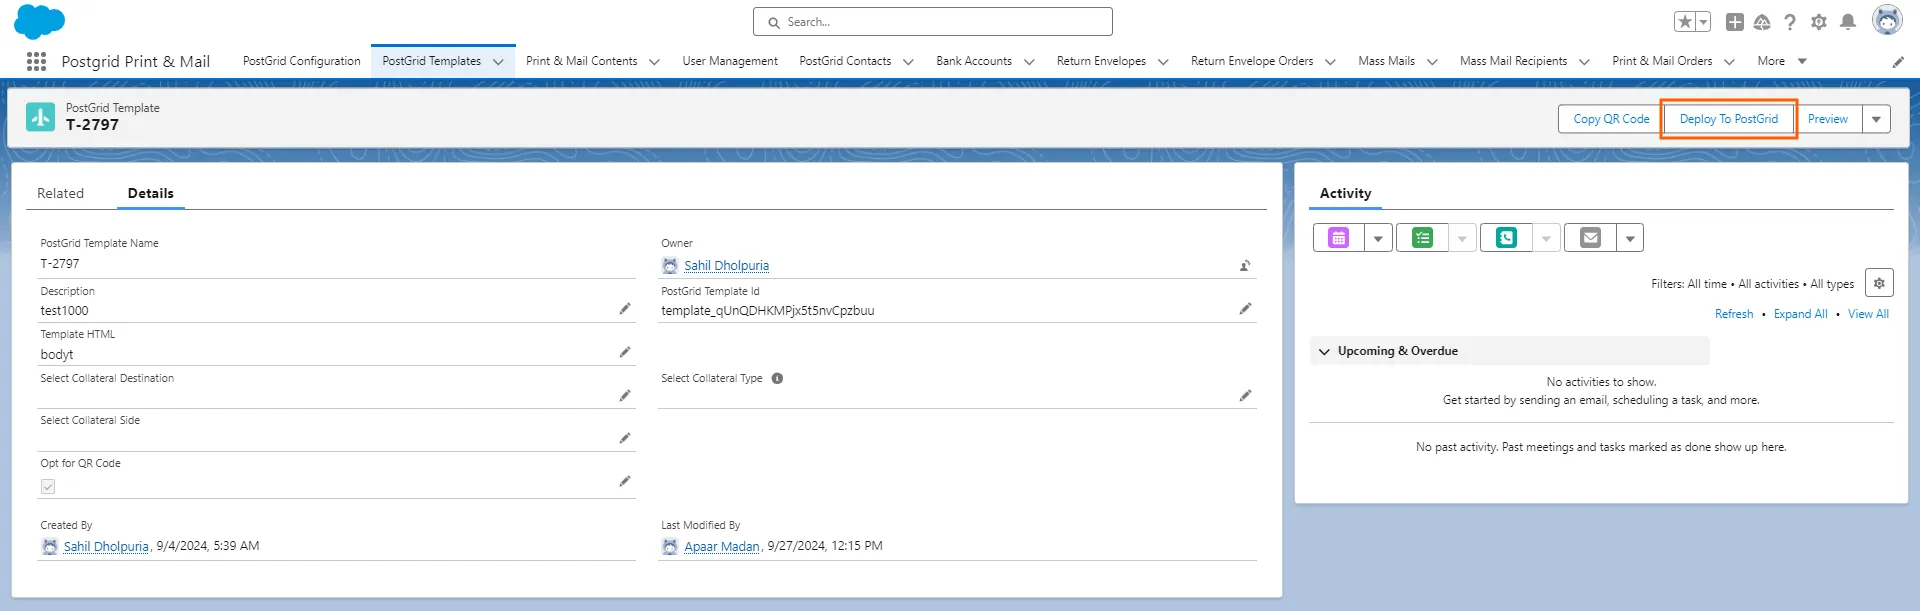
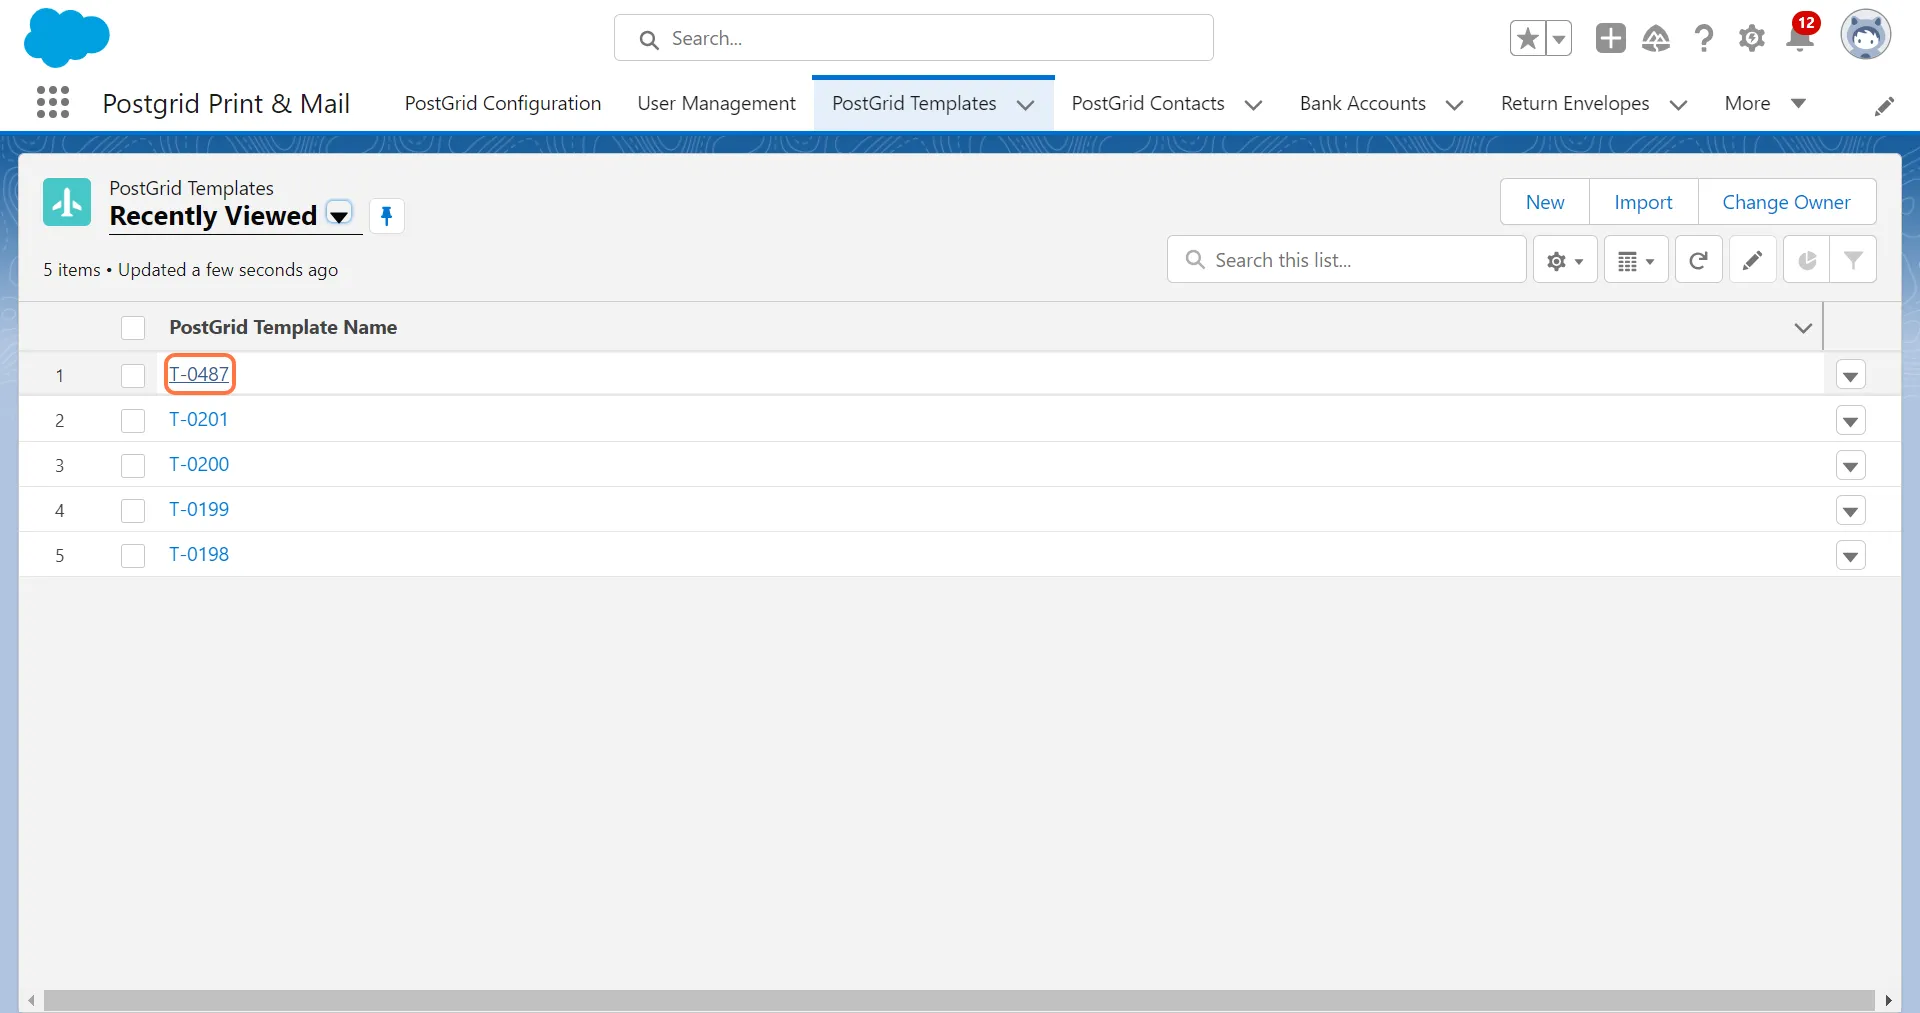
1. Click on PostGrid Templates and then click on the desired Template
Section titled “1. Click on PostGrid Templates and then click on the desired Template”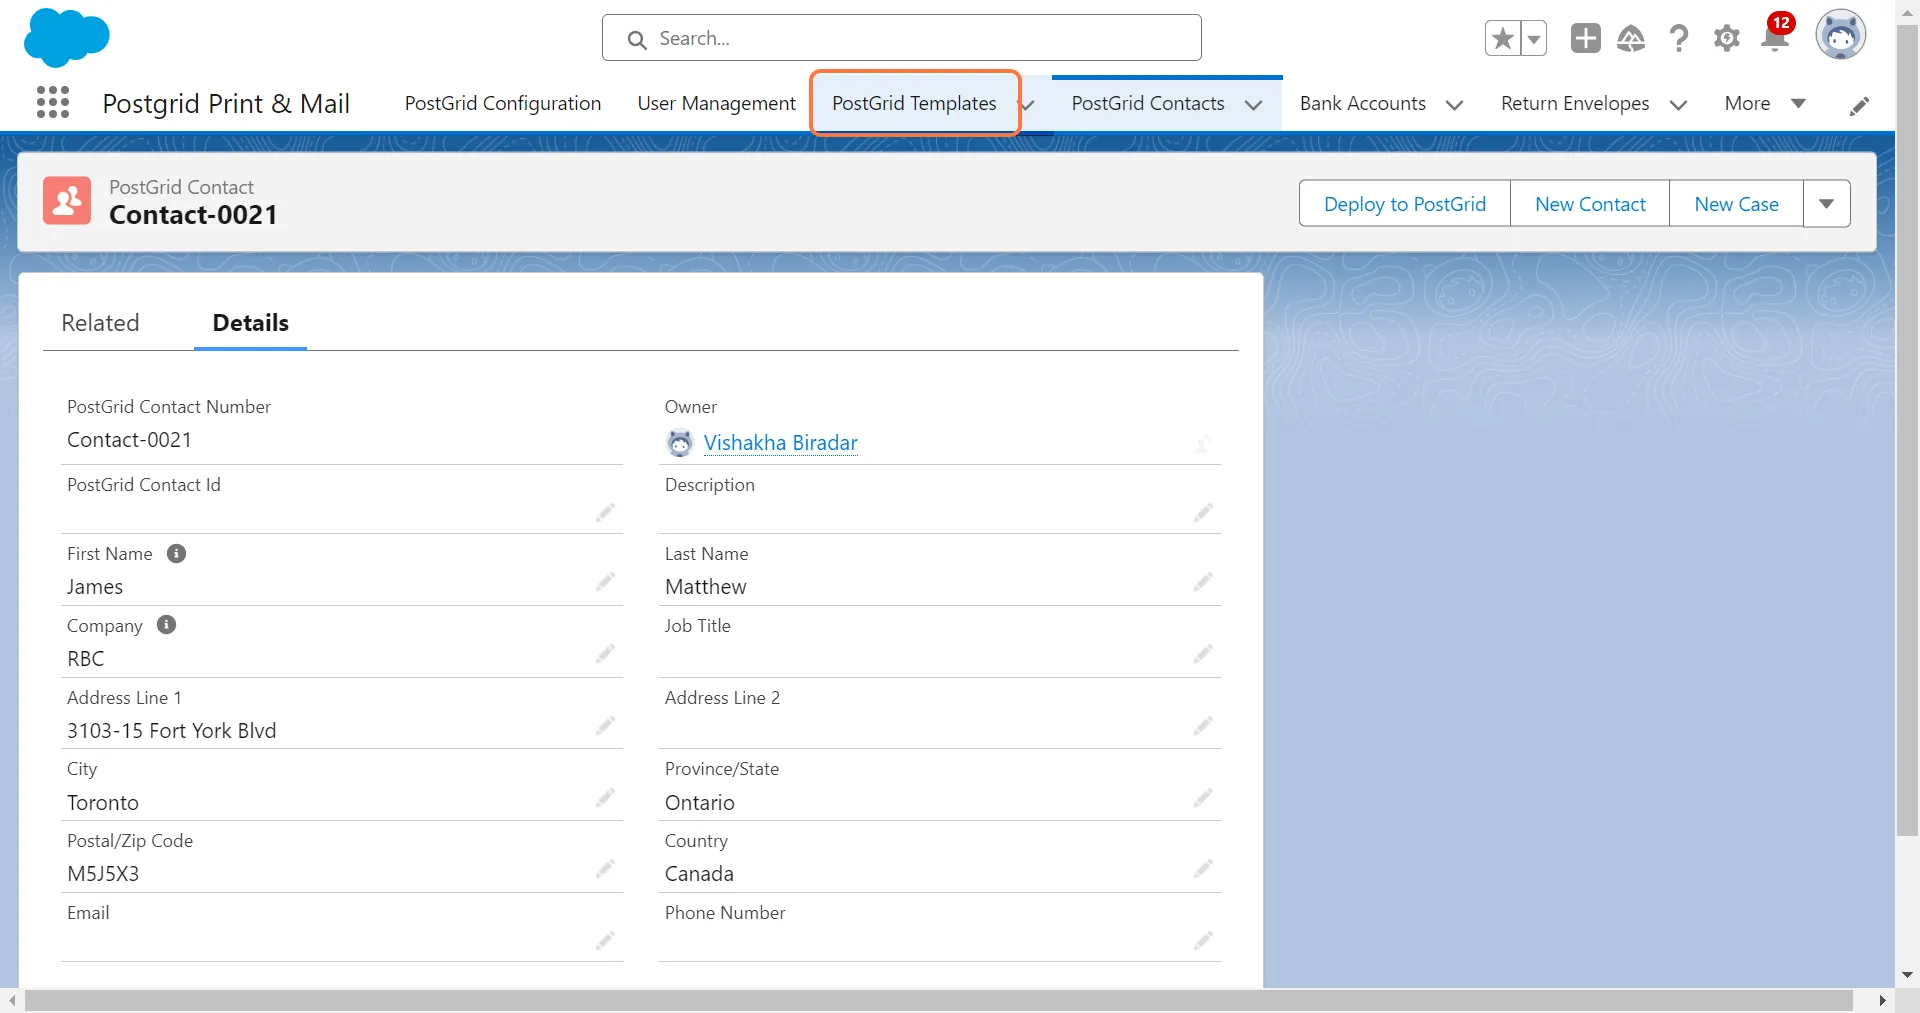
2. Copy the template ID from the browser URL and paste the template Id in the “Template_Id” field
Section titled “2. Copy the template ID from the browser URL and paste the template Id in the “Template_Id” field”
Setting up the merge variables
Section titled “Setting up the merge variables”Salesforce supports 40 merge variables from var1_0 to var4_9 for Letters and 20 merge variables from var1_0 to var2_9 for Postcards.
Below is the format to add merge variables in the HTML template that you create on the dashboard:
- Account number: {{var1_0}}
- Account Id: {{var1_1}}
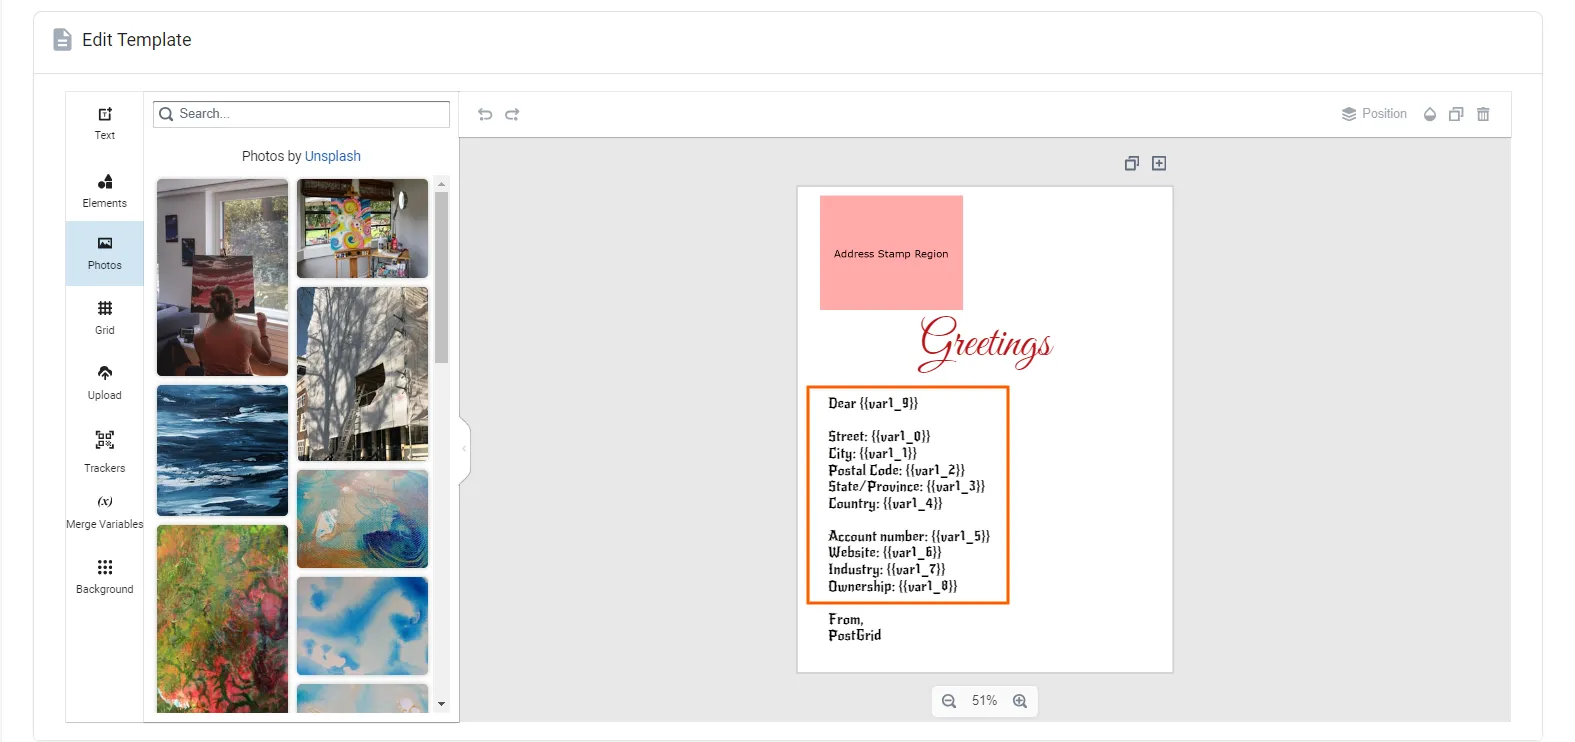
Then map the variables in the flow with the required fields in the object
Launching the FLOW
Section titled “Launching the FLOW”1. Click “Done” after completing the configuration
Section titled “1. Click “Done” after completing the configuration”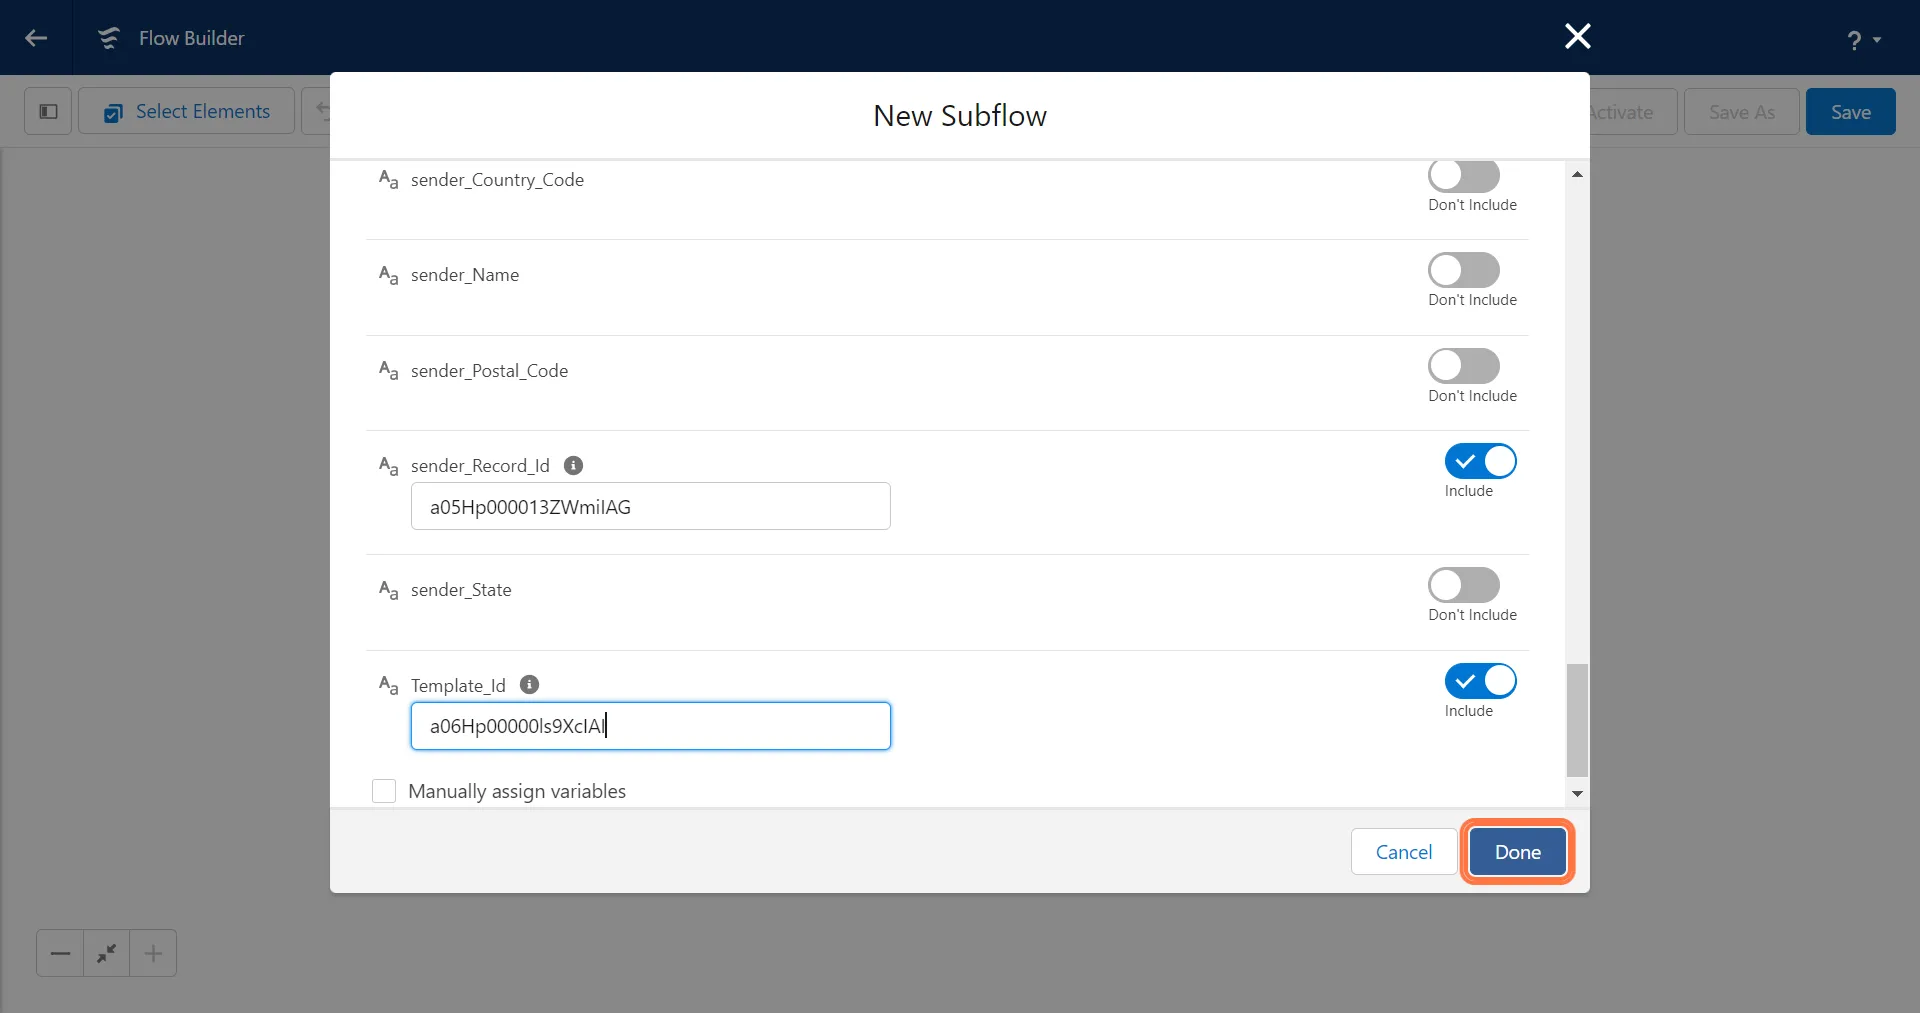
2. Click on Save to save the workflow
Section titled “2. Click on Save to save the workflow”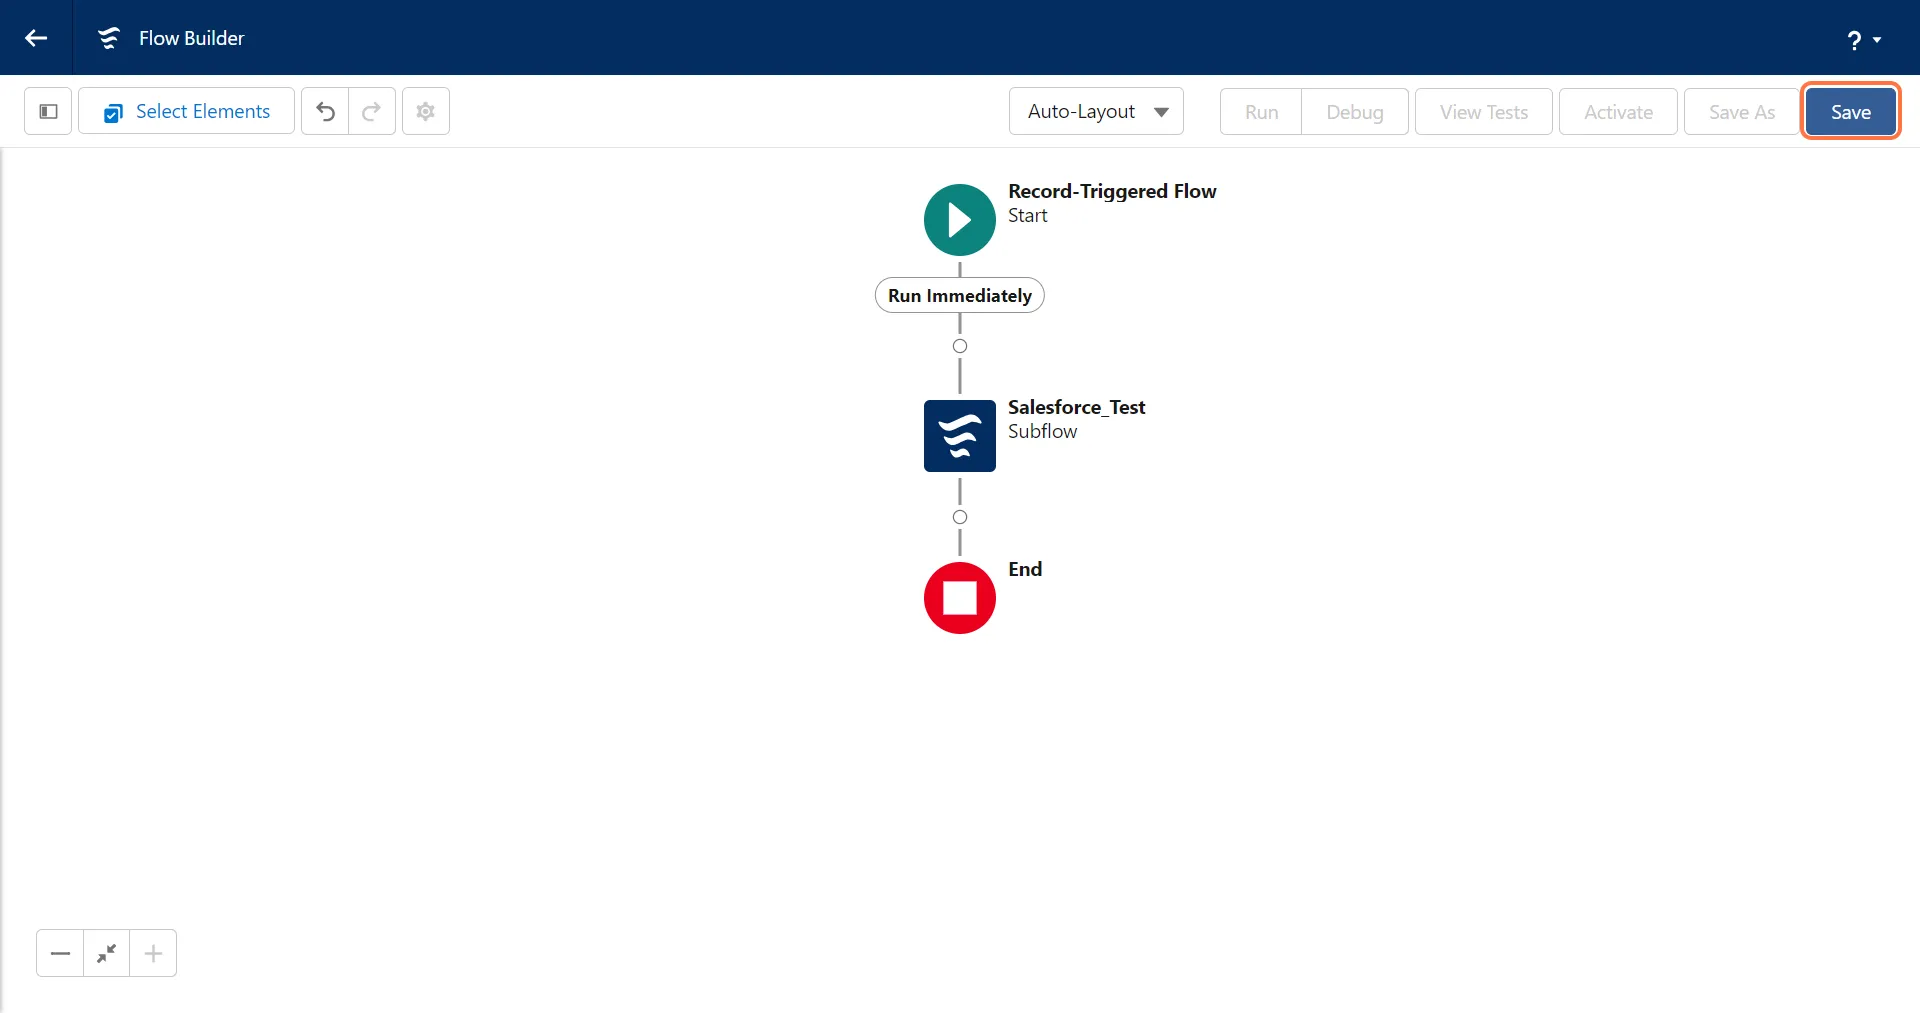
3. Add a name to the workflow under “Flow Label” and click on Save
Section titled “3. Add a name to the workflow under “Flow Label” and click on Save”
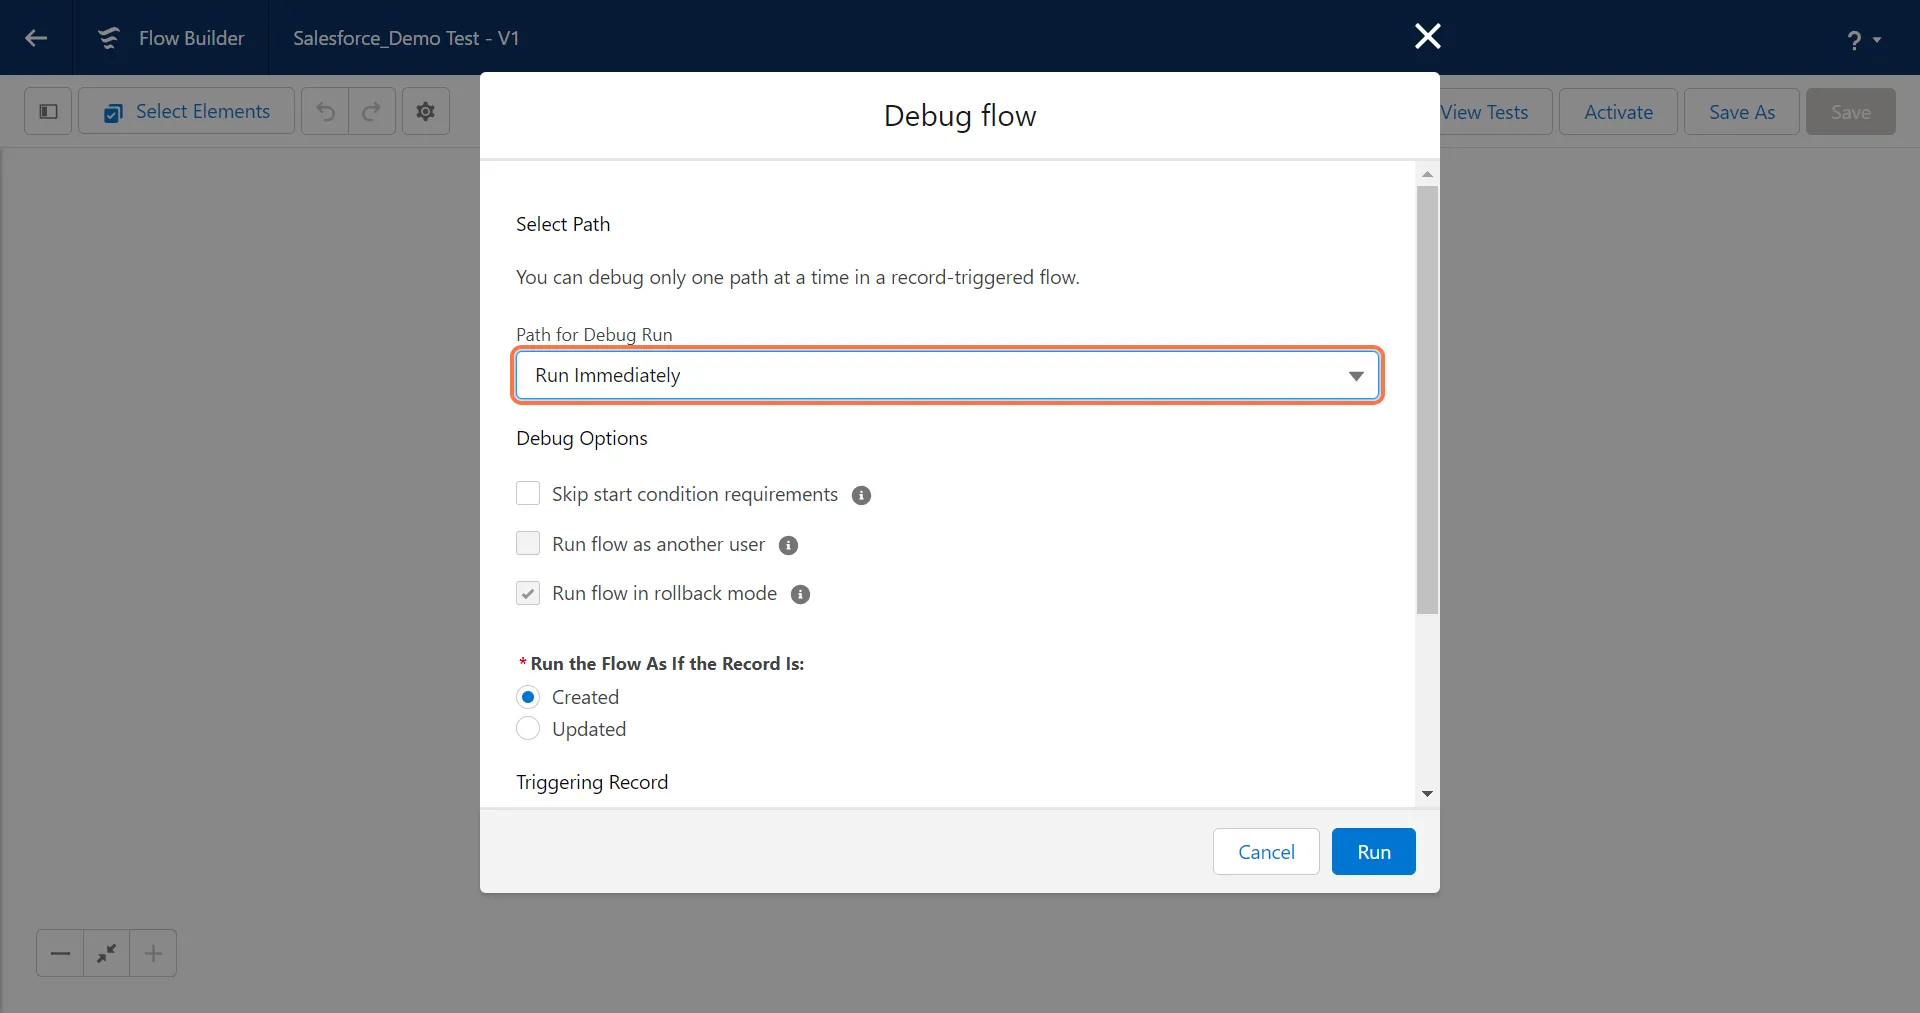
4. To check if the workflow is working fine, Click on “Debug” and click on “Run Immediately”
Section titled “4. To check if the workflow is working fine, Click on “Debug” and click on “Run Immediately””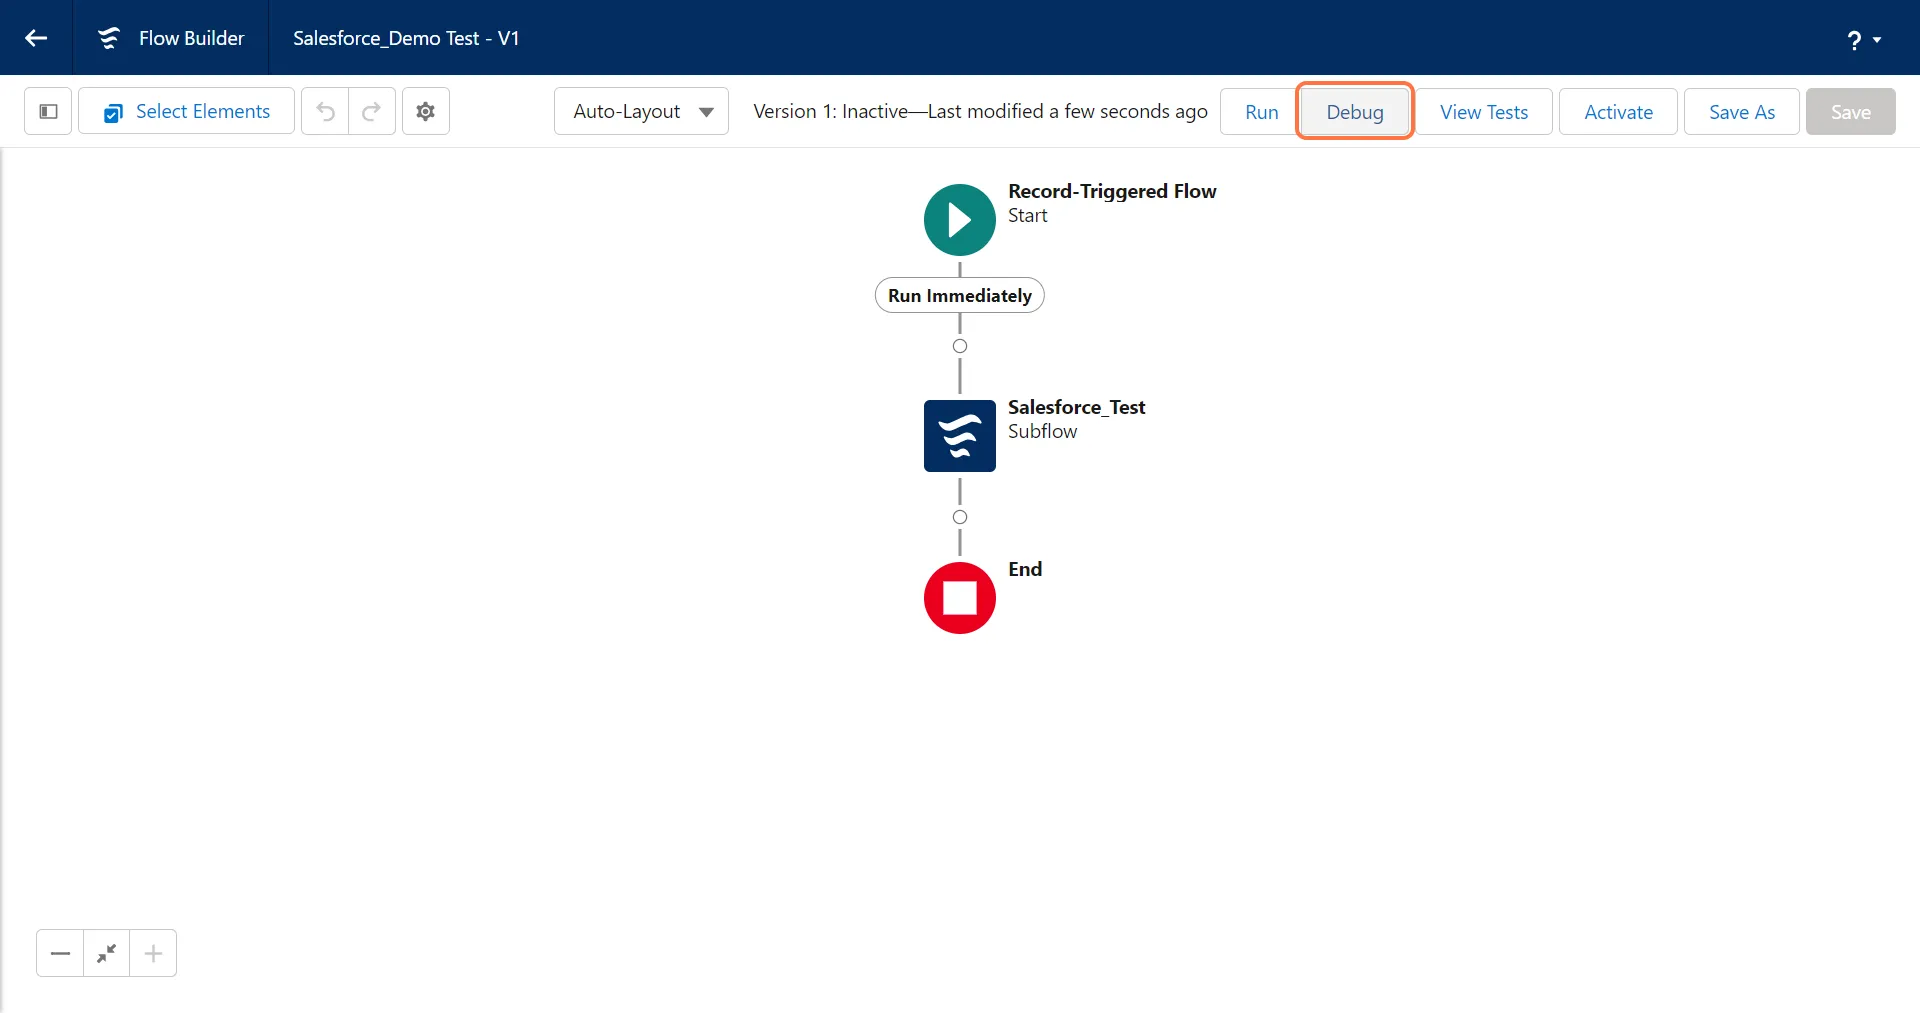
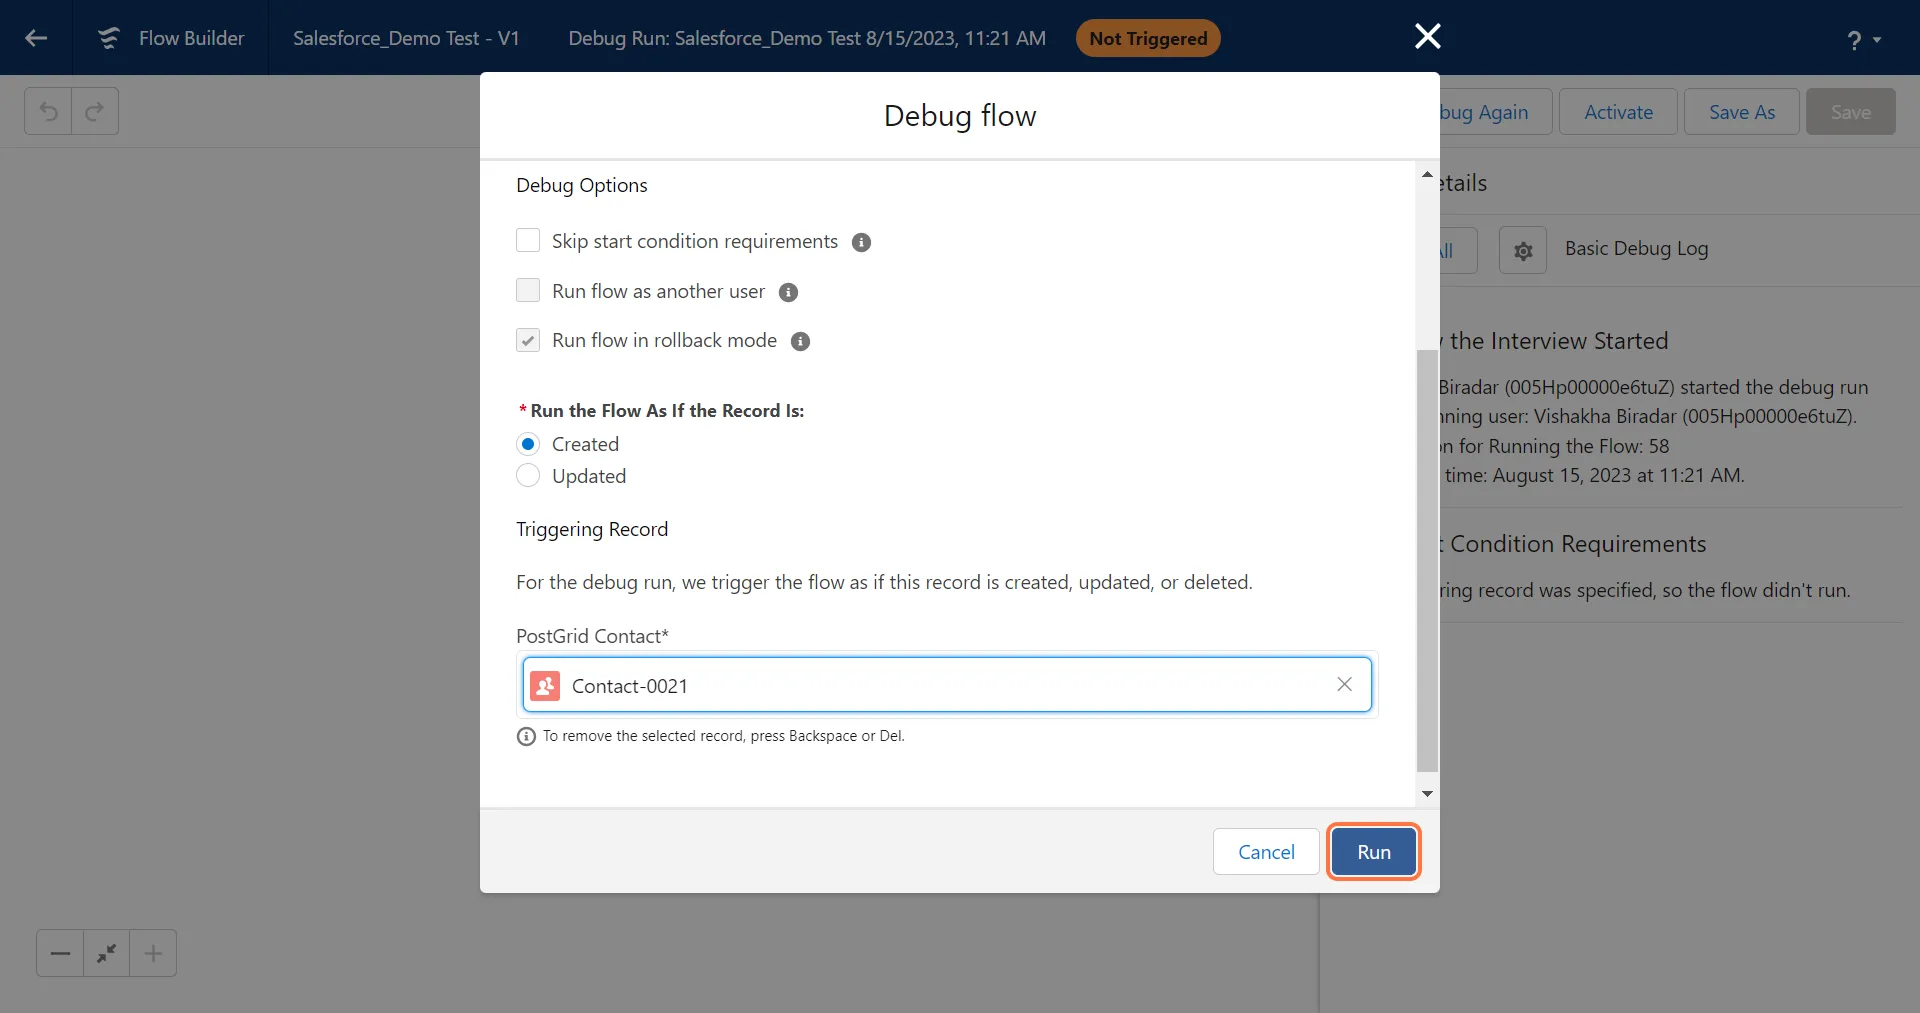
5. Select a custom object to run the workflow on and click on “Run”
Section titled “5. Select a custom object to run the workflow on and click on “Run””Please ensure that you select a contact that meets the configured triggered conditions to ensure accurate testing.

6. Click on Details panel to check the debug details
Section titled “6. Click on Details panel to check the debug details”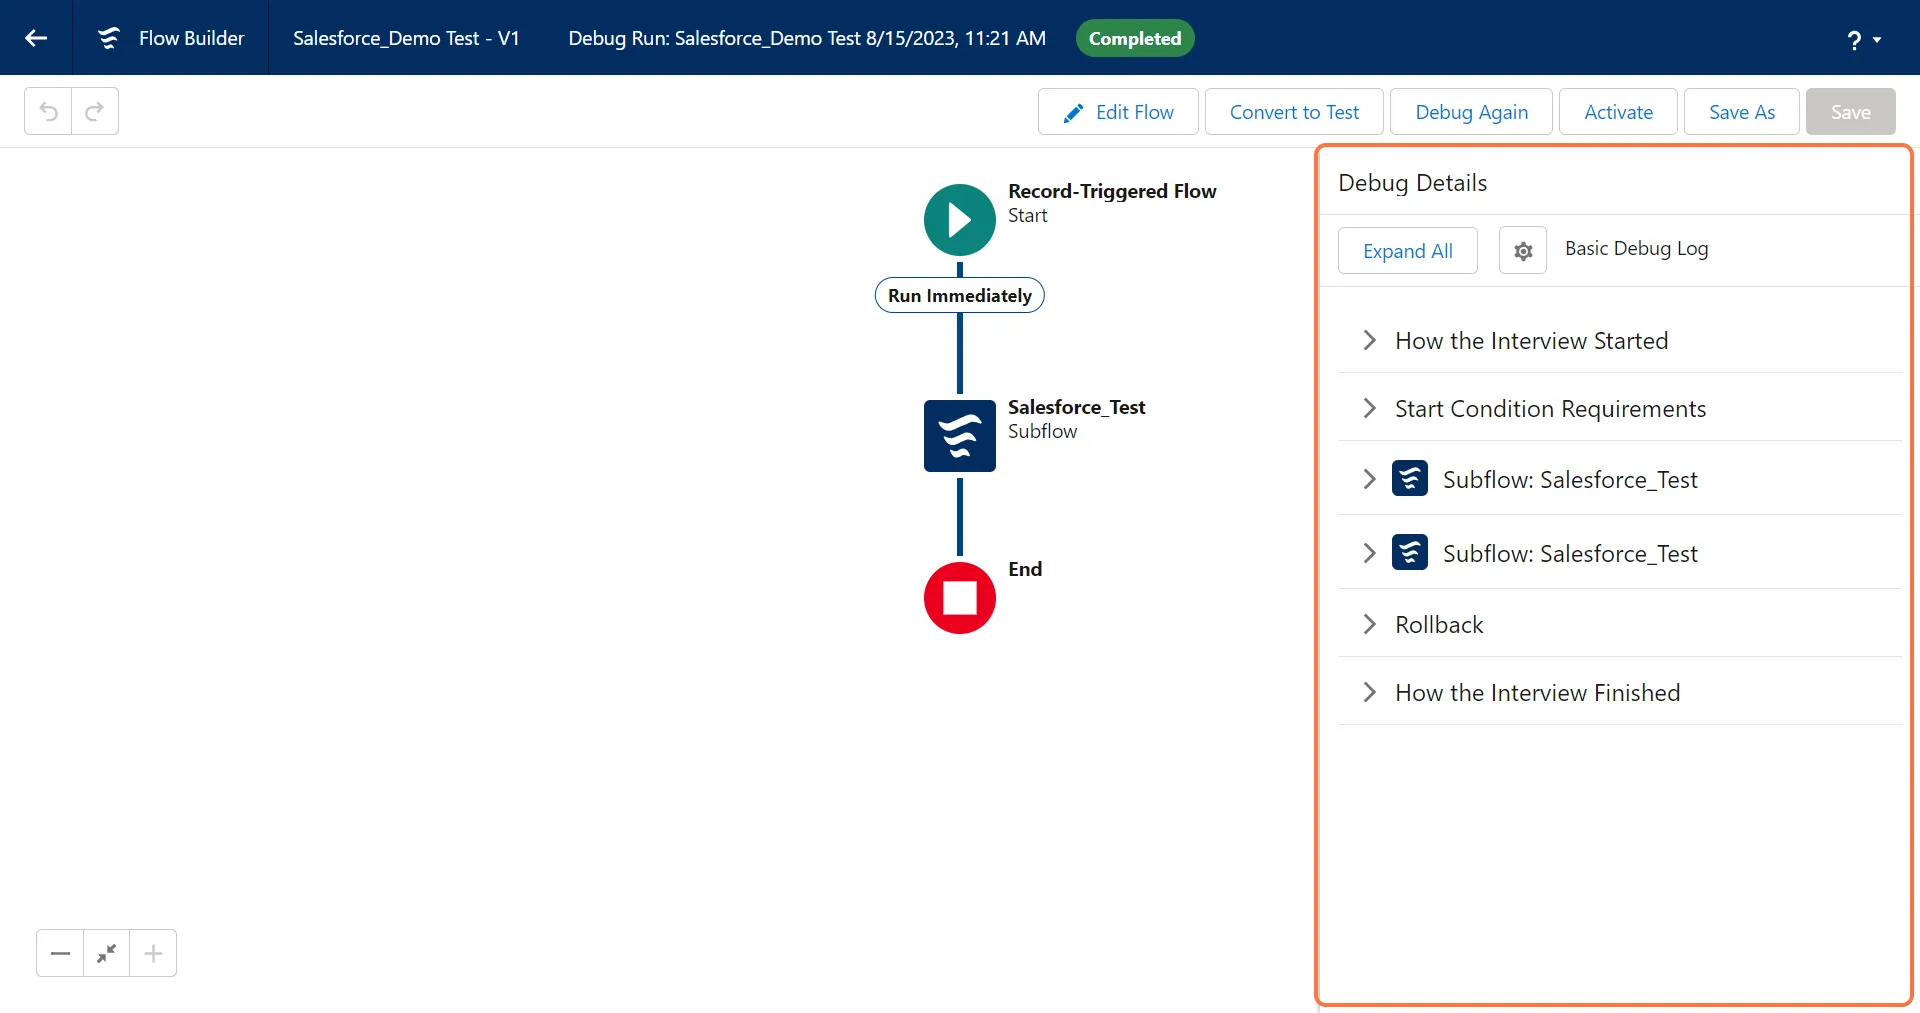
7. Click on “Activate” to activate the workflow
Section titled “7. Click on “Activate” to activate the workflow”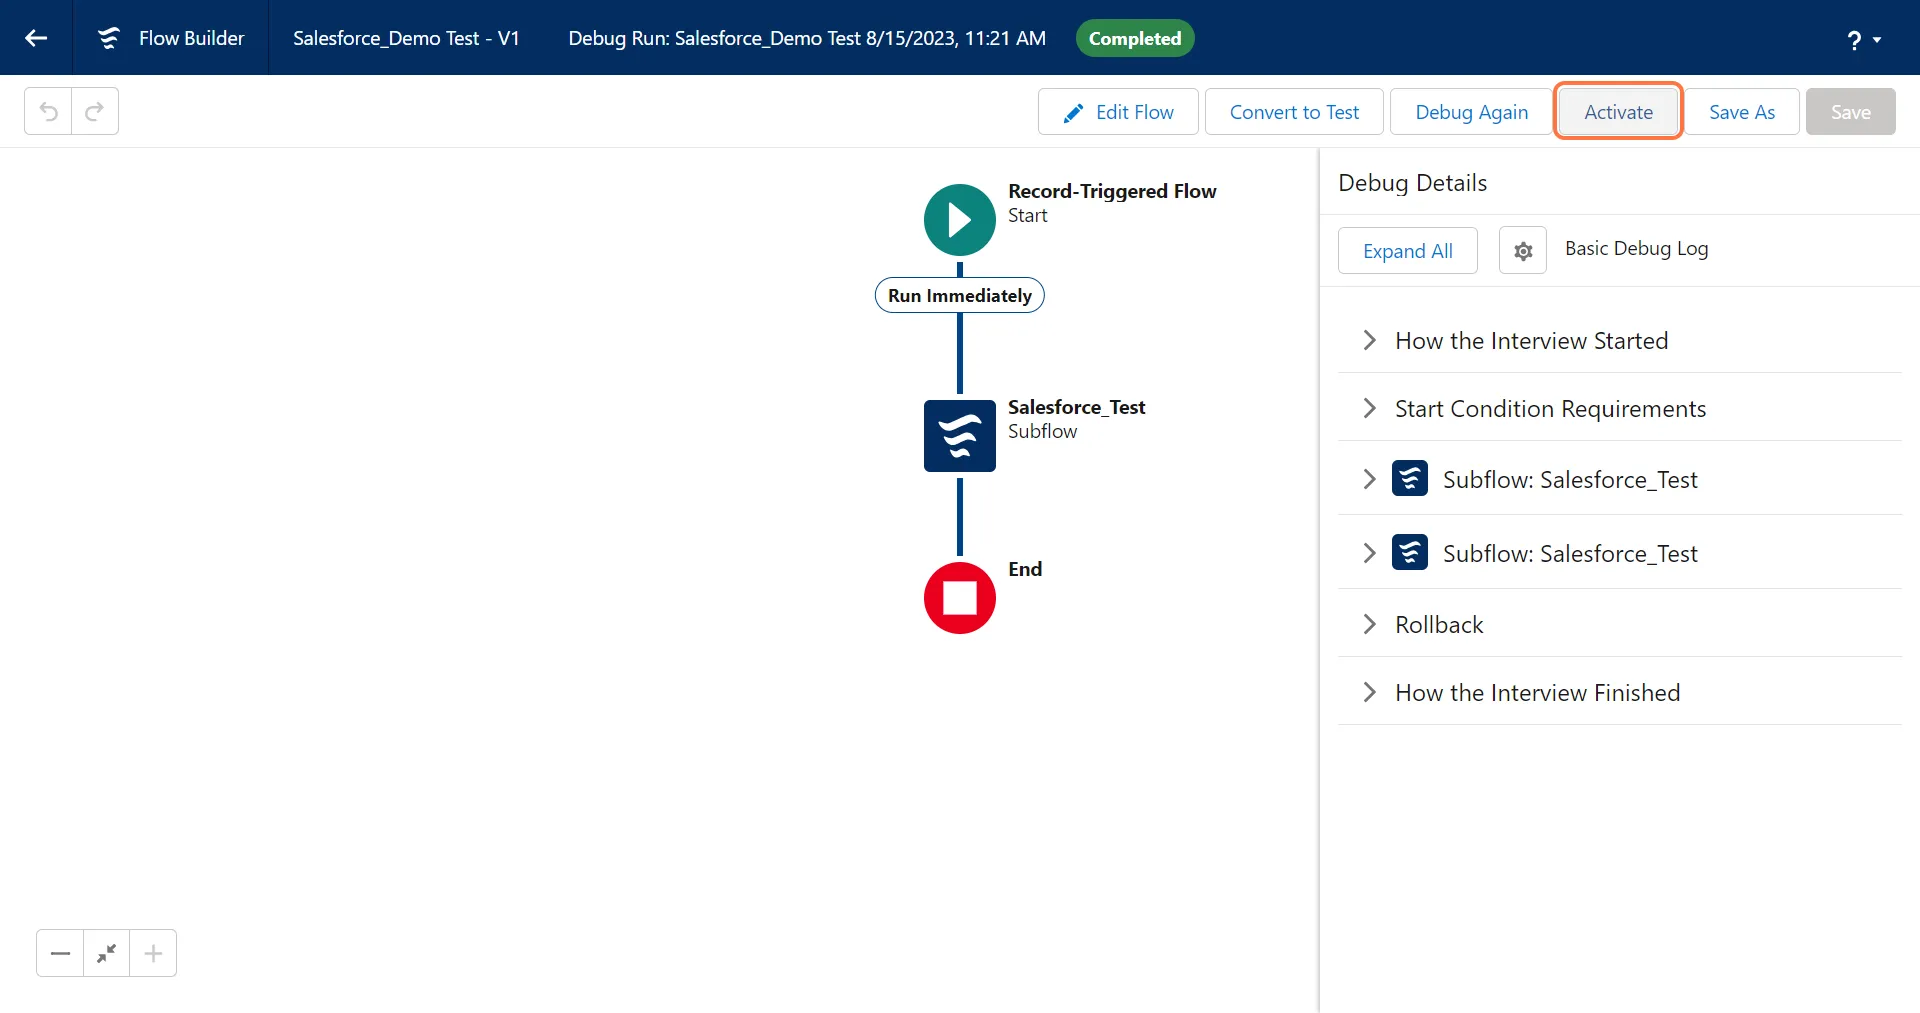
Checking Errors
Section titled “Checking Errors”- Error Log → If you are using a flow and create an order using a template or content or pdf but the order is not created then you can check the error/cause in the error log object.
- To use Error Log → setup → in the quick find box search tabs → create a new tab for the error log.
- After creating a tab for the error log you can search for it.
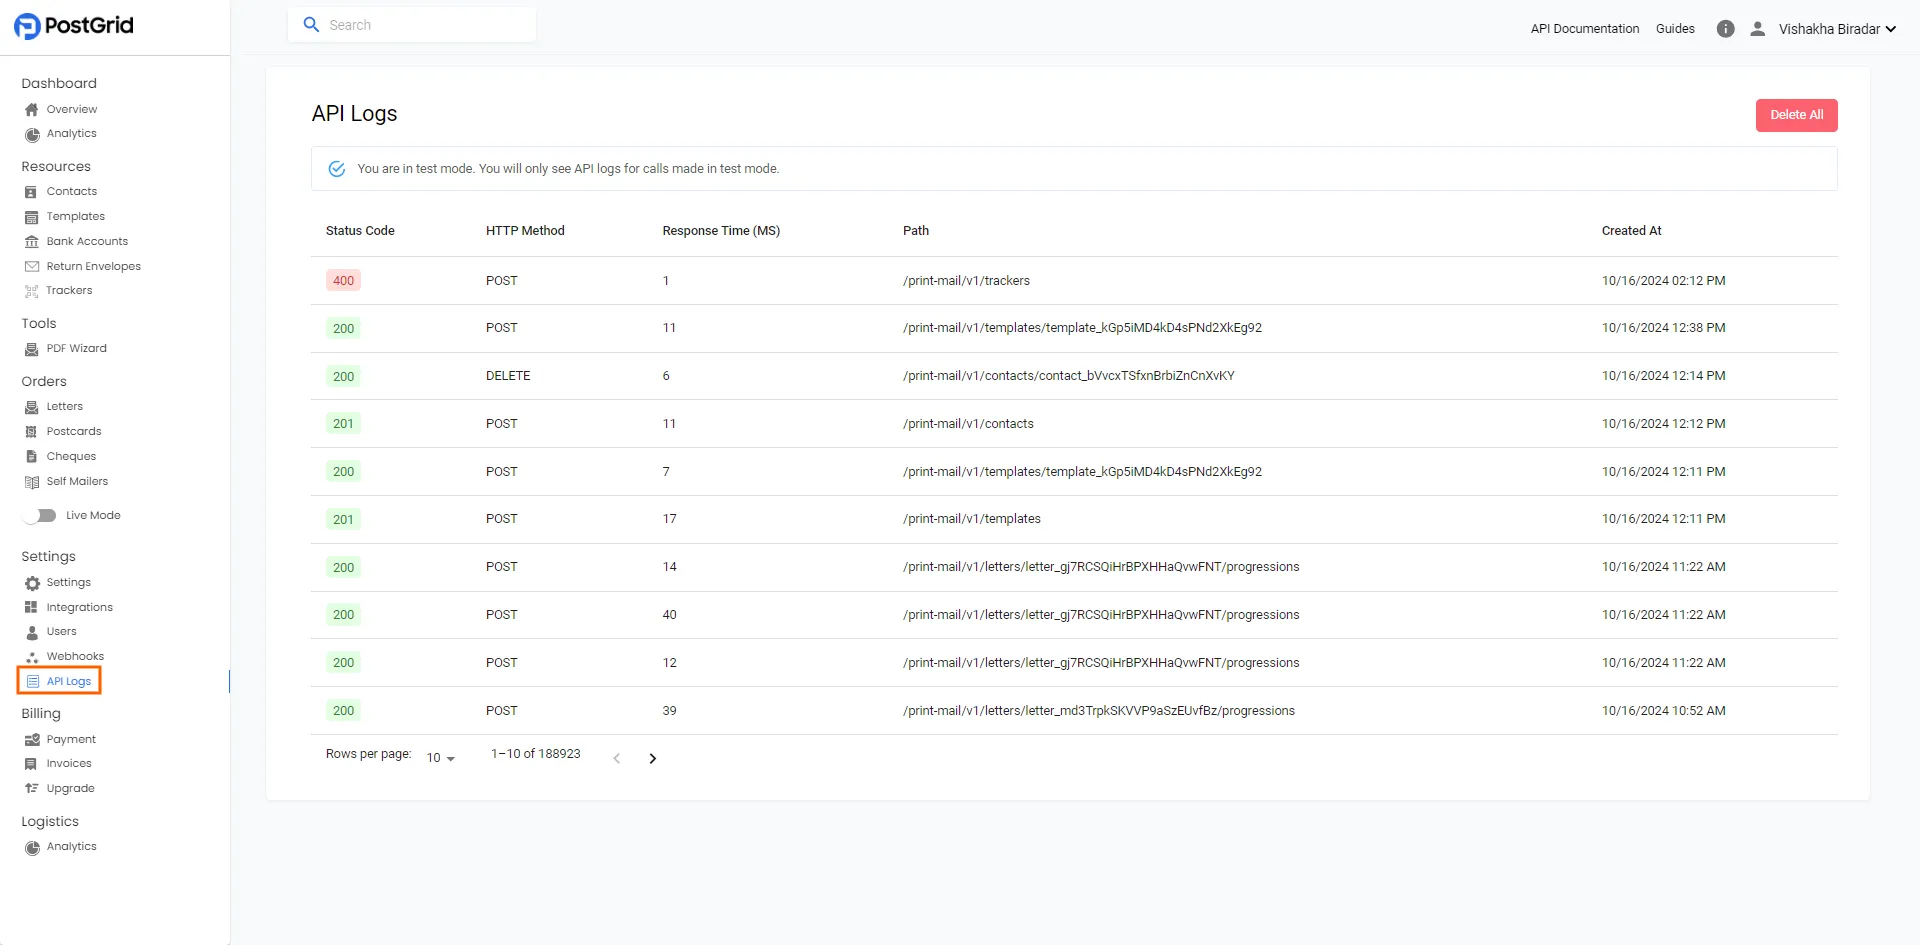
- You can also check the API logs in the PostGrid Dashboard