
Audience Setup
Create and import contacts in the Salesforce PostGrid app to use as recipients for individual or bulk mailings.
To send one-on-one or bulk mailings manually, you need to either create contacts in the PostGrid application within Salesforce or import your Salesforce contacts into the application.
Creating a new contact
Section titled “Creating a new contact”1. Click on “PostGrid Contacts” and then click on “New”
Section titled “1. Click on “PostGrid Contacts” and then click on “New””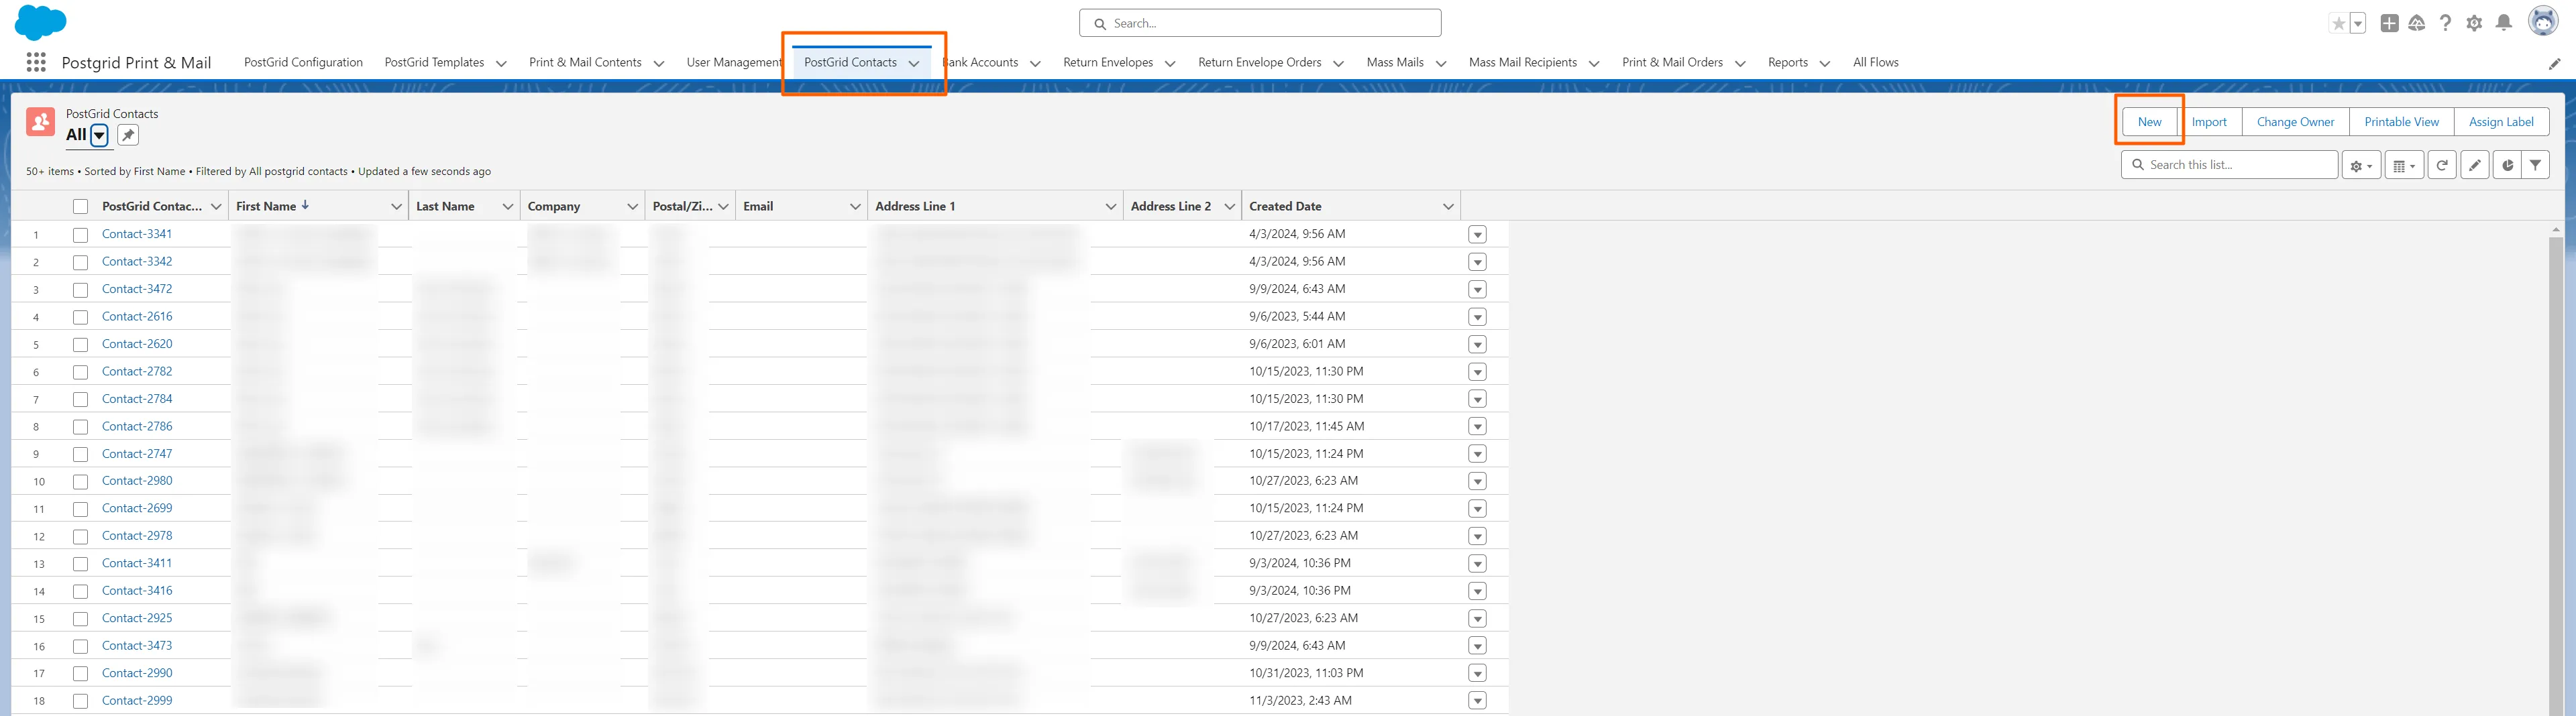
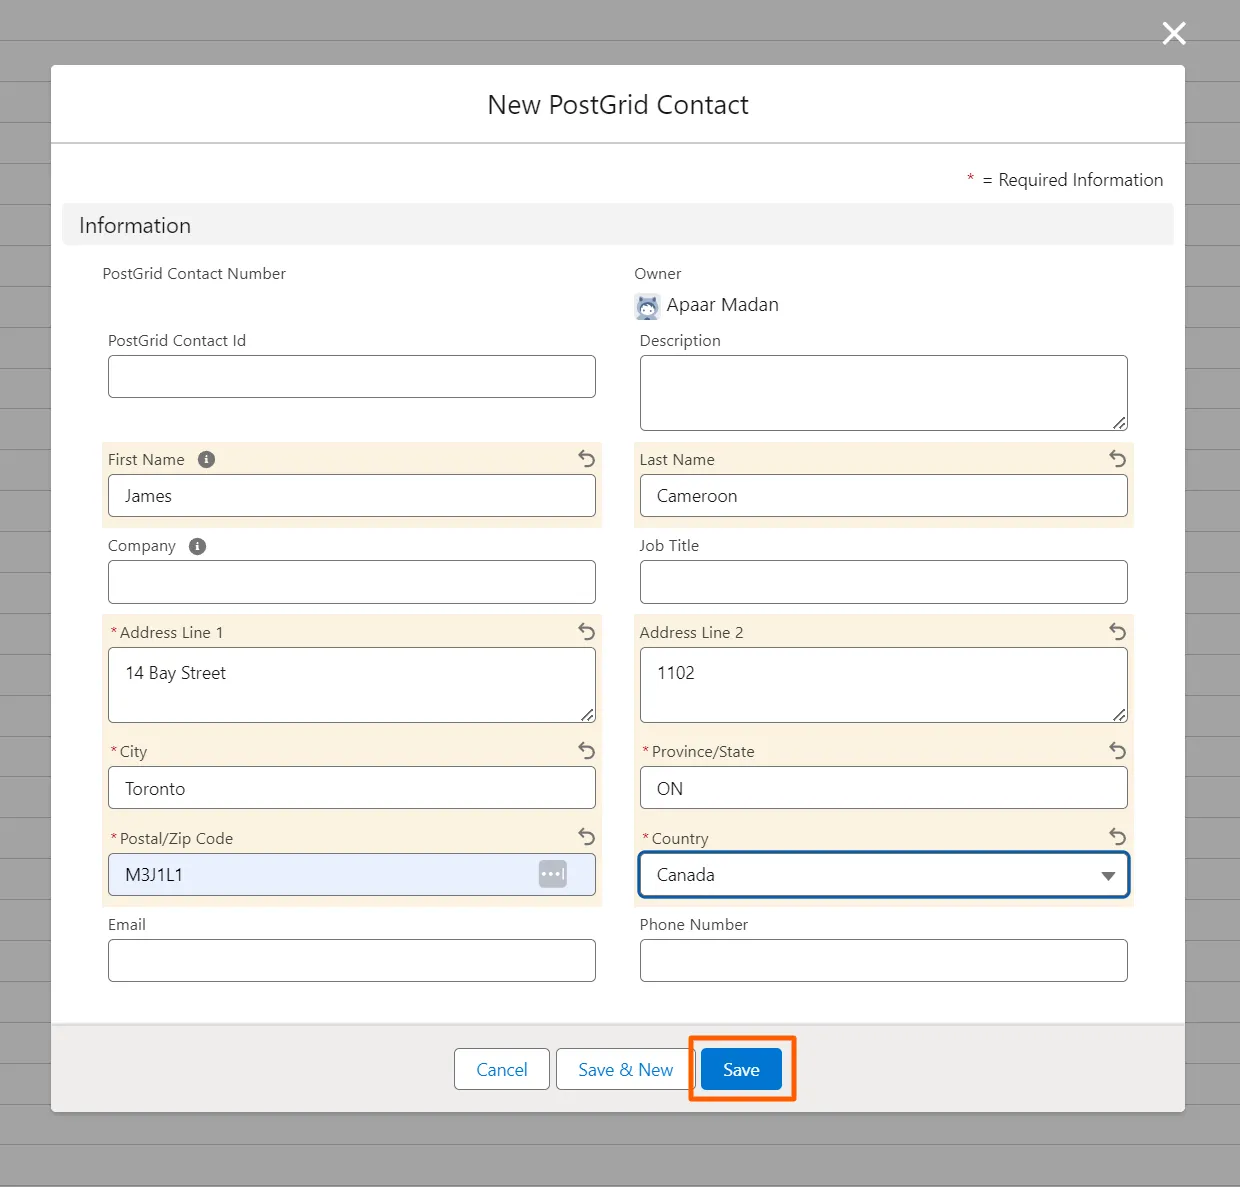
2. Add the First Name and other contact details and click on “Save”
Section titled “2. Add the First Name and other contact details and click on “Save””- You can either add the First Name for the contact or the Company. Adding one of the fields is mandatory
- You can either add the code for the province/state or the complete name
3. Click on “Deploy to PostGrid” to add the contact to the PostGrid dashboard
Section titled “3. Click on “Deploy to PostGrid” to add the contact to the PostGrid dashboard”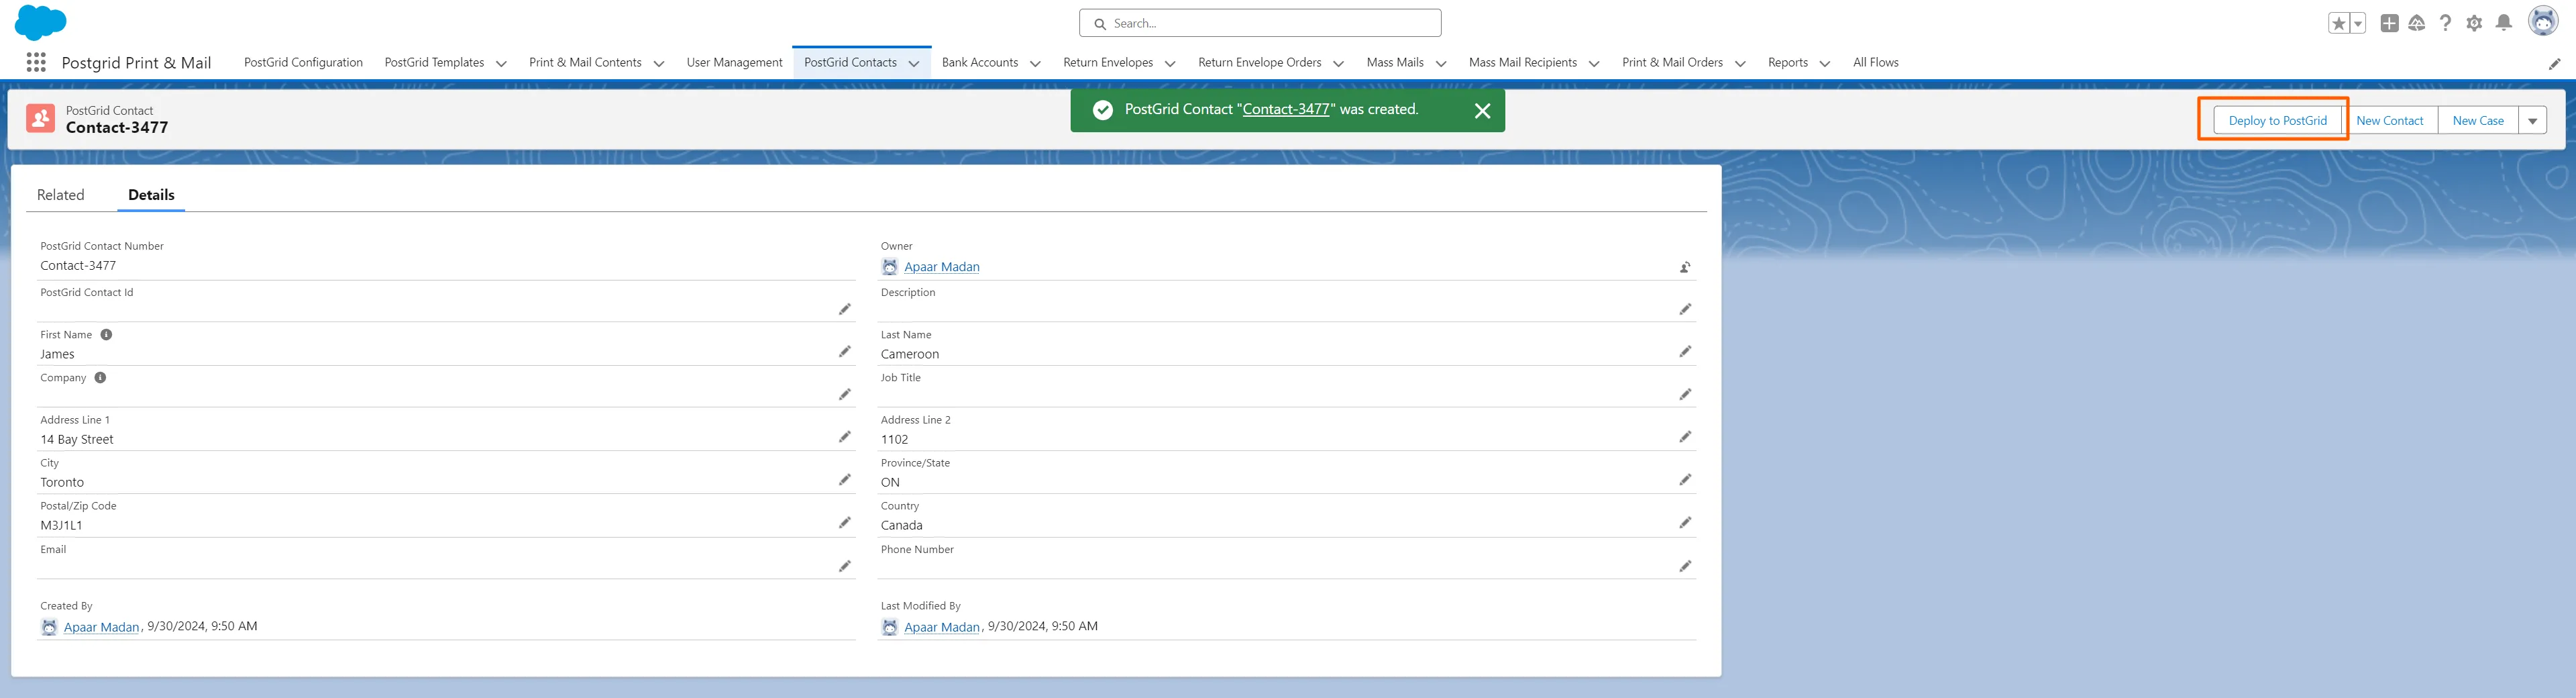
Importing Salesforce contacts to “PostGrid Contacts”
Section titled “Importing Salesforce contacts to “PostGrid Contacts””You can also import your Salesforce contacts to “PostGrid Contacts” using the Data Import Wizard.
1. Click on “Import”
Section titled “1. Click on “Import””
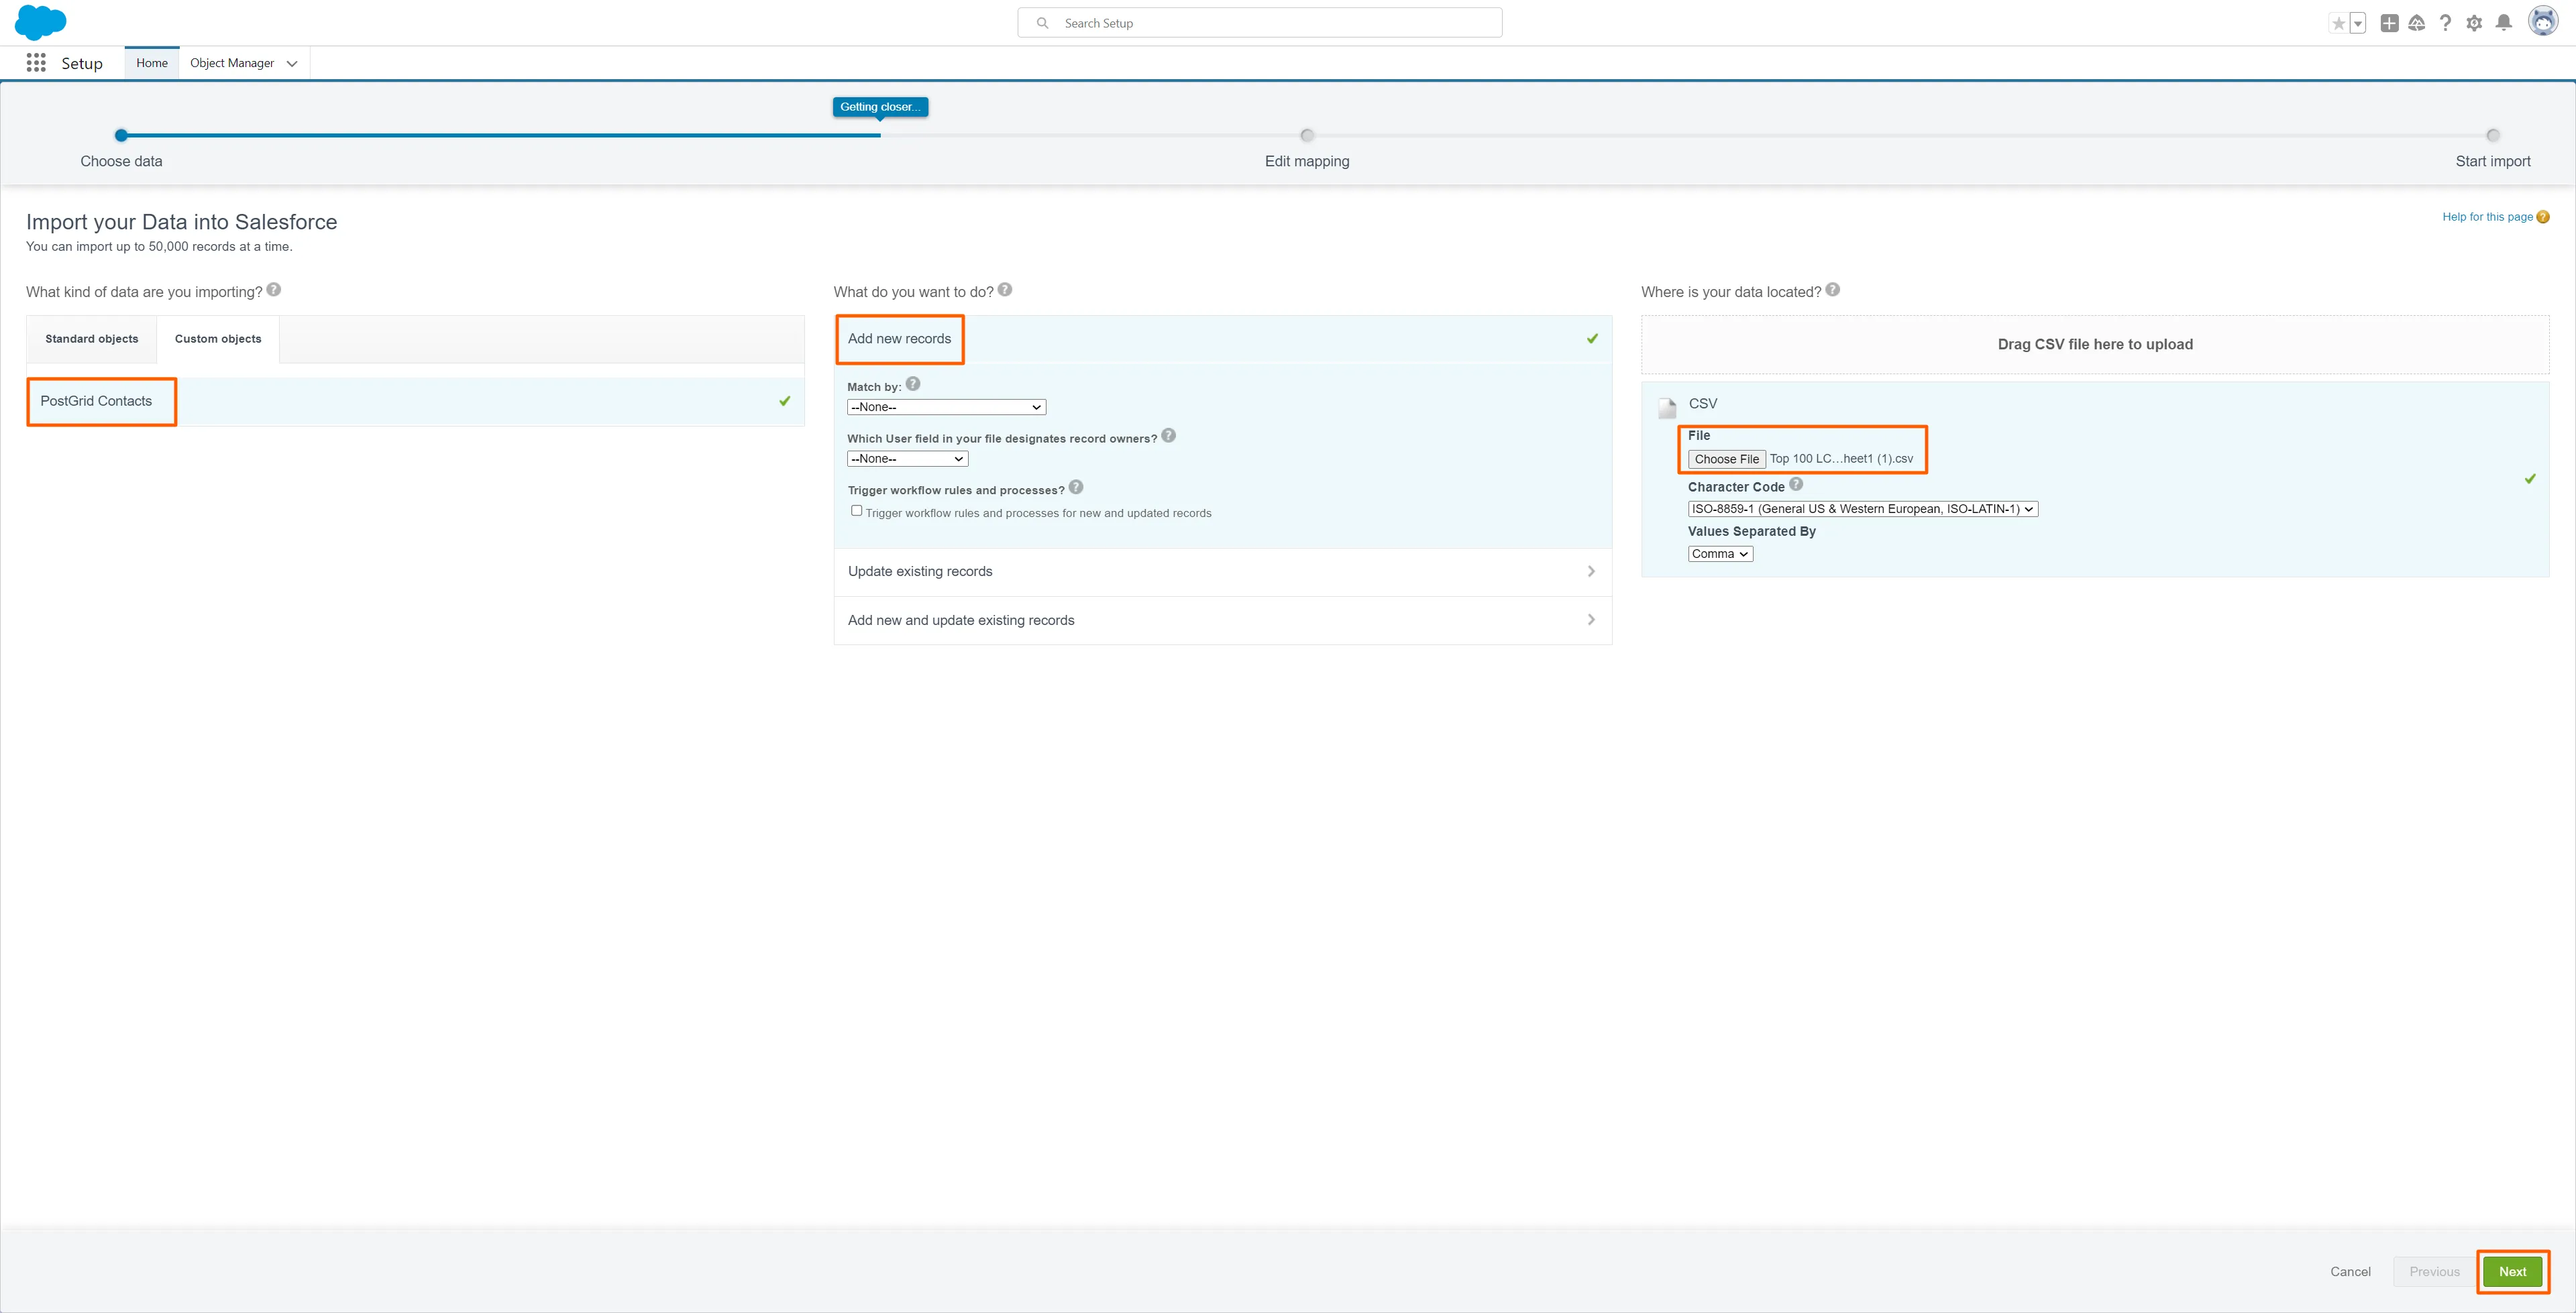
2. Click on “PostGrid Contacts” under Custom Objects. Next, click on “Add new Records”
Section titled “2. Click on “PostGrid Contacts” under Custom Objects. Next, click on “Add new Records””- Because you are adding new records, you don’t have to do the mapping for “Match by”, “Which User field in your file designates record owners?” and “Trigger workflow rules and processes?”
- Drag and drop the CSV or upload the CSV and click on “Next”
3. Map the Salesforce objects to the correct CSV headers and click on “Next”
Section titled “3. Map the Salesforce objects to the correct CSV headers and click on “Next””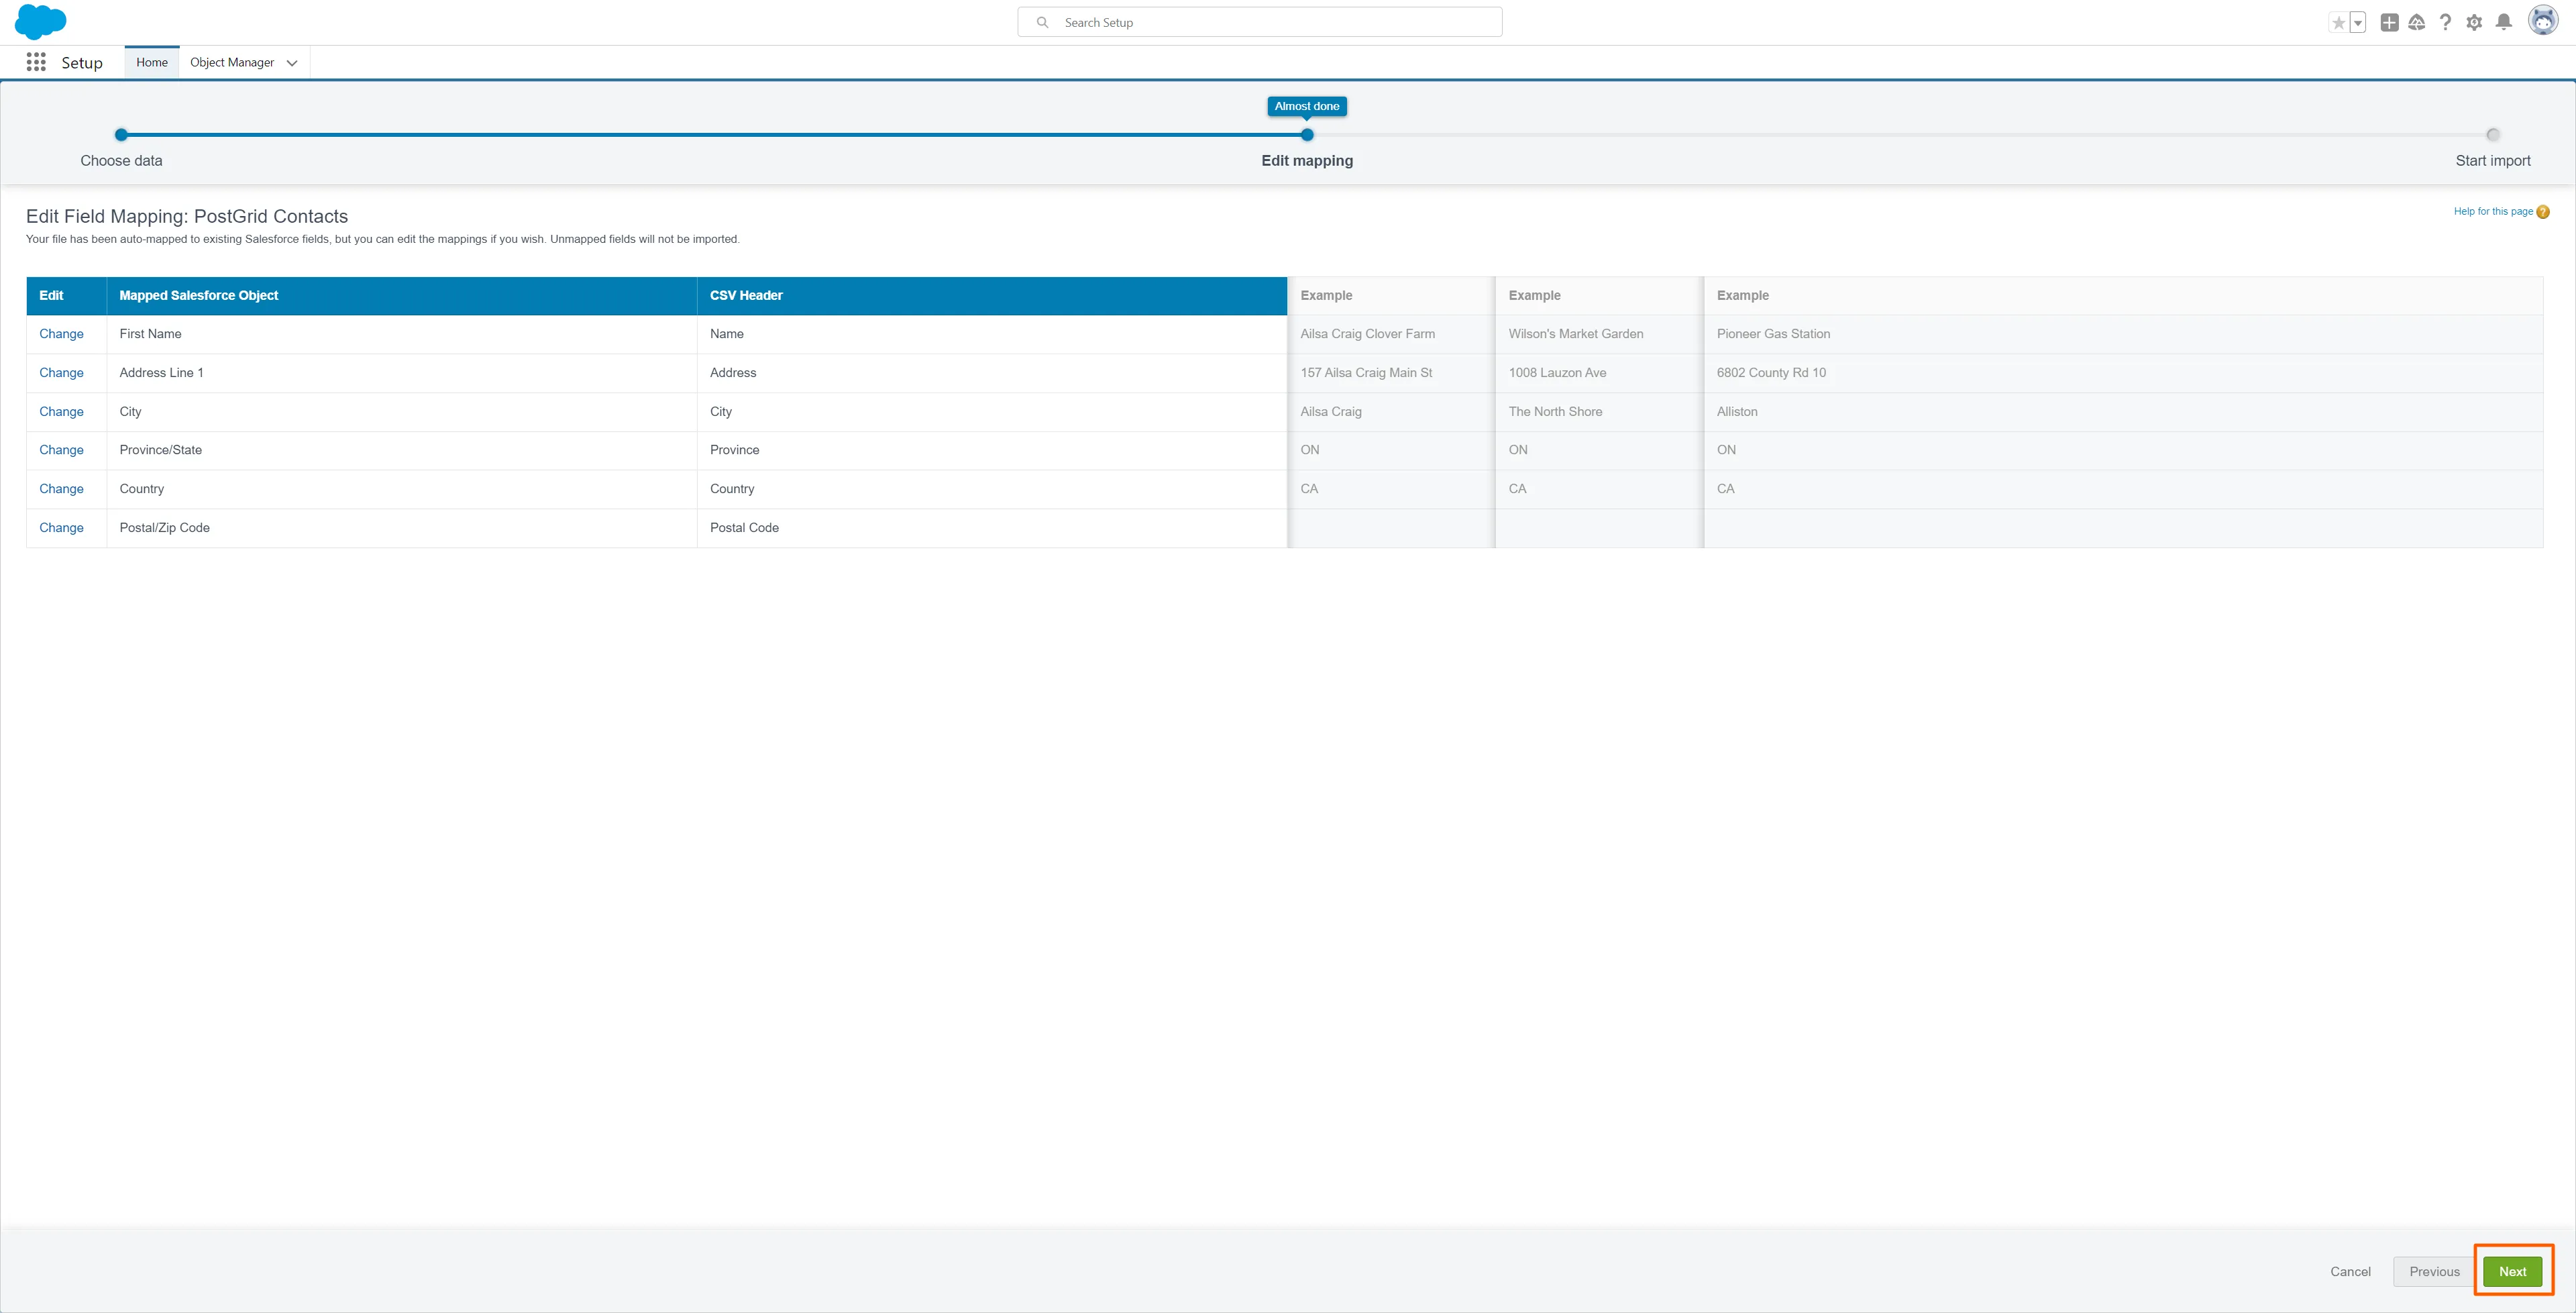
4. Review the Mapping and click on “Start Import”
Section titled “4. Review the Mapping and click on “Start Import””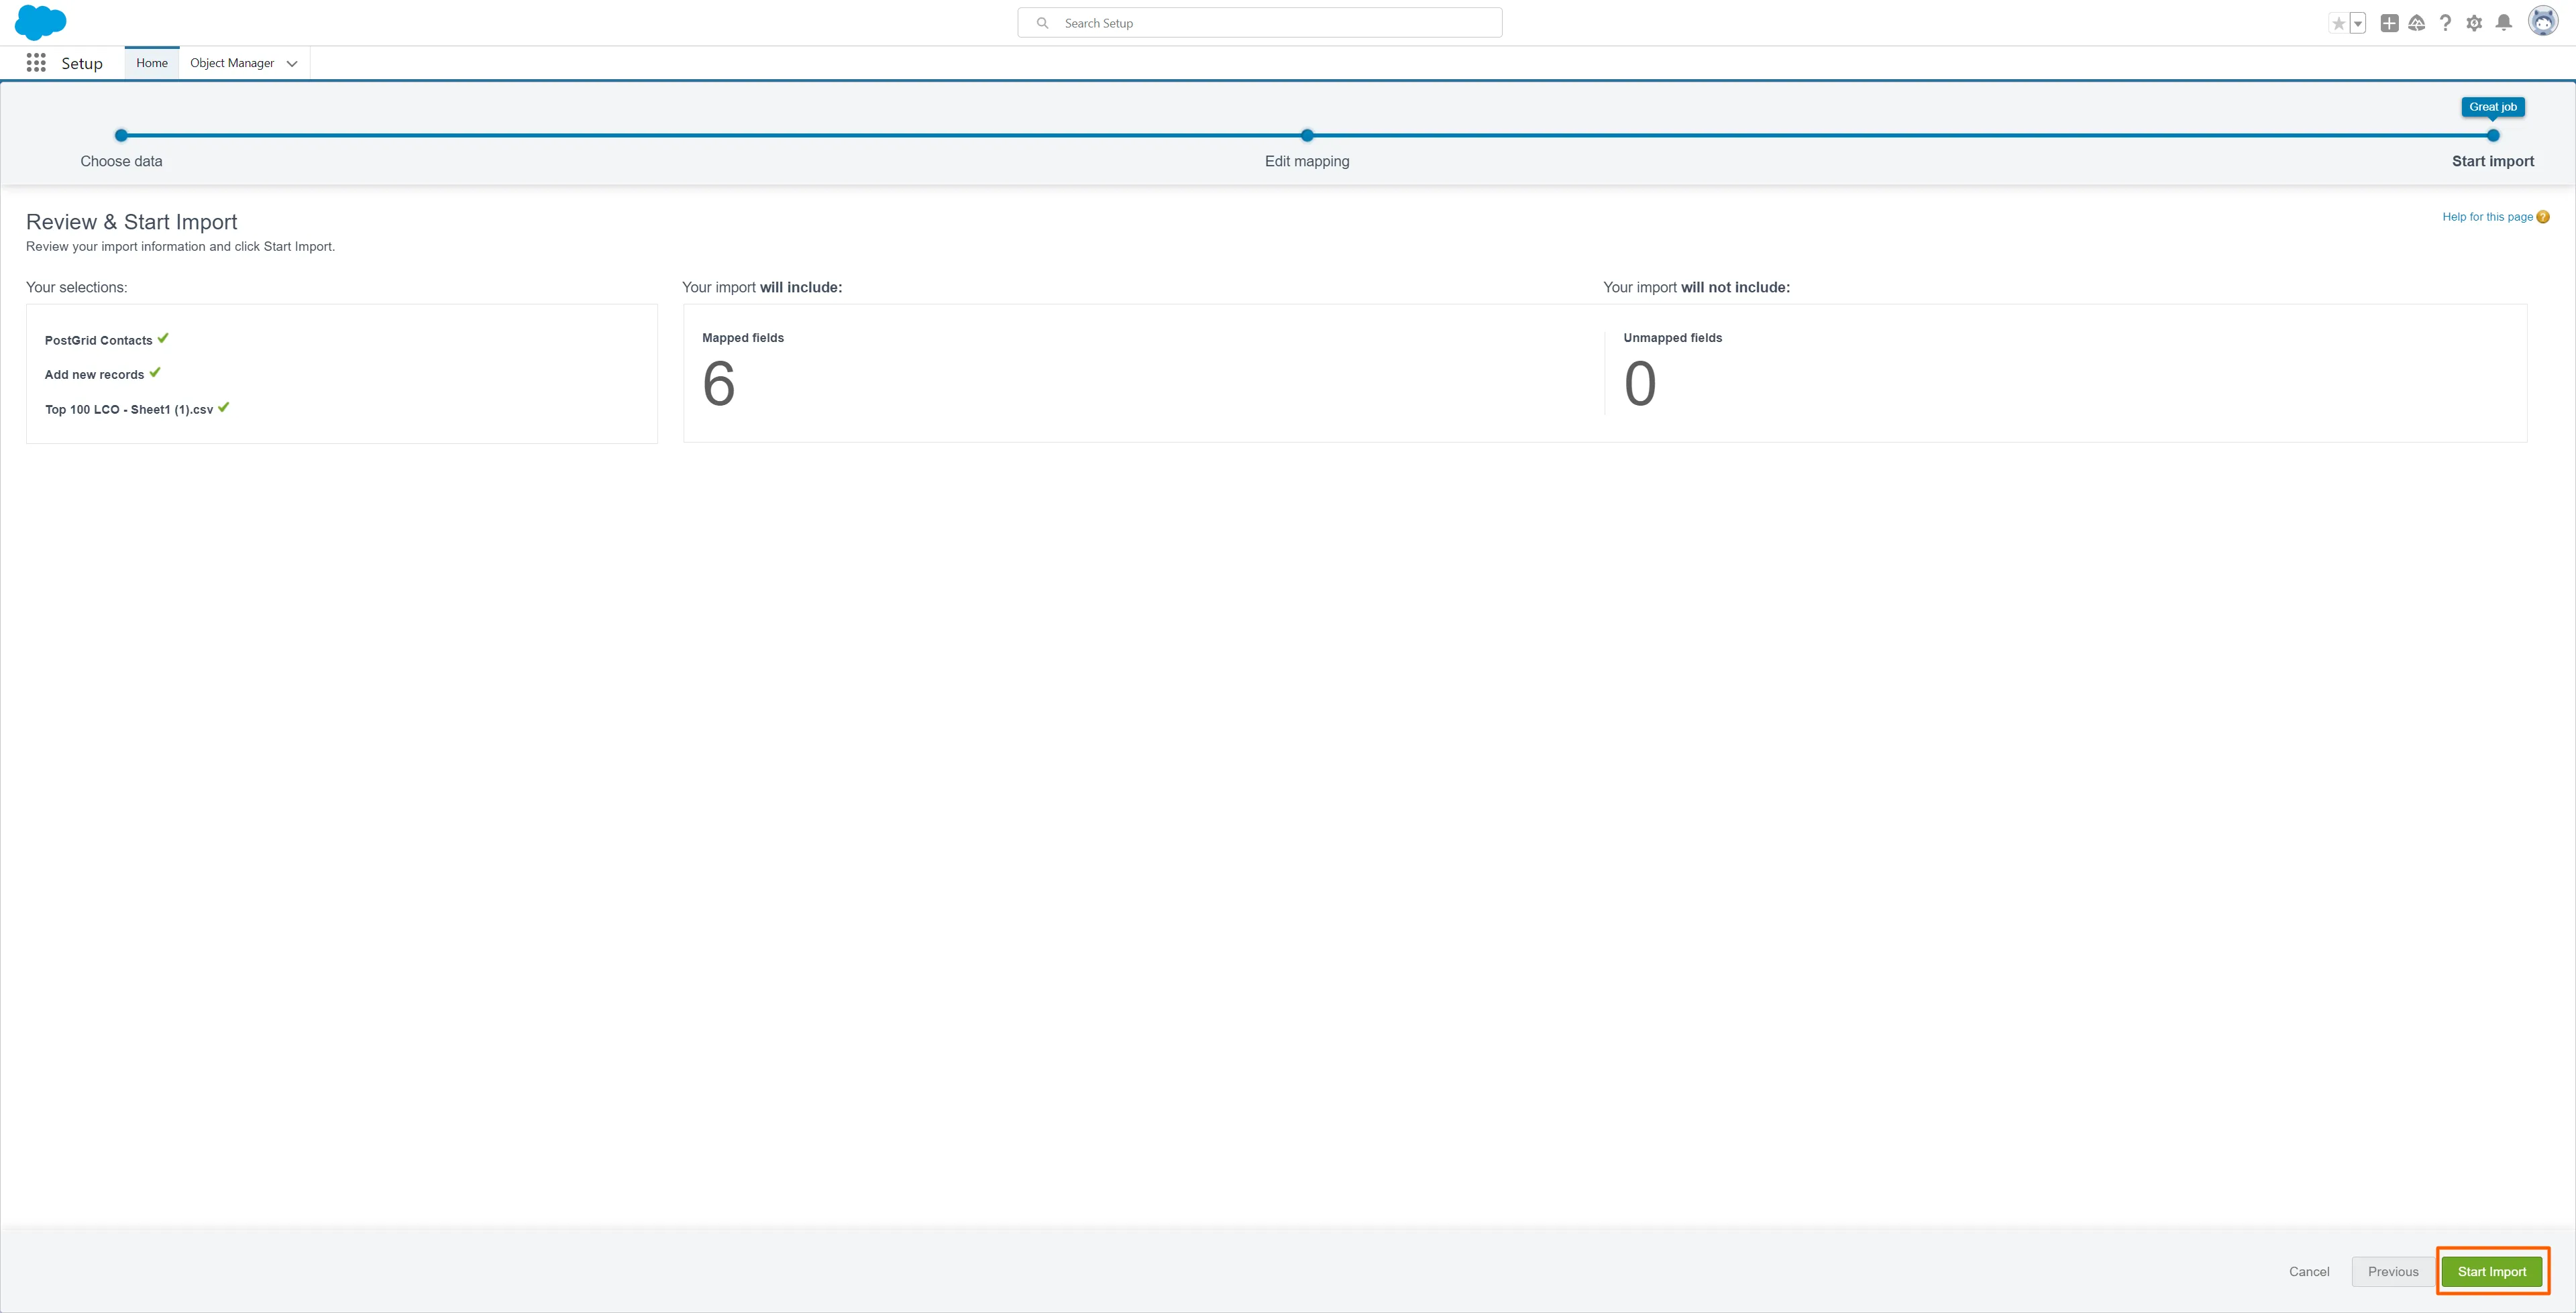
You will be able to see a report post the upload is completed.
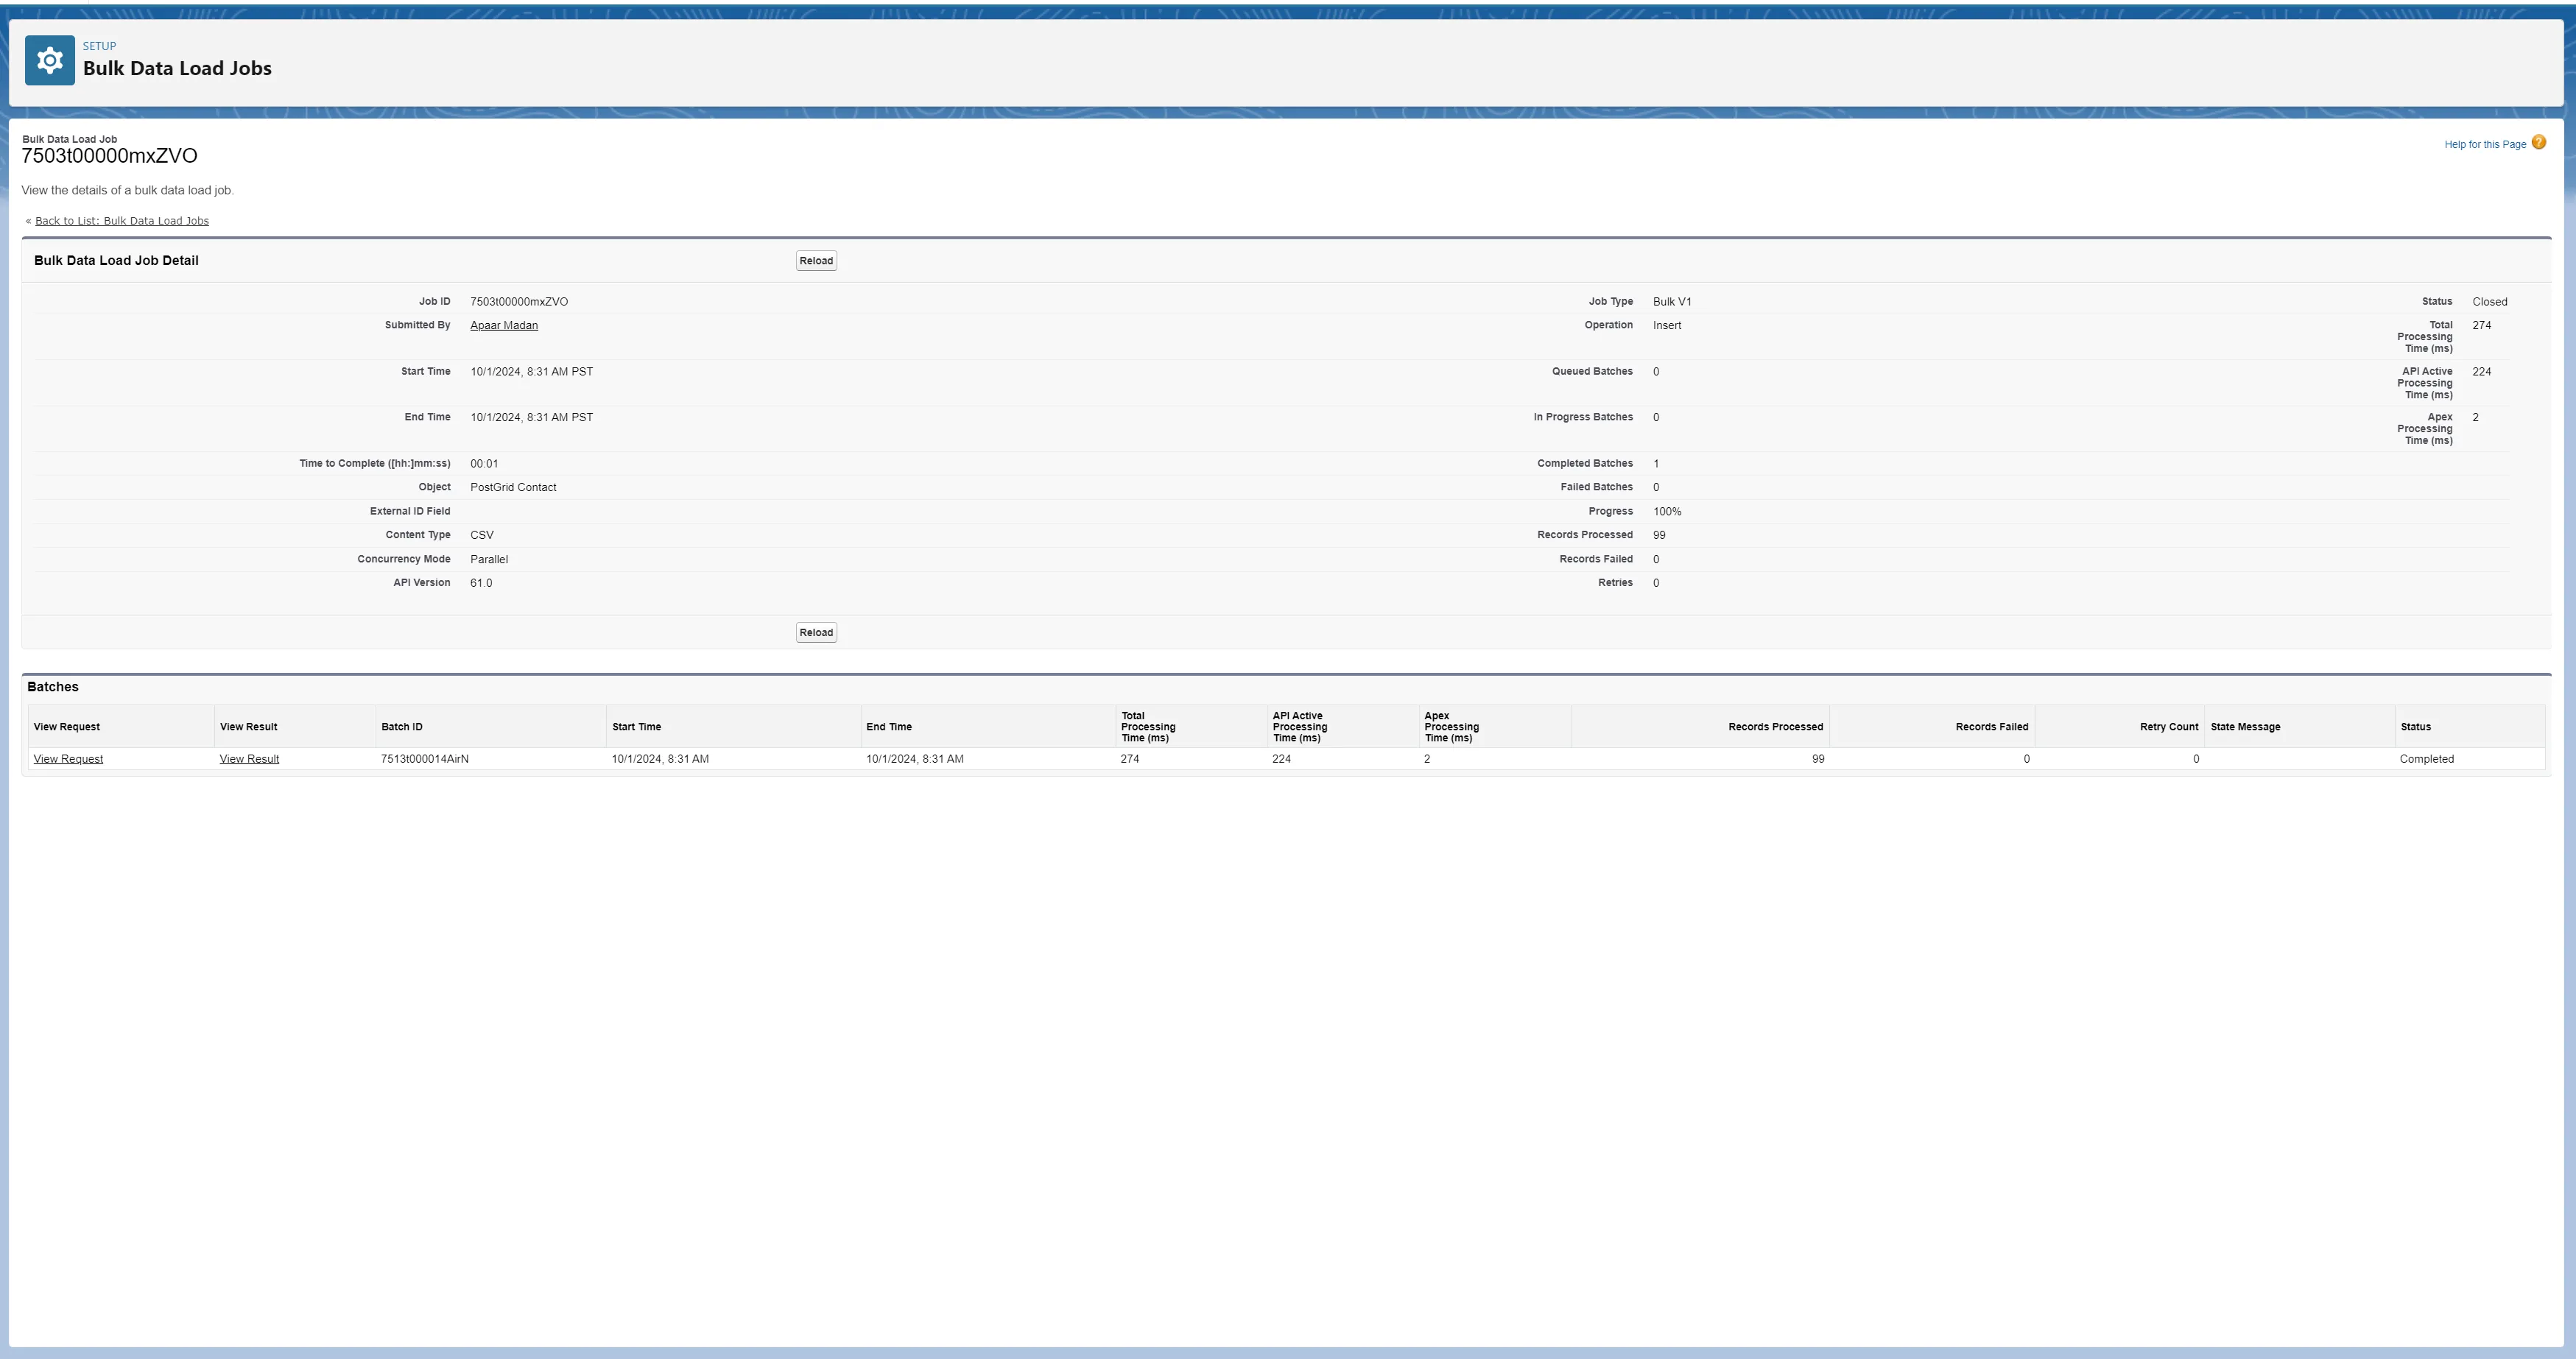
For more information about the Salesforce Data Import Wizard, you can refer to this link: https://help.salesforce.com/s/articleView?id=000385322&type=1