Installation and Configuration
Install and configure the PostGrid Salesforce app, including creating the public site URL and connecting your PostGrid account.
Please refer to the video below for instructions on how to install the application and complete the configuration.
Creating the Public Site URL
Section titled “Creating the Public Site URL”Here’s a step-by-step guide to creating your public site URL:
1. Click on Setup
Section titled “1. Click on Setup”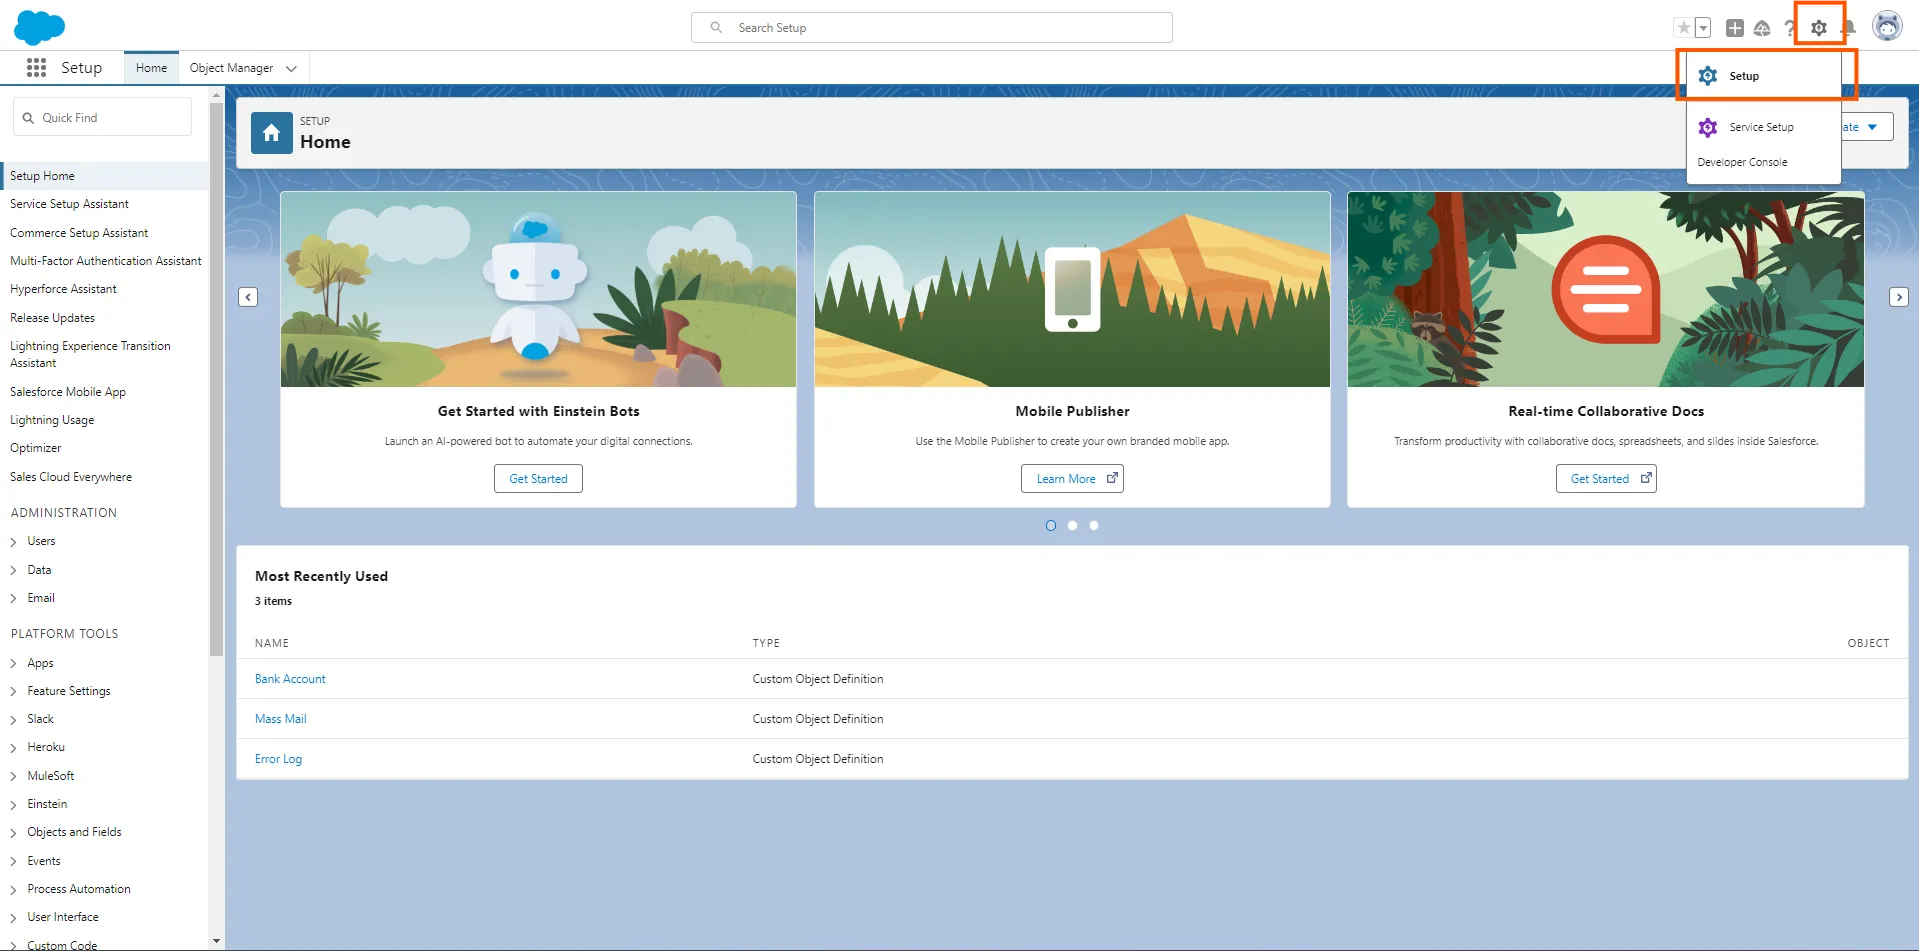
2. Type “sites” in the search box and click on Sites
Section titled “2. Type “sites” in the search box and click on Sites”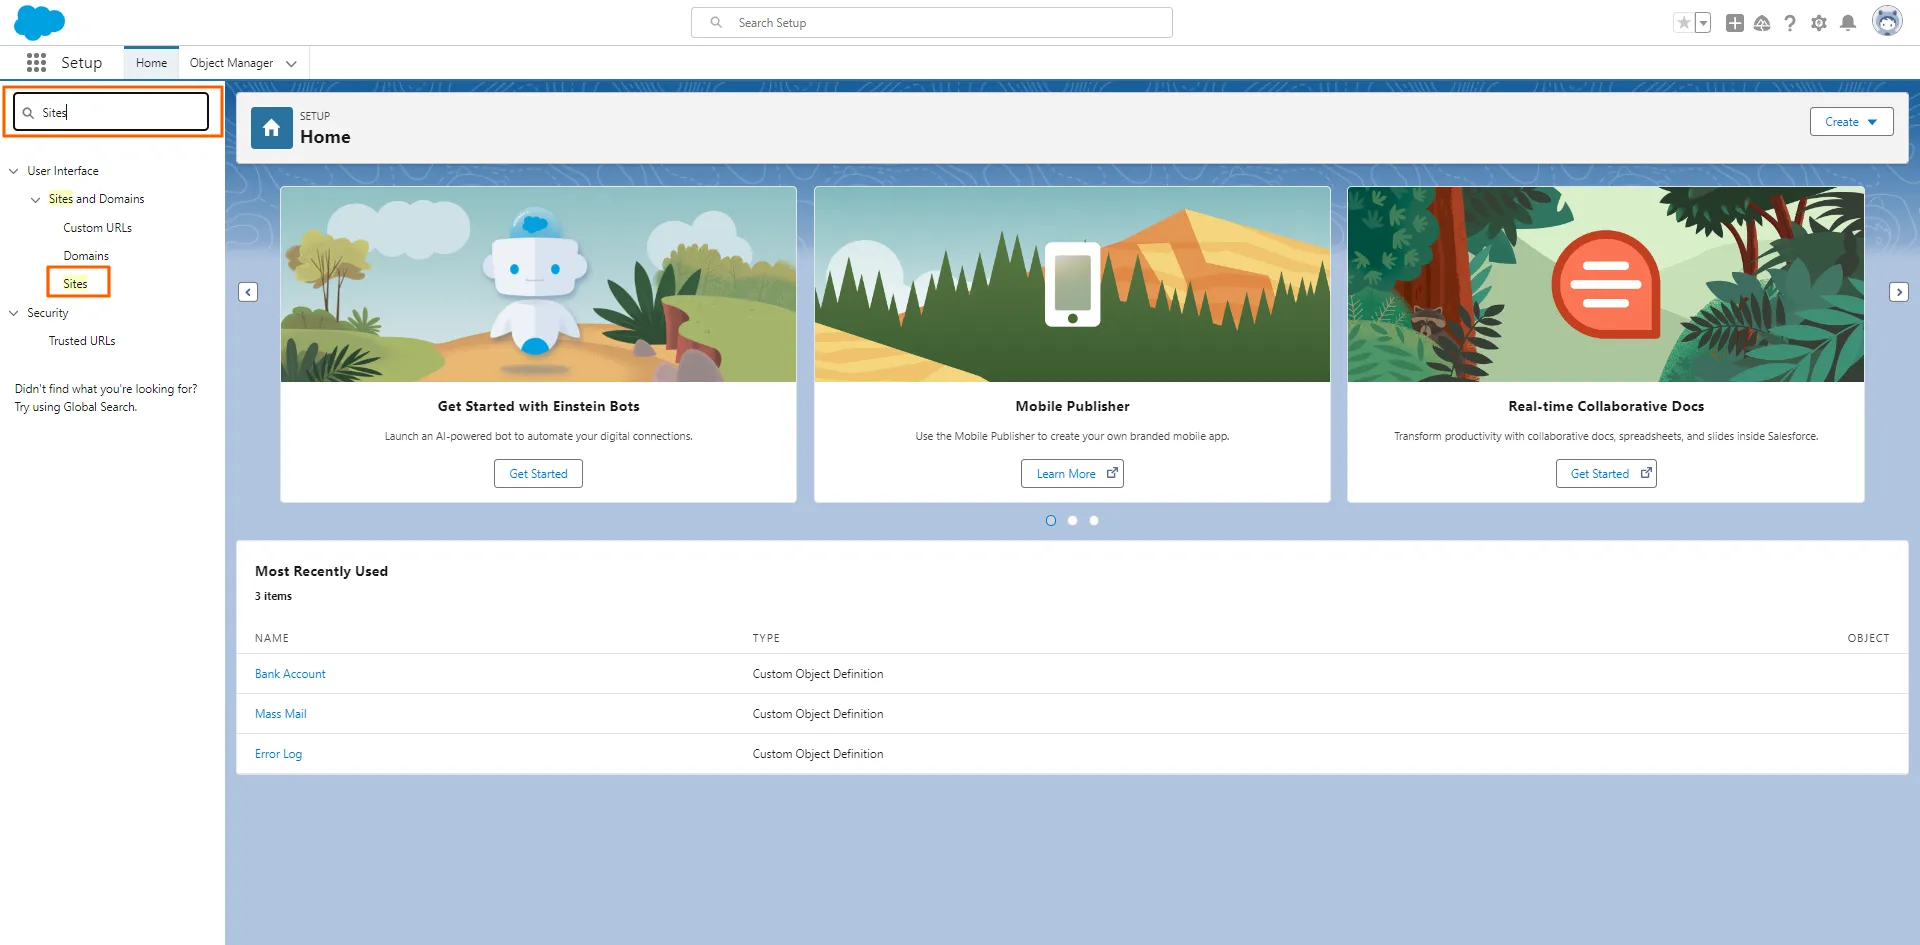
3. Click on “New”
Section titled “3. Click on “New””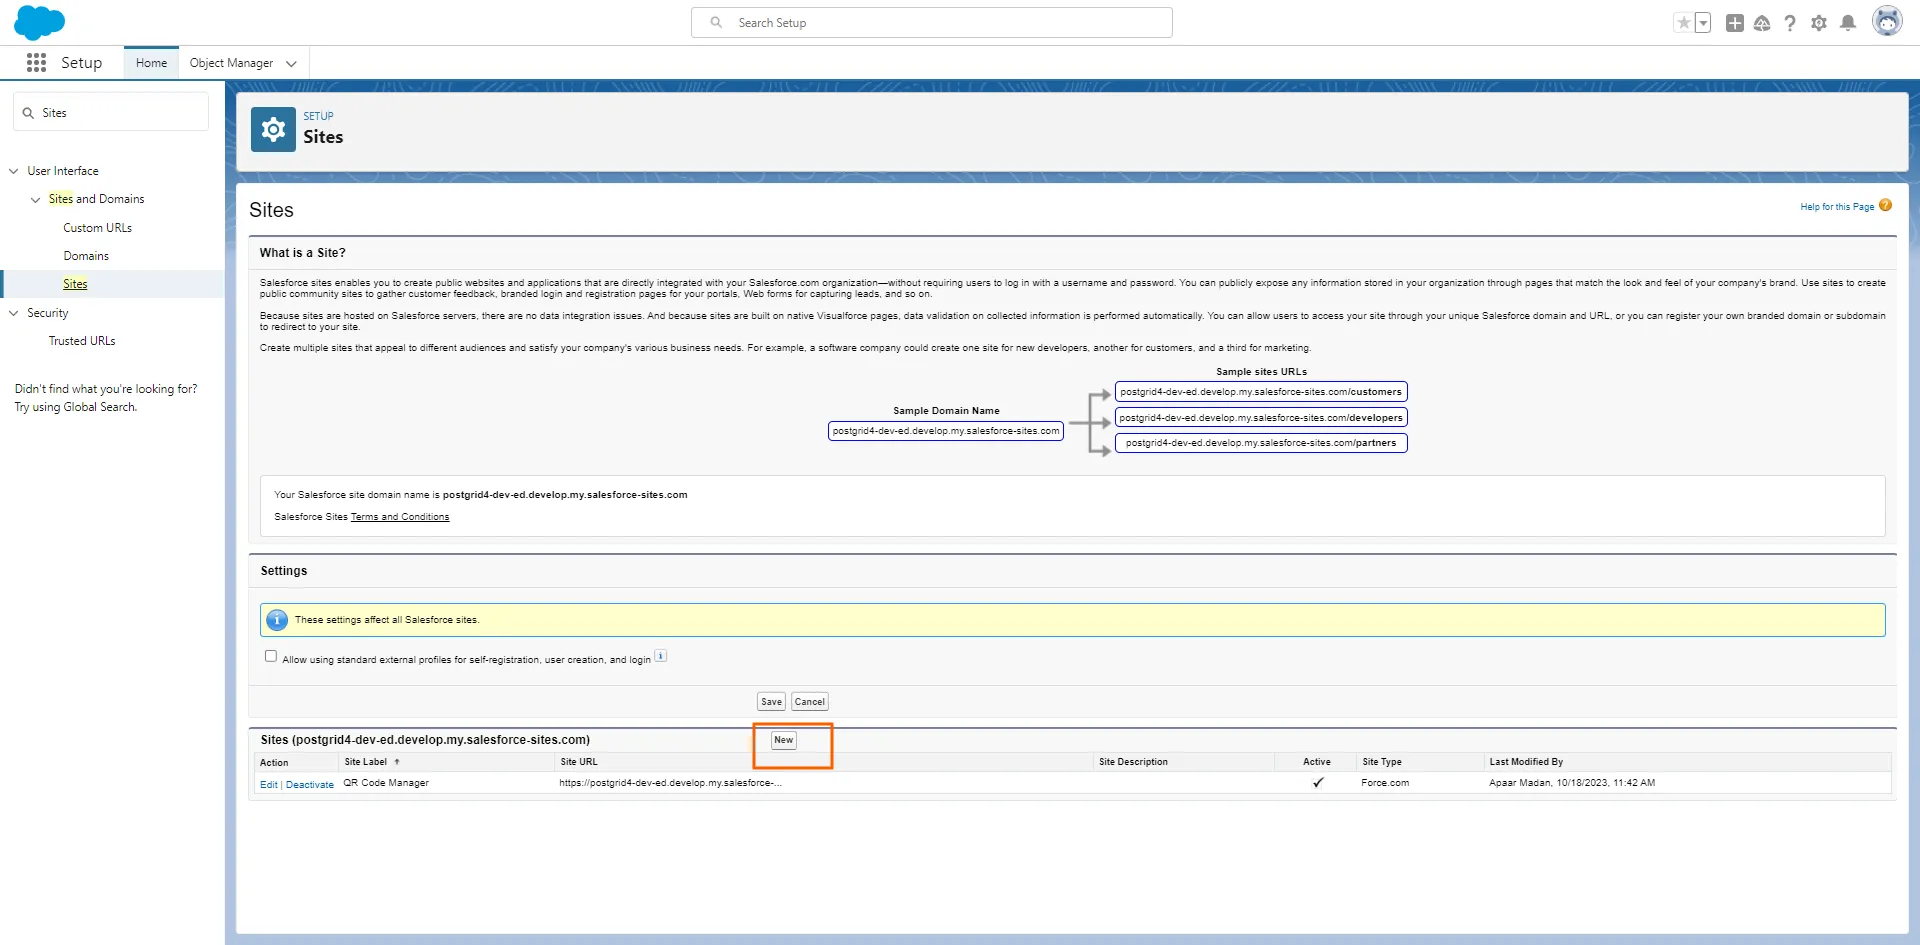
4. Name the site and click on the “Active” Checkbox
Section titled “4. Name the site and click on the “Active” Checkbox”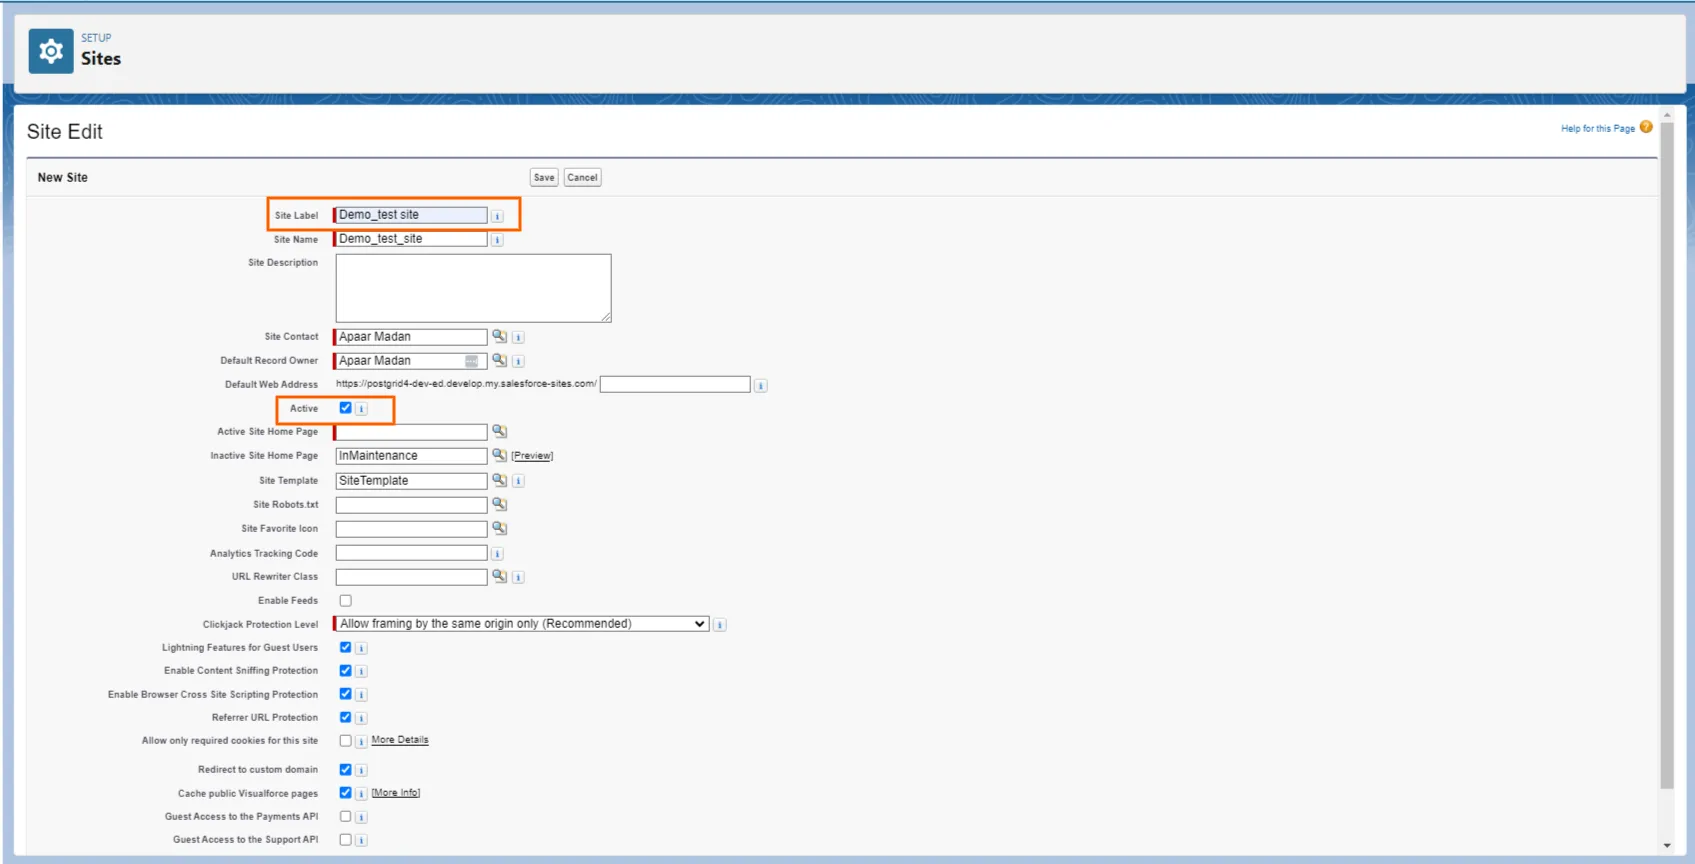
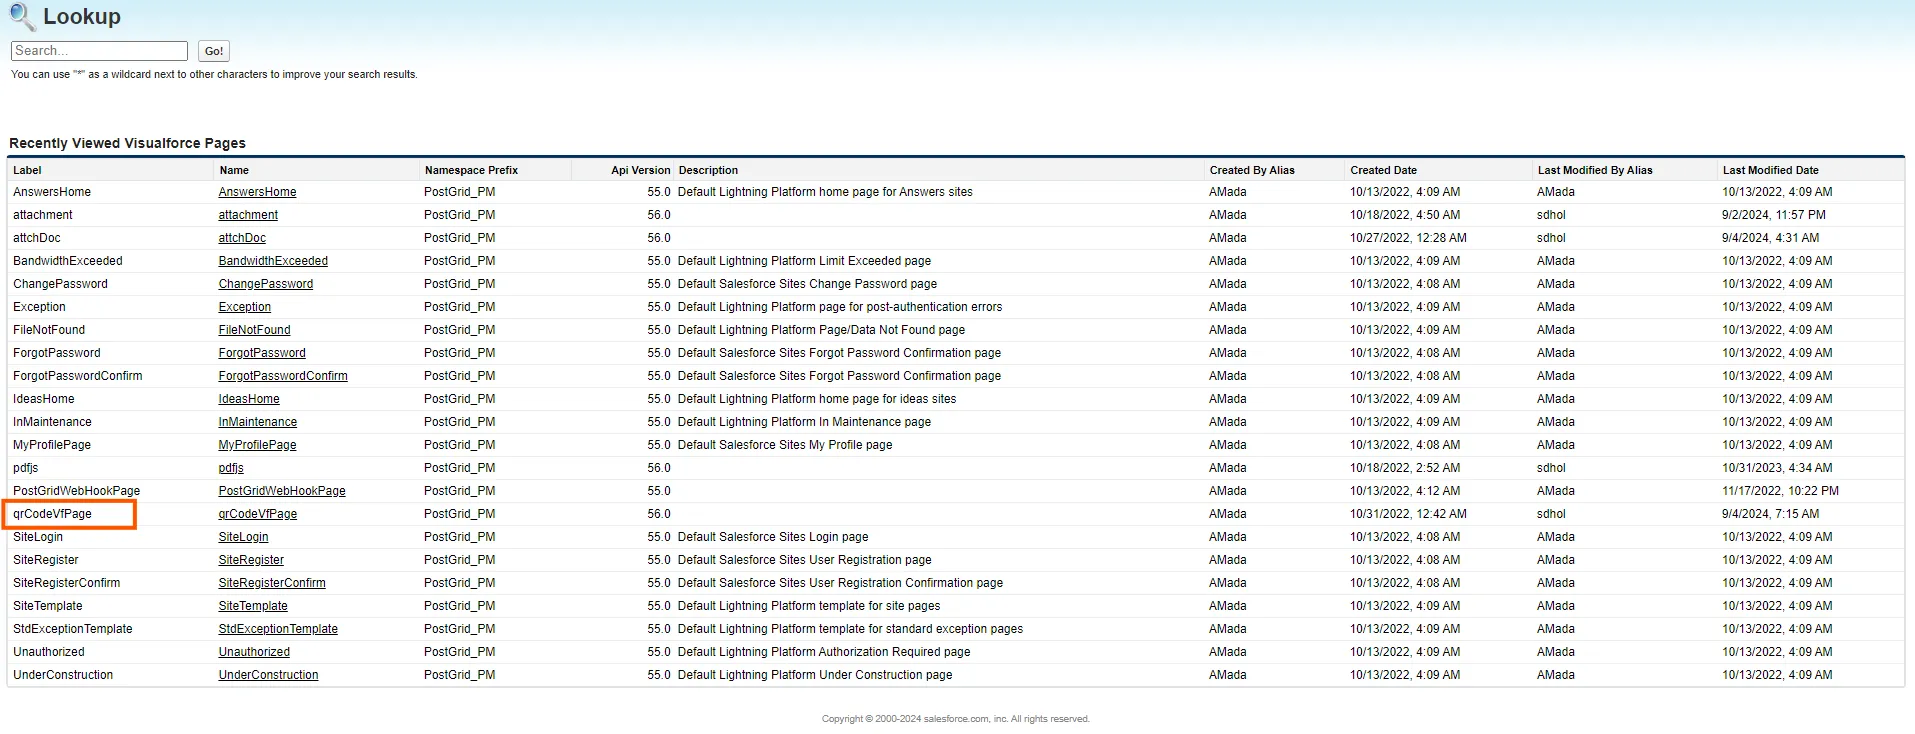
5. Next click on the search icon in front of the Active Site Home Page. A pop-window will open up. Click on “qrCodeVfPage” and then click on “Save”
Section titled “5. Next click on the search icon in front of the Active Site Home Page. A pop-window will open up. Click on “qrCodeVfPage” and then click on “Save””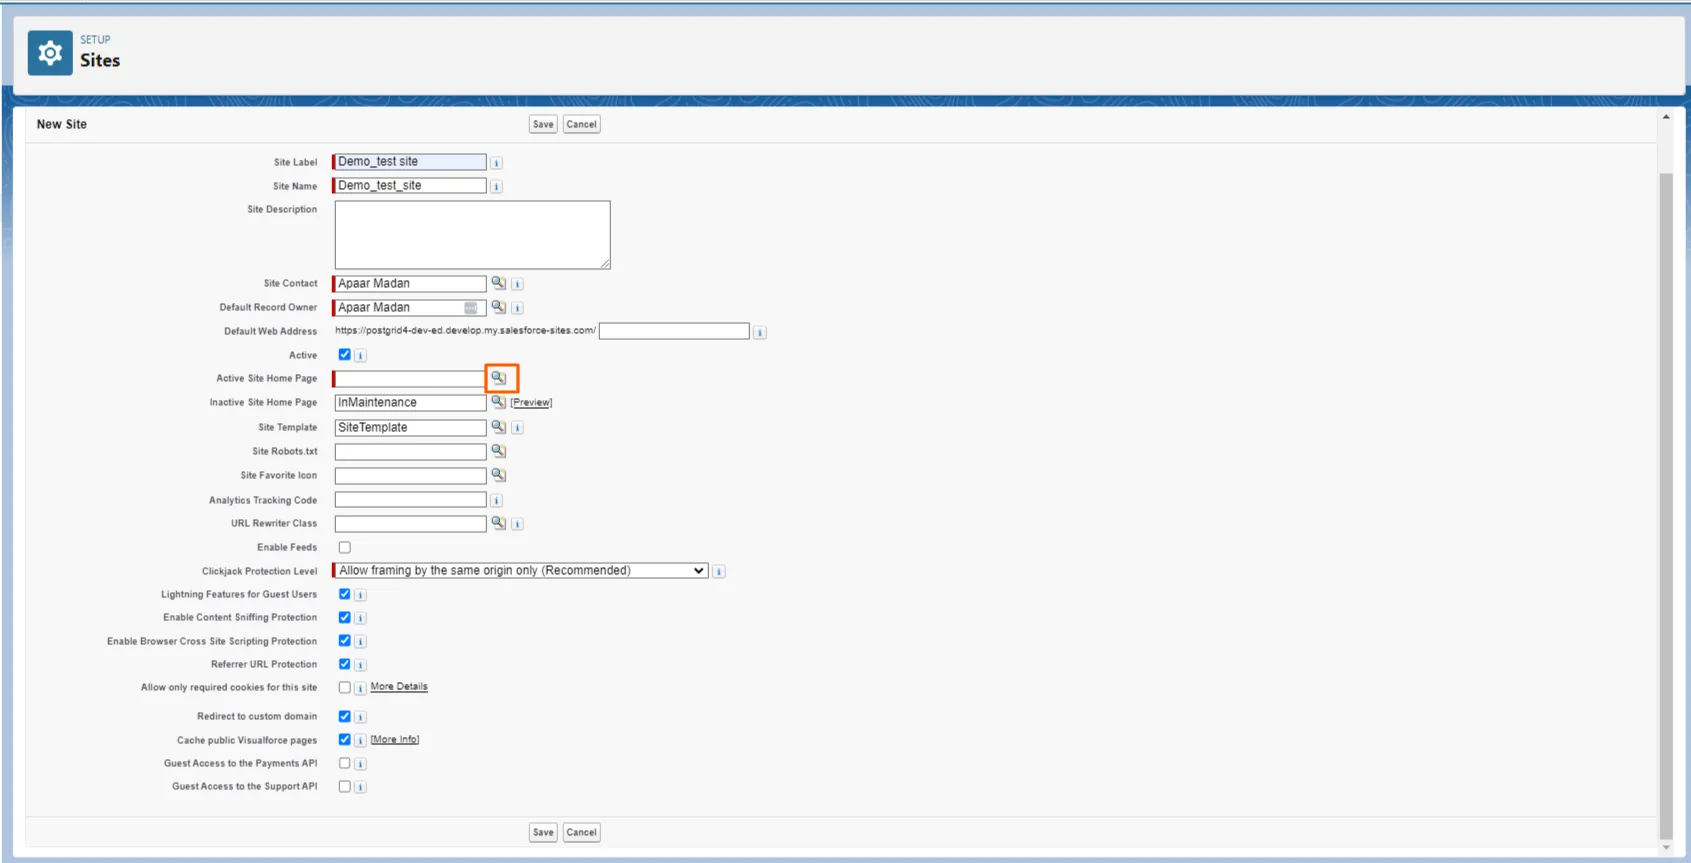
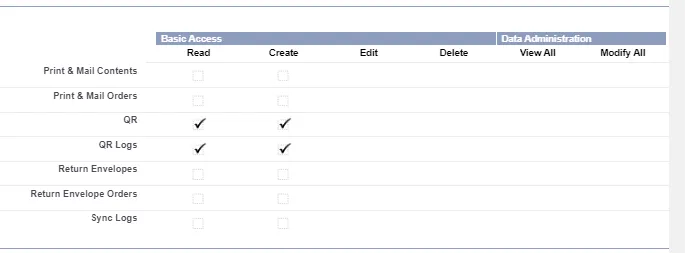
6. Click on “Public Access Settings.” Select the checkboxes for QR and QR logs to grant users access to these components in the CRM. Then click “Save”
Section titled “6. Click on “Public Access Settings.” Select the checkboxes for QR and QR logs to grant users access to these components in the CRM. Then click “Save””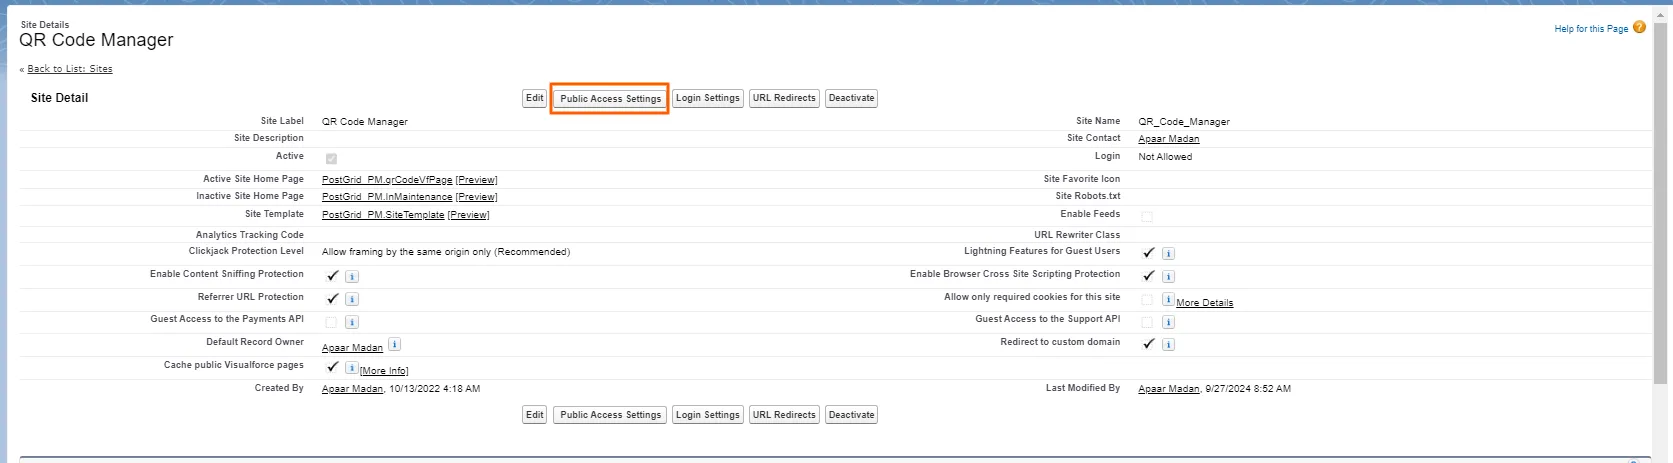
7. Click on “Enabled Apex Class Access[2]“
Section titled “7. Click on “Enabled Apex Class Access[2]“”
8. Add the “PostGrid_PM.GetParam” and “PostGrid_PM.PostgridWebhookController” Apex Classes from the Available Apex Classes to the Enabled Apex Classes and click on “Save”
Section titled “8. Add the “PostGrid_PM.GetParam” and “PostGrid_PM.PostgridWebhookController” Apex Classes from the Available Apex Classes to the Enabled Apex Classes and click on “Save””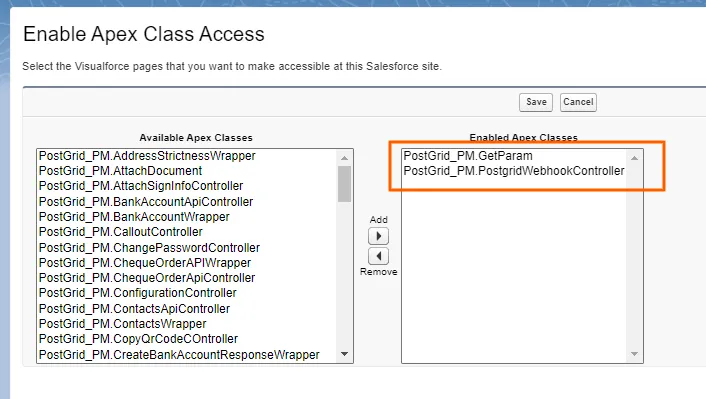
9. Copy the URL, open the PostGrid Print & Mail Application, and paste the URL under “Public Site URL” on the PostGrid Configuration Page.
Section titled “9. Copy the URL, open the PostGrid Print & Mail Application, and paste the URL under “Public Site URL” on the PostGrid Configuration Page.”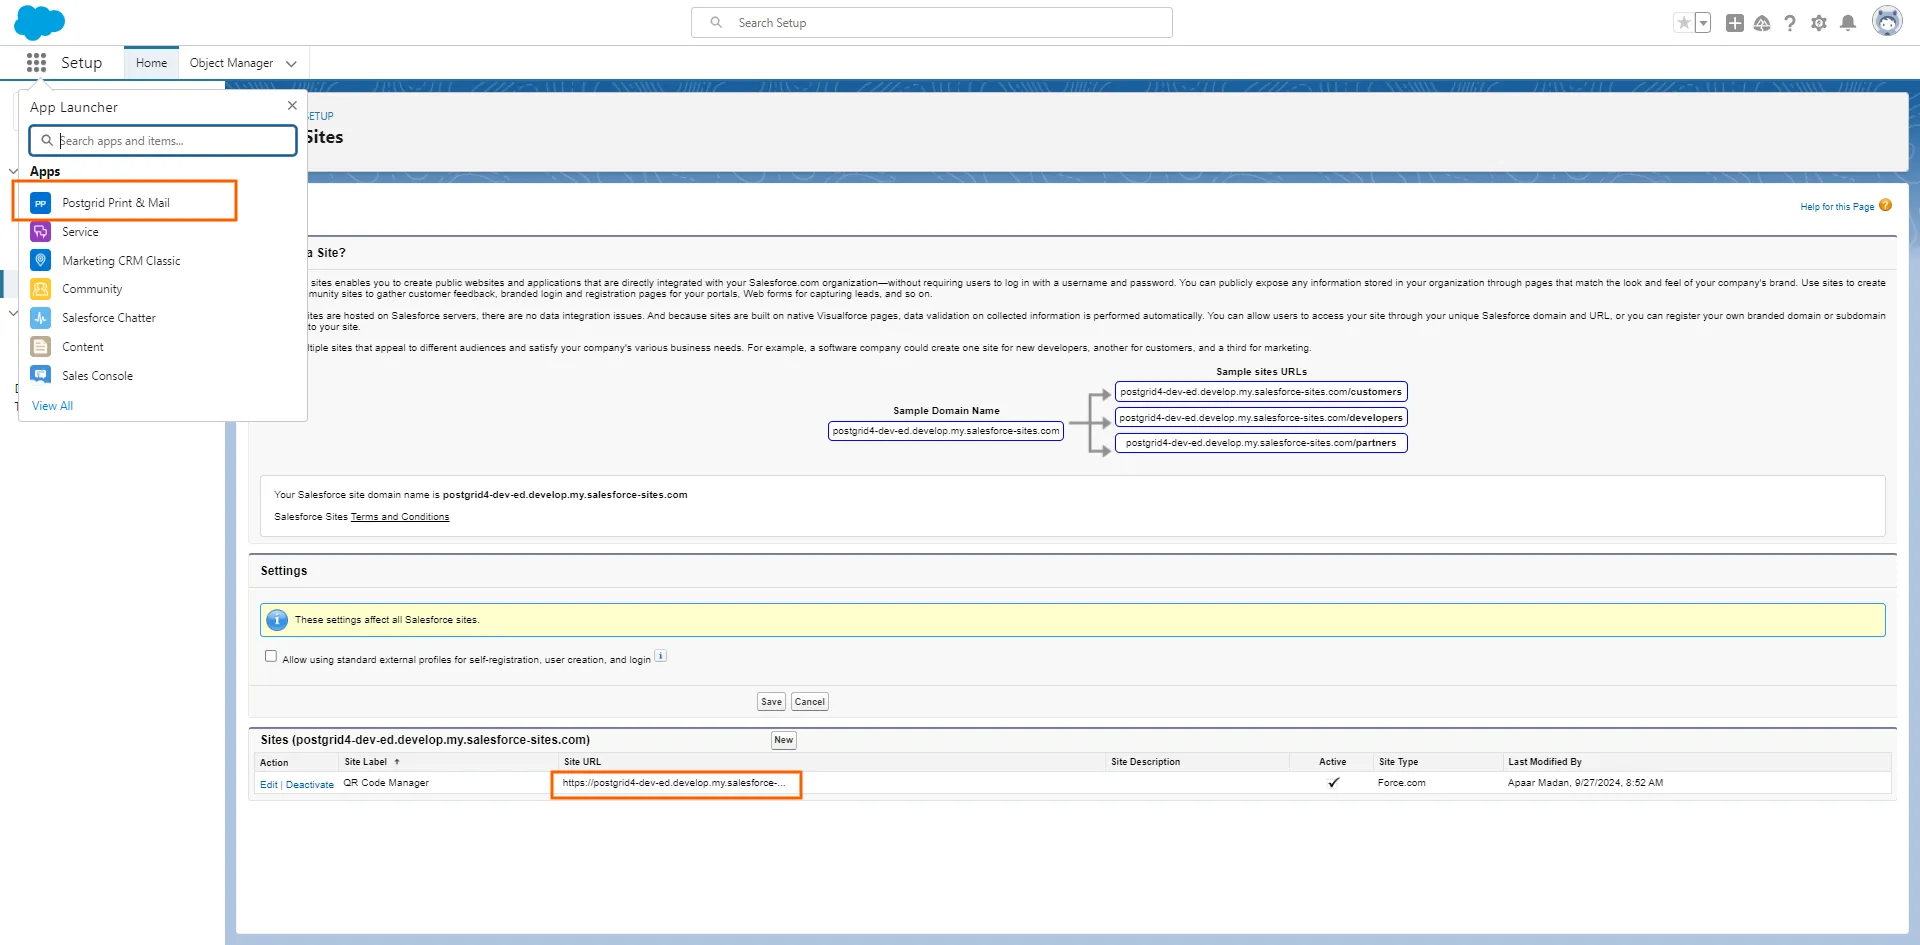
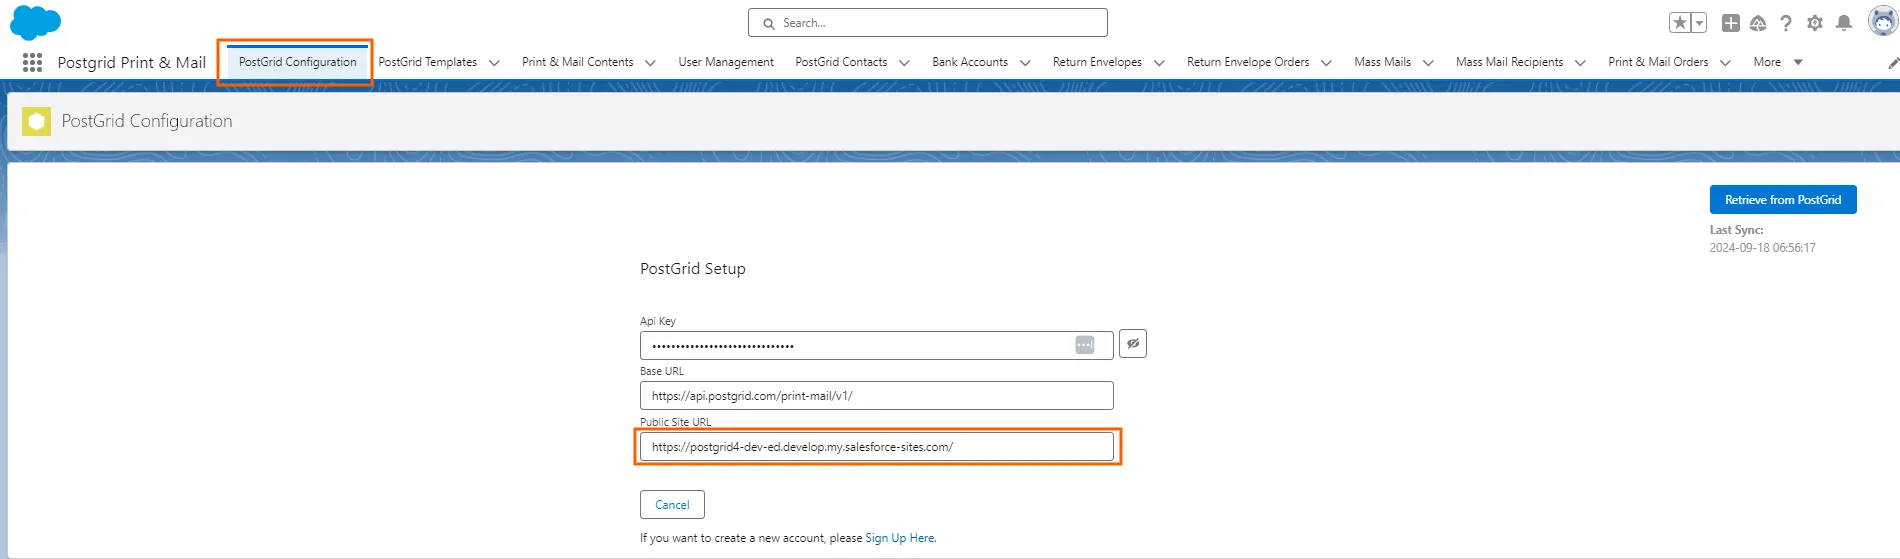
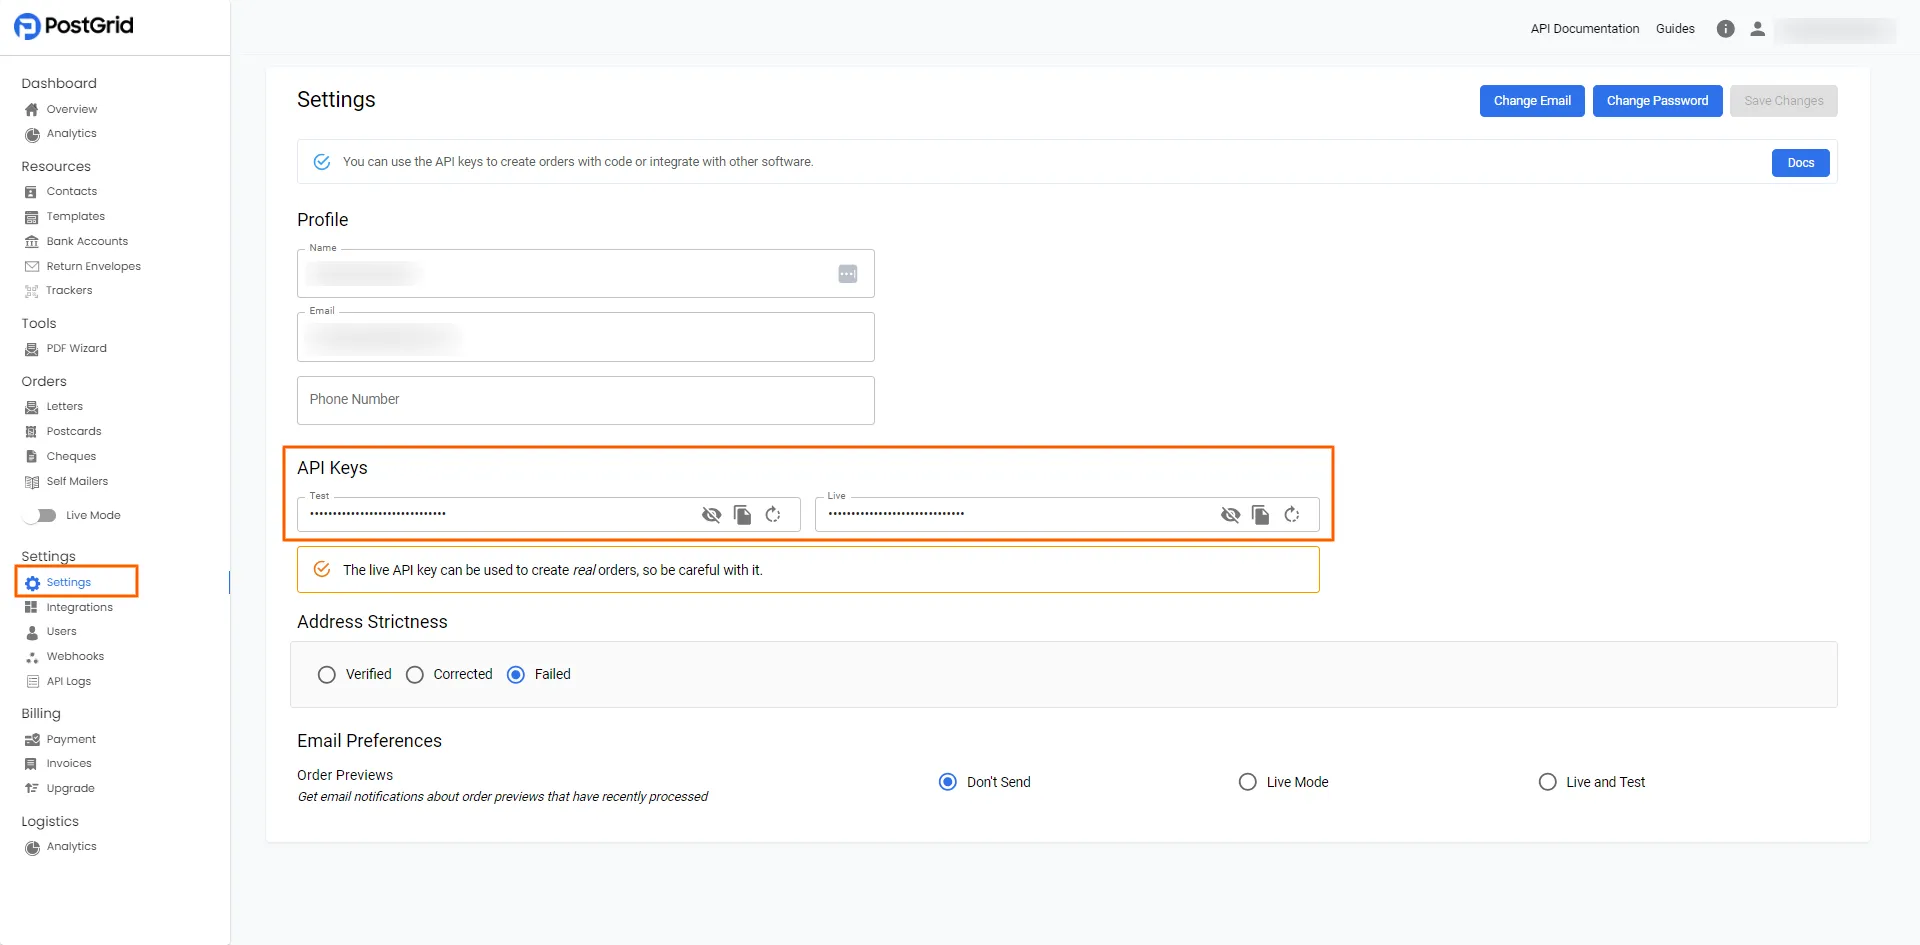
10. Copy the Test or Live API Key from the PostGrid Dashboard and Add the Base URL
Section titled “10. Copy the Test or Live API Key from the PostGrid Dashboard and Add the Base URL”Base URL: https://api.postgrid.com/print-mail/v1/
Please note that the setup configuration may differ for your Salesforce CRM depending on its specific configuration. If you encounter any issues, please contact your Salesforce Administrator for assistance with the configuration process.